Successfully establishing a dawn redwood in the landscape begins with a precise understanding of the planting process and the various methods of propagation. This species, once thought to be extinct, has shown incredible vigor when given the proper start in a well-chosen environment. Whether starting from a nursery-grown sapling or attempting to grow new trees from seed or cuttings, attention to detail is paramount. A professional approach to these early stages ensures that the tree will develop the strong foundation necessary for its rapid and monumental growth.
The selection of the planting site is the most critical decision in the life of a dawn redwood. These trees require full sun and plenty of moisture, making low-lying areas or locations near water sources ideal for their development. The soil should be deep, rich, and slightly acidic to neutral, as these conditions most closely mimic their natural riparian habitat. Before planting, it is essential to consider the tree’s eventual height and spread, ensuring it will not interfere with buildings or utilities.
When preparing the planting hole, the rule of thumb is to dig a space twice as wide as the root ball but no deeper than its current depth. Loosening the soil in a wide area around the hole encourages the roots to spread horizontally, which is vital for the tree’s stability. Any heavy clay or compacted soil should be amended with organic matter to improve aeration and drainage. Avoiding the use of high-nitrogen fertilizers in the planting hole prevents the risk of burning the sensitive new roots.
The actual placement of the tree requires careful handling to avoid damaging the root system or the delicate bark. The tree should be positioned so that the root flare is slightly above the soil surface, as planting too deep can lead to suffocation and rot. Once positioned, the hole should be backfilled with the native soil, tamping it down gently to remove air pockets without over-compacting. A thorough watering immediately after planting helps settle the soil and provides the hydration needed for the tree to overcome transplant shock.
Advanced propagation from seeds
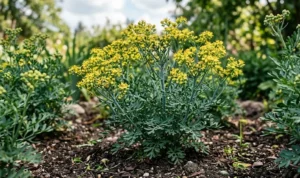
Propagating the dawn redwood from seed is a rewarding but technically demanding process that requires patience and precision. The small, winged seeds are typically harvested from the cones in late autumn after they have turned brown and begun to open. Because the seeds have a relatively low germination rate, it is advisable to collect and sow more than you eventually intend to plant. Fresh seeds generally perform better than those that have been stored for long periods, so timing is a key factor in success.
More articles on this topic
Before sowing, the seeds often benefit from a period of cold stratification to simulate the winter conditions they would experience in nature. Placing the seeds in a moist medium like peat moss or sand and storing them in a refrigerator for sixty to ninety days can significantly improve germination. This process breaks the seed’s dormancy and signals that it is time to grow when they are finally moved to a warmer environment. Consistent moisture during this stratification period is essential to prevent the seeds from drying out and losing viability.
Once the stratification period is complete, the seeds should be sown in a well-draining seed-starting mix and kept in a warm, bright location. They should be covered only lightly with soil, as they require some light to stimulate the germination process. Keeping the soil consistently moist but not waterlogged is a delicate balance that must be maintained until the first sprouts appear. Using a humidity dome or plastic wrap can help maintain the necessary atmospheric moisture during this sensitive phase.
As the seedlings emerge and develop their first true needles, they need to be carefully monitored for damping-off and other fungal issues. Providing good air circulation and avoiding overhead watering can reduce the risk of these common seedling diseases. Once they have reached a height of several inches and developed a sturdy stem, they can be transplanted into individual pots. This transition allows them to develop a more robust root system before they are eventually moved to their permanent outdoor home.
Vegetative propagation through cuttings
For those looking to produce clones of a specific specimen, vegetative propagation through cuttings is a highly effective and widely used method. Hardwood cuttings taken in late winter or early spring, just before bud break, are generally the most successful for this species. These cuttings should be taken from the current year’s growth and should be about six to eight inches in length. Using a sharp, sterilized cutting tool ensures a clean wound that is less likely to become infected or rot during the rooting process.
More articles on this topic
The base of each cutting should be treated with a rooting hormone to stimulate the development of new root tissue. Removing the needles from the bottom half of the cutting prevents them from rotting in the rooting medium and reduces water loss through transpiration. The cuttings are then inserted into a medium consisting of perlite, sand, or a mix of peat and perlite to ensure excellent drainage. Providing bottom heat can further accelerate the rooting process by keeping the base of the cuttings warmer than the surrounding air.
Maintaining high humidity around the cuttings is essential since they have no roots to take up water during the initial weeks. A misting system or a simple plastic enclosure can provide the moist environment necessary to keep the foliage hydrated. Indirect light is preferable during this stage, as direct sunlight can cause the cuttings to overheat and dry out too quickly. It usually takes several months for a significant root system to form, during which time the cuttings should be handled as little as possible.
Once a healthy root system has been established, the cuttings can be gradually acclimated to lower humidity and more direct light. This hardening-off process is vital for ensuring the young plants can survive the transition to a nursery bed or a larger container. After one or two years of growth in a controlled environment, these propagated trees are usually strong enough to be planted in their final landscape positions. This method allows for the rapid expansion of a collection while maintaining the genetic characteristics of the parent tree.
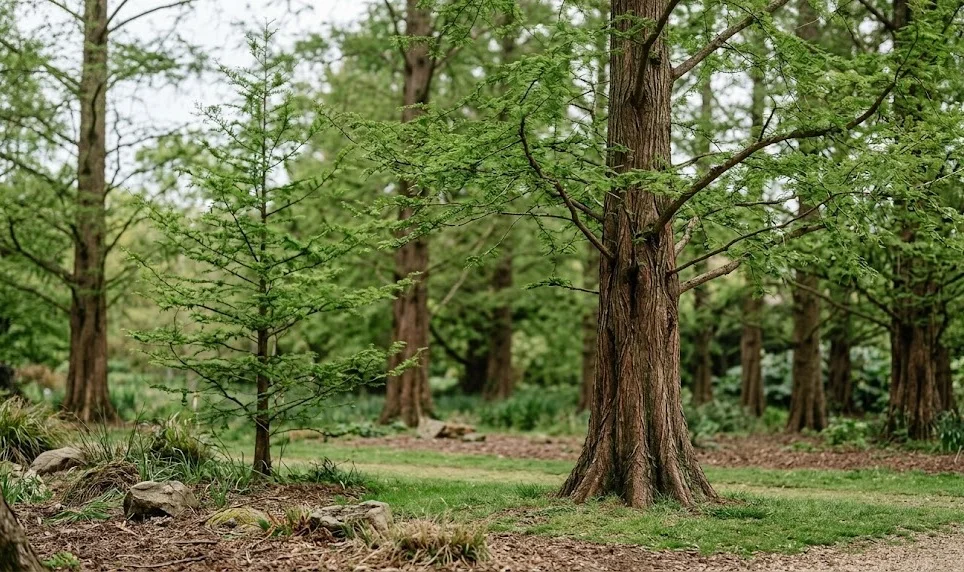
Establishing the young tree
The first few years after planting or propagation are the most critical for the long-term survival and health of a dawn redwood. During this establishment phase, the tree focuses most of its energy on expanding its root system to support future canopy growth. Regular, deep watering is the most important task for the gardener, especially during the dry summer months of the first three years. A tree that is well-hydrated during this period will grow much faster and be more resistant to pests and diseases later in life.
Mulching the area around the base of the tree provides multiple benefits that support establishment and vigorous growth. A three-to-four-inch layer of organic mulch helps retain soil moisture, suppresses weed competition, and adds nutrients to the soil as it decomposes. It also protects the trunk from accidental damage caused by lawn equipment, which can be fatal for young trees with thin bark. The mulch should be replenished annually to maintain its effectiveness and continue improving the soil structure around the root zone.
Staking a newly planted dawn redwood is often unnecessary and can sometimes be detrimental if not done correctly. Trees that are allowed to move slightly in the wind develop stronger trunks and more robust root systems as they compensate for the motion. However, if the planting site is exceptionally windy or the tree is very top-heavy, loose staking can provide temporary support. Any ties used should be soft and flexible, and they must be removed as soon as the tree is stable enough to stand on its own.
Fertilization should be handled with caution during the first few growing seasons to avoid forcing too much top growth at the expense of root development. If the soil is naturally rich and the tree shows healthy green needles, supplemental feeding may not be necessary at all. If growth seems stunted or the foliage is pale, a balanced, slow-release fertilizer can be applied in early spring. Monitoring the tree’s reaction to its new environment allows the gardener to make informed decisions that promote a lifetime of health and beauty.