Successful establishment of these classic garden plants begins with a precise approach to seed starting and soil preparation. Because they follow a biennial life cycle, the timing of your planting efforts is the most critical factor in achieving a beautiful display. You must plan at least a year in advance to ensure that the plants have enough time to mature before their flowering season. Starting with high-quality seeds and a controlled environment will give your garden the best possible foundation for success.
Sowing and germination techniques
The seeds of this species are remarkably small and require specific conditions to break dormancy and begin growing. You should sow them on the surface of a fine seed-starting mix, as they need light to trigger the germination process. Avoid covering them with soil, as even a thin layer can significantly reduce the success rate of your seedlings. A light misting of water is sufficient to settle the seeds into the medium without burying them too deeply.
Maintaining a consistent temperature between eighteen and twenty degrees Celsius is ideal for rapid and uniform germination. You can use a heat mat if your indoor environment is too cool, but be careful not to let the soil dry out completely. Covering the seed trays with a clear plastic dome helps retain humidity, which is vital for the tiny emerging sprouts. You will usually see the first signs of green within fourteen to twenty-one days if the conditions remain stable.
Once the seedlings have developed their first set of true leaves, they will need plenty of bright, indirect light to stay strong. If you are growing them indoors, a dedicated grow light positioned just a few centimeters above the plants prevents them from becoming leggy. Leggy seedlings often struggle to survive the transplanting process and may never develop into robust adult plants. Thinning the seedlings early on ensures that the strongest individuals have enough space to grow without competition.
Air circulation is just as important in the seedling tray as it is in the mature garden bed later on. Using a small fan to create a gentle breeze helps strengthen the stems and prevents the growth of mold or fungus. This process, known as mechanical conditioning, prepares the young plants for the physical stresses they will face outdoors. You should also begin a very weak fertilization routine at this stage to support the development of healthy root systems.
More articles on this topic
Transplanting into the garden
Hardening off your young plants is a mandatory step before they can be permanently moved into their outdoor home. You should gradually expose them to the outdoor elements over a period of seven to ten days to prevent transplant shock. Start with just an hour in a sheltered spot and slowly increase the time and intensity of the exposure to wind and sun. This patient approach ensures that the cellular structure of the leaves can adapt to the harsher outdoor climate.
The timing of the final transplant usually occurs in late summer or early autumn when the weather begins to cool. You want the plants to have several weeks to establish their roots in the garden soil before the first hard frost arrives. Dig a hole that is slightly larger than the root ball and enrich the bottom with a small amount of organic compost. Firm the soil gently around the base of the plant to eliminate any air pockets that could dry out the roots.
Proper spacing is essential for the health of the plants as they enter their dormant phase and prepare for spring growth. You should aim for a distance of at least thirty centimeters between each individual to allow for their mature spread. Crowding the plants can lead to poor air circulation and an increased risk of disease during the damp autumn months. A well-spaced garden bed also makes it much easier for you to perform maintenance tasks like weeding and mulching.
Immediately after transplanting, give the area a thorough watering to help settle the soil and hydrate the young roots. You might notice some slight wilting for a day or two, which is a normal part of the adjustment process for most perennials and biennials. Monitor the moisture levels closely during the first two weeks, as the plants are particularly vulnerable until their roots take hold. Once they appear stable and start showing new growth, you can scale back the frequency of your watering.
More articles on this topic
Site selection and soil preparation
Choosing the right location in your landscape is a strategic decision that affects the plant for its entire life cycle. These flowers thrive in areas that receive full sun for most of the day but appreciate some light shade in hotter climates. Look for a spot that is naturally sheltered from strong winds, which can damage the tall flower spikes in the second year. A site with good natural drainage is also vital to prevent the roots from rotting during the wet winter months.
Soil quality should be assessed and improved well before the planting date to allow the amendments to integrate. If your garden has heavy clay, you will need to add coarse sand or organic matter to improve the drainage and aeration. For sandy soils, adding plenty of compost or aged manure helps retain the moisture and nutrients that these hungry plants require. You are aiming for a rich, friable texture that allows the roots to penetrate easily and expand.
Testing the soil pH is a professional practice that can save you a lot of trouble and disappointment later on. These plants prefer a neutral to slightly alkaline environment, so you may need to add lime if your soil is too acidic. If you are unsure about your soil composition, a simple home test kit can provide enough information to make the necessary adjustments. Taking the time to prepare the earth properly ensures that the plants have immediate access to everything they need.
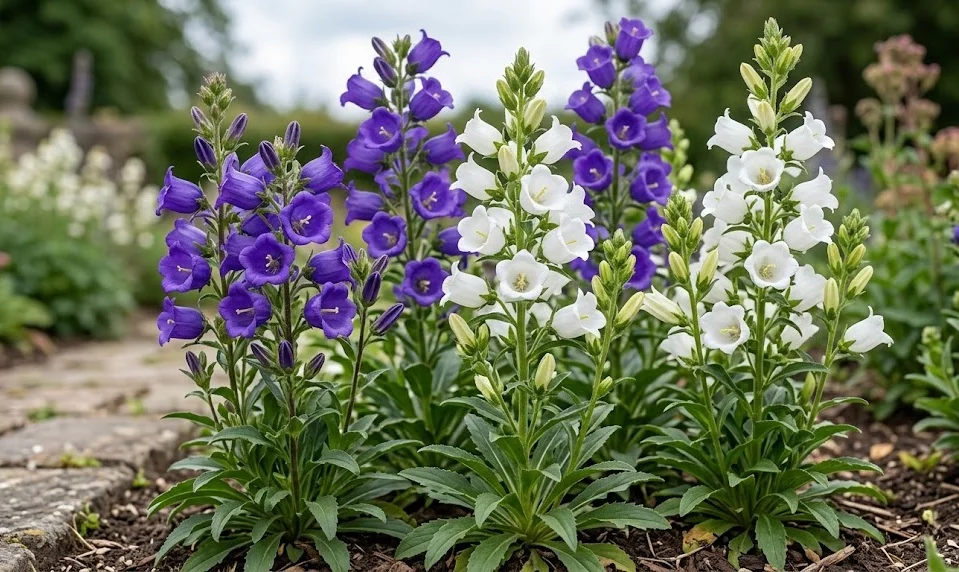
Finally, consider the aesthetic placement of the plants within your overall garden design and color scheme. Since they are tall, they work best when placed toward the back of a border or in the center of a large island bed. You should also think about the plants that will bloom alongside them to create a harmonious and professional-looking display. Planning the visual layout is just as important as the biological requirements if you want a truly impressive garden.
Propagation through division and offsets
While most gardeners grow this species from seed, it is sometimes possible to propagate established clumps through division. This is typically done in the early spring of the second year before the flower stalks begin to emerge rapidly. You must be very careful not to damage the main taproot, as the plant depends heavily on its central core. Using a sharp, clean spade to separate a small side shoot can sometimes yield a successful new plant.
This method is less common because the plant is a biennial, meaning the original parent will die after the flowering season is over. However, some varieties occasionally produce small offsets or “pups” at the base that can be nurtured into independent plants. If you find these small rosettes, you can carefully lift them and pot them up in a nursery bed. This can be an interesting way to save a particularly beautiful color or form for an extra season.
When attempting division, always ensure that the new piece has a healthy section of roots and at least one viable growth point. Replant the division immediately at the same depth it was growing previously to minimize the stress on the plant. Keep the area consistently moist but not saturated until you see signs of new leaf development in the center. It is a rewarding technique for experienced gardeners who enjoy experimenting with different ways to expand their collection.
Collecting your own seeds is the most reliable way to ensure a continuous supply of plants for your garden each year. Once the flowers have faded and the pods turn brown and dry, you can shake the tiny seeds into a paper envelope. Store them in a cool, dry place until you are ready to start the cycle over again in the late spring or summer. This self-sustaining cycle is one of the most satisfying aspects of growing traditional biennial flowers in a home landscape.