Establishing the blue eryngo in a garden landscape requires careful planning and an understanding of its reproductive biology. This perennial is most successfully introduced during the spring or autumn when environmental conditions support root development without the stress of extreme heat. Because of its sensitive taproot, the initial planting process must be executed with precision to ensure long-term survival. Propagating this species allows gardeners to expand their collection, though it demands patience and specific horticultural techniques.
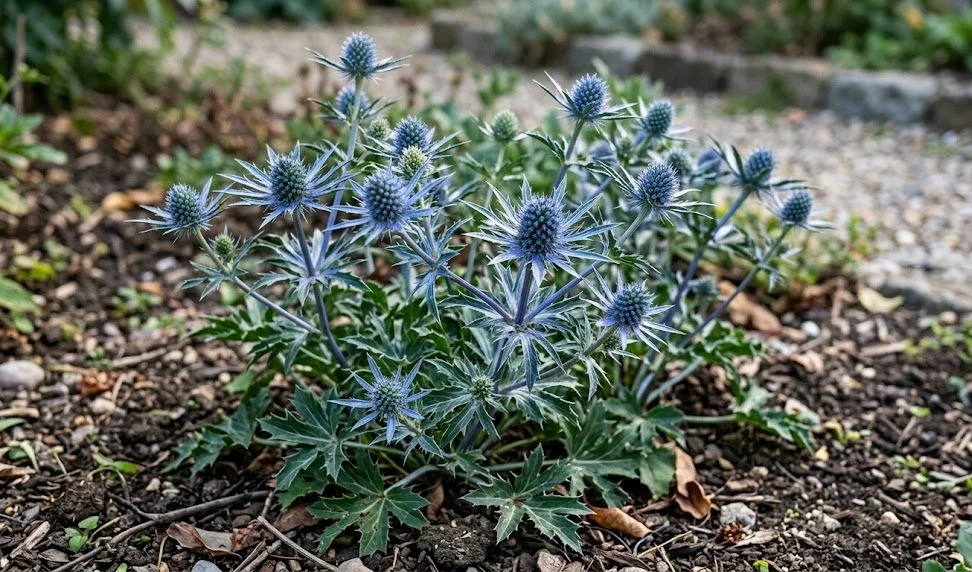
Choosing the right location is the first and most critical step in the planting process for this architectural plant. It requires a site that receives full sun for the majority of the day to develop its iconic blue color and sturdy stems. The soil must be exceptionally well-drained, as the plant will not tolerate “wet feet” during the dormant winter months. Before digging the hole, assess the area to ensure there is enough space for the plant to reach its mature width of approximately two feet.
The actual planting procedure involves digging a hole that is twice as wide as the root ball but no deeper than the original container. Placing the plant too deep in the ground can lead to crown rot, while planting it too high may cause the roots to dry out. Once the plant is positioned, backfill the hole with the native soil, perhaps mixed with a handful of grit to enhance drainage. Firm the soil gently around the base to remove air pockets without compacting the earth too tightly.
Immediately after planting, a deep watering is necessary to help settle the soil around the roots and reduce transplant shock. However, subsequent watering should be moderate and only performed when the top inch of soil feels dry to the touch. It is often beneficial to apply a thin layer of gravel mulch around the base to keep the crown dry and discourage weeds. Monitoring the plant closely for the first few weeks will help ensure it is adapting well to its new home.
Propagation through seed sowing
Starting blue eryngo from seed is a rewarding method for those who wish to produce a large number of plants at a low cost. The seeds require a period of cold stratification to break their dormancy, which mimics the natural winter cycle they would experience outdoors. This can be achieved by sowing the seeds in trays during late autumn and leaving them in a cold frame over the winter. Alternatively, a refrigerator can be used to provide the necessary cold treatment for several weeks before spring sowing.
More articles on this topic
Once the stratification period is complete, move the seed trays to a warm, bright location to encourage germination. The seeds should be sown on the surface of a well-draining seed-starting mix and barely covered with a fine layer of grit. Germination can be erratic and may take several weeks, so it is important to maintain consistent but light moisture during this time. As the seedlings emerge, they require plenty of light to prevent them from becoming leggy and weak.
When the seedlings have developed their first true leaves, they can be carefully transplanted into individual pots to continue their growth. It is vital to use deep pots to accommodate the developing taproot, which begins to grow downward almost immediately. Avoid letting the seedlings become root-bound, as this can stunt their future growth once they are placed in the garden. Handling the young plants by their leaves rather than their stems or roots will minimize the risk of damage.
Hardening off the young plants is a crucial step before they are permanently moved into the garden soil. Gradually expose them to outdoor conditions over a period of ten to fourteen days to prevent shock from wind and direct sun. Start with a few hours in a sheltered spot and slowly increase their time outside until they can handle a full day of exposure. This transition period ensures that the plants are robust enough to survive the challenges of the open landscape.
Root cuttings as a propagation technique
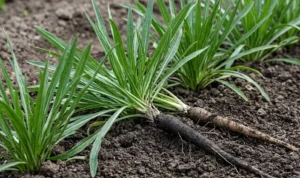
For those who want to ensure their new plants are identical to a specific parent specimen, root cuttings are an effective method. This process is best performed in late winter or early spring while the plant is still in its dormant state. Carefully dig down near the base of an established plant to expose some of the thicker, healthy roots without lifting the entire plant. Select a few vigorous roots and remove them using a sharp, sterilized knife to ensure clean cuts.
More articles on this topic
The collected roots should be cut into sections approximately two to three inches long, making sure to keep track of which end was closest to the plant’s crown. The top end should be cut straight across, while the bottom end should be cut at an angle to help with orientation and increase surface area for growth. Place these sections vertically into pots filled with a sandy compost mix, with the straight-cut end just below the surface. Cover the top with a layer of horticultural grit to maintain moisture and provide stability.
Place the pots in a cool but frost-free environment, such as a cold frame or an unheated greenhouse. Over the next few months, the root cuttings will slowly develop new buds at the top and fresh feeder roots at the bottom. It is important to keep the compost slightly moist but never waterlogged, as the cuttings are prone to rotting before they establish. Once new green growth appears above the grit, the cuttings have successfully begun their journey to becoming independent plants.
When the new plants have established a strong root system and visible foliage, they can be treated much like seedlings. They will need to be hardened off and eventually moved to their permanent positions in the garden during a period of mild weather. Because they are clones of the parent plant, you can expect the same flower color and growth habit as the original. This method is particularly useful for maintaining the quality of specific cultivars within a professional garden design.
Establishing plants through division
While the blue eryngo is not the easiest plant to divide due to its taproot, it is possible with a careful and professional approach. Division is best attempted in early spring just as the new growth begins to emerge from the crown. Using a sharp spade, carefully lift the entire plant from the ground, taking as much of the root system as possible. This is a delicate operation that requires significant physical effort and precision to avoid snapping the main root.
Once the plant is lifted, use a sharp knife to split the crown into two or three smaller sections, ensuring each piece has a portion of the root and at least one growth bud. Work quickly to prevent the exposed roots from drying out in the air or sun. The resulting divisions should be replanted immediately into prepared holes at the same depth they were previously growing. Water the new divisions thoroughly and monitor them closely for signs of stress or wilting.
It is important to note that divided plants may take a full growing season to recover and may not flower in their first year. Providing a little extra care, such as temporary shade on very hot days, can help the divisions establish more successfully. This method is generally reserved for older plants that have become too large for their space or are starting to die out in the center. However, many professionals recommend avoiding division unless absolutely necessary due to the high risk of plant loss.
After the divisions have been replanted, maintain consistent moisture levels for several weeks to encourage new root growth. If the division was successful, the plant will eventually stabilize and resume its normal growth pattern by mid-summer. Successfully dividing a taprooted perennial like the blue eryngo is a testament to a gardener’s skill and patience. It remains a viable way to rejuvenate a tired planting area and secure the future of a prized specimen.