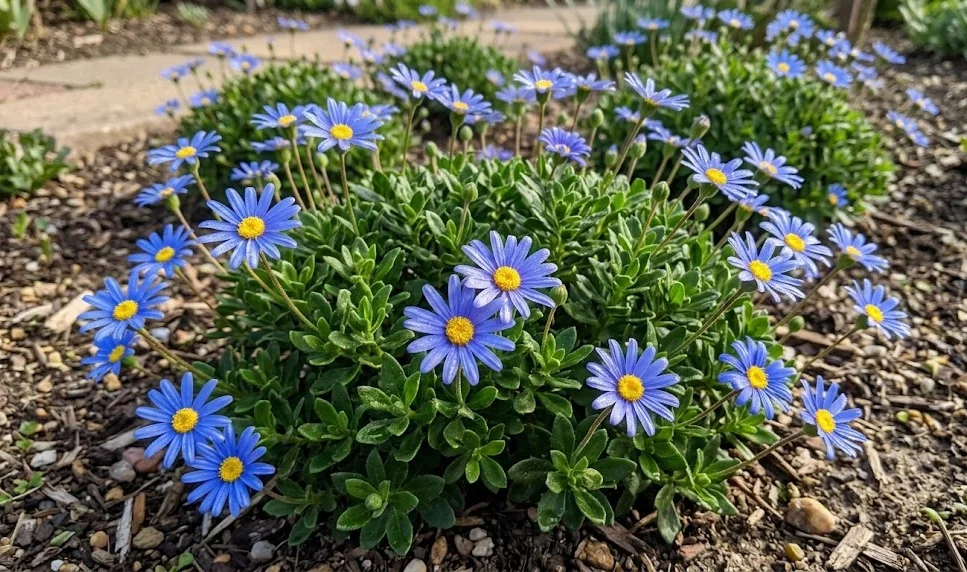
The process of planting the blue daisy marks the beginning of a rewarding journey for any gardening enthusiast. Selecting the perfect location and preparing the environment correctly are the most influential factors in determining the future health of the plant. This species thrives when it is given a sunny, well-drained spot where it can stretch its roots without interference. By following professional planting techniques, you can ensure that your young specimens transition smoothly into their new homes.
Before you dig your first hole, it is essential to assess the drainage capabilities of your chosen garden site. You can perform a simple drainage test by filling a hole with water and observing how quickly it disappears into the soil. If the water stands for more than an hour, you should consider raising the planting bed or adding grit to improve the structure. The blue daisy cannot tolerate “wet feet,” as its roots will quickly suffocate in waterlogged conditions.
Spacing is another critical element that often gets overlooked during the excitement of a new planting project. These plants need enough room for air to circulate around their foliage to prevent the buildup of moisture and heat. Generally, a distance of thirty to forty centimeters between each plant is sufficient to allow for their natural spread. Proper spacing also makes it easier for you to perform maintenance tasks like weeding and deadheading later in the season.
The best time for planting is typically in the mid-spring, after the final threat of frost has passed and the soil has begun to warm. Planting during this window gives the root system plenty of time to establish itself before the intense heat of summer arrives. If you are planting later in the season, you must be extra diligent about providing consistent moisture to help the plant cope with the stress. A well-timed planting schedule sets the stage for a spectacular floral display.
Professional propagation techniques
Propagation is an excellent way to expand your collection of blue daisies without having to purchase new plants every year. There are two primary methods used by experts: growing from seeds and taking stem cuttings. Each method has its own set of advantages and requires a slightly different approach to be successful. Many gardeners find that propagation is one of the most satisfying aspects of horticulture, as it allows you to see the entire life cycle of the plant.
More articles on this topic
Taking cuttings is often the preferred method because it ensures that the new plants will be identical to the parent. This is particularly important if you have a specific variety with a color or growth habit that you particularly enjoy. Cuttings can be taken in the late summer or early autumn from healthy, non-flowering stems. This timing allows the young clones to develop roots and become established before the winter dormancy begins.
Seed propagation, on the other hand, can offer a wider variety of genetic diversity and is a cost-effective way to produce many plants at once. While it takes a bit longer than using cuttings, watching the first tiny leaves emerge from the soil is a magical experience. You can start the seeds indoors several weeks before the last frost to give them a significant head start. High-quality seeds and a sterile starting mix are the keys to avoiding common seedling diseases.
Whichever method you choose, providing the right environmental conditions for the young plants is paramount. They need a stable temperature, consistent but not excessive moisture, and bright, indirect light. Using a specialized propagation tray or a small greenhouse can help maintain the high humidity levels that tender new roots require. Once the root systems are robust, you can gradually acclimate the new plants to the outdoor conditions.
Specifics of sowing seeds
Starting blue daisies from seed requires a bit of patience and attention to detail during the first few weeks. You should fill a seed tray with a fine, well-draining seed-starting mix that has been pre-moistened. Sow the seeds thinly on the surface and cover them with only a very light dusting of soil or vermiculite. These seeds actually require some light to trigger the germination process, so do not bury them too deeply.
More articles on this topic
Place the tray in a warm location with plenty of bright, filtered light, but avoid direct midday sun which can overheat the soil. A consistent temperature of around eighteen to twenty-one degrees Celsius is ideal for the most rapid and even germination. You should see the first sprouts appearing within two to three weeks, depending on the freshness of the seeds. Keeping the soil surface slightly damp with a fine mist sprayer will prevent the seeds from drying out.
Once the seedlings have developed their first set of true leaves, you can begin to thin them out to prevent overcrowding. This ensures that the strongest individuals have enough space and nutrients to develop into healthy plants. You can also start introducing a very weak liquid fertilizer to support their early growth. Be careful not to overwater at this stage, as young seedlings are particularly prone to damping-off disease.
Before moving the young plants into the garden, they must undergo a process called hardening off. This involves placing them outside in a sheltered spot for a few hours each day, gradually increasing their exposure to the elements. This step toughens the plant’s cell structure and prepares it for the realities of outdoor life. After a week or two of this transition, your home-grown blue daisies will be ready for permanent planting.
Methods for successful stem cuttings
Stem cuttings are a fast and reliable way to create new plants that will bloom much sooner than those grown from seed. You should select a healthy, vigorous stem that does not have any flower buds, as energy should be focused on root production. Use a sterilized knife or garden snips to take a cutting about ten centimeters long, making the cut just below a leaf node. Remove the leaves from the bottom half of the stem to prevent them from rotting in the soil.
Some gardeners choose to dip the cut end in a rooting hormone powder to speed up the process, although this isn’t strictly necessary. Insert the cutting into a pot filled with a mixture of perlite and peat moss, or a similar light propagation medium. Ensure that at least two nodes are submerged in the soil, as this is where the new roots will most likely emerge. Firm the soil gently around the stem to ensure there is good contact between the plant and the medium.
To maintain the necessary humidity around the cutting, you can place a clear plastic bag over the pot or use a propagation dome. Make sure there are a few holes for ventilation to prevent the buildup of mold or fungus. Keep the pots in a bright spot away from direct sunlight, and check the moisture levels every few days. You can test for root development by giving the stem a very gentle tug after about four weeks.
Once you feel resistance, it means the roots have successfully formed and are anchoring the plant. At this point, you can remove the plastic cover and start treating the cutting like a mature plant. Transplant the young blue daisy into a larger pot with regular potting soil to allow it to grow further. This method is an excellent way to preserve your favorite plants and share them with friends or family.