Starting your journey with this plant begins with a clear understanding of the best planting techniques and timing. You must select a period when the weather is stable and the risk of extreme temperatures has passed for the season. Proper preparation of the site or the container is the most important step in ensuring long-term survival and growth. A well-planted specimen will establish its roots much faster and begin producing flowers sooner than a stressed one.
The timing of your planting should ideally coincide with the beginning of the spring growth surge for the best results. This allows the plant to take full advantage of the entire growing season to build up its energy reserves. You should avoid planting during the peak of summer heat as the high temperatures can lead to excessive moisture loss. If you must plant in autumn, ensure there is enough time for the roots to settle before the winter cold arrives.
Choosing the right location involves assessing both the light levels and the quality of the soil in your garden. You want a spot that receives plenty of bright light but is protected from the most intense afternoon sun rays. The soil should be loose and friable, allowing the young roots to penetrate deeply without meeting too much resistance. If your garden soil is heavy clay, you will need to amend it significantly with sand and organic matter.
The actual process of putting the plant in the ground requires a hole that is twice as wide as the root ball. This creates a zone of loose soil that encourages the roots to spread out horizontally as they grow. You should place the plant at the same depth it was growing in its original container to avoid stem rot. Gently firming the soil around the base of the plant removes large air pockets and ensures good root contact.
Propagation through softwood cuttings
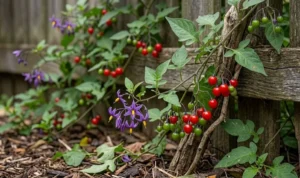
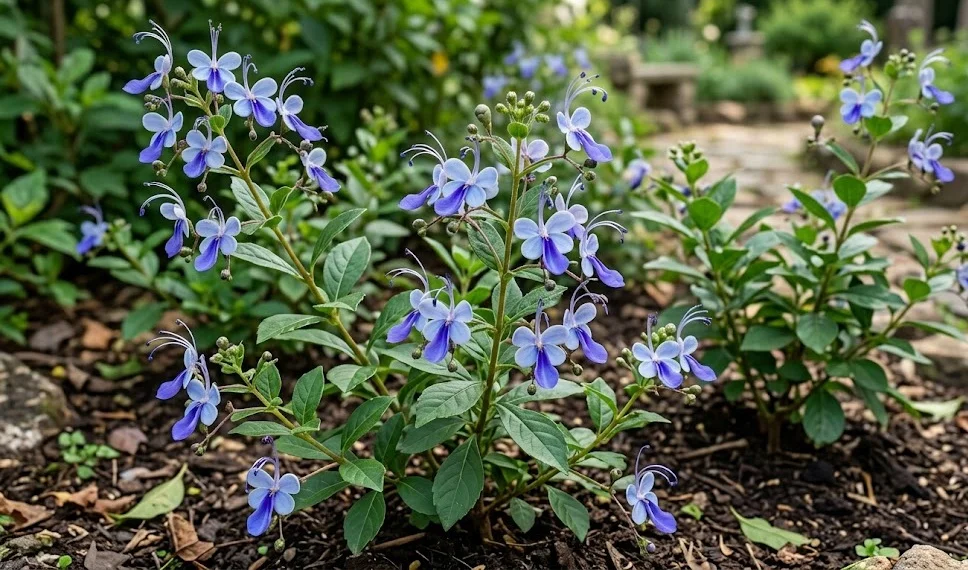
Taking cuttings is one of the most effective and popular ways to increase your collection of these blue-flowered shrubs. You should look for healthy, non-flowering shoots that are flexible but firm to the touch during late spring. Each cutting should be about four to six inches long and contain at least two or three leaf nodes. Using a sharp, sterilized knife or shears will ensure a clean cut that heals quickly and resists infection.
More articles on this topic
Preparing the cuttings involves removing the lower leaves to expose the nodes where the new roots will eventually emerge. You can dip the cut end into a rooting hormone powder to stimulate faster root development and protect against rot. Place the cuttings into a light, well-draining propagation mix made of perlite and peat or sand. It is vital to keep the medium consistently moist but never waterlogged during this delicate initial phase.
Creating a humid environment around the cuttings will prevent them from wilting before they have a chance to grow roots. You can use a plastic dome or a simple clear bag to trap moisture and maintain a stable temperature. Place the propagation tray in a bright spot with indirect light to avoid overheating the sensitive young tissues. Check the cuttings regularly for any signs of mold or fungal growth and provide fresh air if necessary.
You will know that the propagation has been successful when you see new leaves starting to form at the top. You can gently tug on the base of the cutting to feel for resistance, which indicates that roots have formed. Once the root system is well-established, you can gradually acclimate the young plants to less humid conditions. This process of hardening off is essential before moving them into their permanent pots or garden locations.
Growing from seeds and germination
While propagation from cuttings is faster, growing these plants from seeds can be a very rewarding and educational experience. You should source high-quality seeds from a reputable supplier to ensure a good germination rate and healthy seedlings. The seeds often benefit from being soaked in warm water for 24 hours before you plan to sow them. This helps to soften the outer shell and signal to the embryo that it is time to begin growing.
More articles on this topic
Sow the seeds in a sterile seed-starting mix and cover them with only a very thin layer of fine soil. They require a warm environment with consistent temperatures to trigger the biological processes needed for germination. Using a heat mat underneath the seed tray can provide the steady warmth that tropical species often require to sprout. Keep the surface of the soil moist by using a fine mist sprayer to avoid disturbing the tiny seeds.
Germination can be a slow process, sometimes taking several weeks or even a month depending on the conditions provided. You must be patient and maintain the right environment even if nothing seems to be happening on the surface. Once the first green shoots appear, move the tray to a location with very bright, indirect light to prevent leggy growth. Strong light at this stage is crucial for developing sturdy stems and healthy, compact foliage.
When the seedlings have developed their second set of true leaves, they are ready to be transplanted into individual small pots. You should handle the young plants very carefully by the leaves rather than the stems to avoid crushing them. Use a balanced potting soil that is rich in nutrients to support the rapid growth phase that follows germination. Providing a small amount of diluted fertilizer can help the young plants establish themselves more quickly in their new homes.
Establishing and stabilizing young plants
The first few months after planting or propagation are the most critical for the long-term health of your butterfly bush. You must monitor the moisture levels in the soil daily to ensure the young roots never dry out completely. Providing a temporary shade structure can help protect newly transplanted specimens from the stress of direct sunlight. As the plant shows signs of new growth, you can slowly reduce the level of extra protection you provide.
Encouraging a bushy growth habit early on will result in a much more attractive and productive plant in the future. You can pinch back the growing tips of the young stems to stimulate the development of side branches. This creates a denser structure with more potential sites for flower clusters to form during the blooming season. It is much easier to shape a young plant than to try and correct the form of an older, woody specimen.
Mulching around the base of your newly planted shrub will help maintain the stable conditions it needs to thrive. A thin layer of organic mulch keeps the soil moist and prevents the surface from baking hard in the sun. It also provides a slow release of nutrients as it breaks down and incorporates into the soil over time. Make sure the mulch does not touch the main stem of the plant to prevent any moisture-related rot issues.
Observation and patience are your best allies as you watch your new plants become established in their environment. Do not be discouraged if growth seems slow at first, as the plant is likely focusing its energy on building a strong root system. Once the roots are settled, you will see a significant increase in the growth rate and the overall vigor of the foliage. Successfully planting and propagating this species is a major milestone for any serious gardening enthusiast.