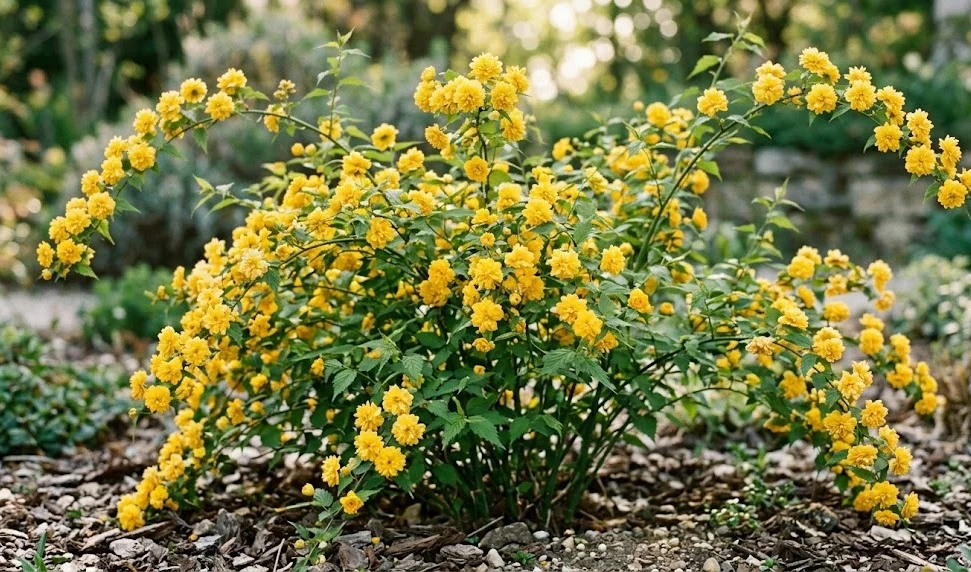
Establishing a Japanese kerria in your garden begins with a thoughtful approach to site selection and soil preparation. This adaptable shrub offers a unique flexibility, allowing it to thrive in various locations provided its basic needs for moisture and drainage are met. Whether you are starting with a nursery-grown specimen or attempting to create new plants from existing ones, the process requires patience and precision. Success in planting and propagation ensures a long-lasting and vibrant addition to your landscape that will continue to grow for decades.
Selecting the perfect site
The first step in a successful planting project is identifying a location that mirrors the natural woodland habitat of the species. You should look for a spot that receives dappled sunlight or partial shade, as this prevents the delicate flowers from bleaching in the sun. While the plant can tolerate full sun in cooler climates, it often performs best when protected from the harsh midday rays. Observing the light patterns in your garden throughout the day will help you find the ideal balance for optimal growth.
Soil quality is equally important and should be evaluated before you even pick up a shovel. You need a site with well-draining soil that is rich in organic matter and capable of holding consistent moisture without becoming stagnant. If the area is prone to standing water after a rainstorm, you might need to consider a different location or install a drainage solution. The plant’s roots are sensitive to anaerobic conditions, so a loose and airy soil structure is non-negotiable for long-term health.
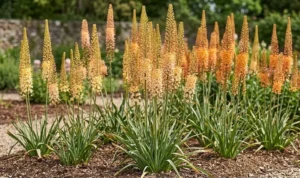
Consider the ultimate size and spread of the Japanese kerria when deciding where to place it in your garden. You should allow enough space for the shrub to reach its full width of six to nine feet without crowding neighboring plants. This space is not just for the physical branches but also for the suckering habit that allows the plant to expand over time. Proper spacing ensures adequate airflow, which is a major factor in preventing the development of fungal diseases later on.
Wind exposure is another factor that can impact the success of your new planting. You should try to find a sheltered spot where the flexible canes will not be whipped around by strong gusts, which can cause physical damage. A location near a fence, wall, or larger evergreen hedge can provide the necessary protection while also creating a beautiful visual backdrop. Ensuring the plant is not constantly battling the elements allows it to focus its energy on root establishment and flowering.
More articles on this topic
Professional planting techniques
Timing your planting is critical to give the Japanese kerria the best possible start in its new home. You should aim to plant during the dormant season, either in late autumn or early spring, before the buds begin to swell. This allows the root system to become established in the cool, moist soil without the stress of supporting active foliage or flowers. If you must plant during the summer, be prepared to provide significant shade and extra water to prevent transplant shock.
When digging the hole, you should make it twice as wide as the root ball but no deeper than the container the plant came in. This wide hole allows the new roots to penetrate the surrounding soil more easily as they begin to expand outward. It is a good practice to loosen the soil at the bottom and sides of the hole to remove any glazing caused by the shovel. Proper hole preparation is a simple step that significantly increases the speed of establishment for young shrubs.
Before placing the plant in the hole, you should gently tease out any roots that have started to circle the inside of the nursery pot. This encourages them to grow horizontally into the garden soil rather than continuing to grow in a tight, restrictive spiral. Place the shrub so that the top of the root ball is level with or slightly above the surrounding ground level. Backfill the hole with a mixture of native soil and a small amount of high-quality compost to provide an initial nutrient boost.
Once the hole is filled, you should firm the soil gently with your hands to remove any large air pockets around the roots. Immediately after planting, give the shrub a thorough watering to settle the soil and ensure good root-to-soil contact. Applying a layer of mulch around the base will help retain moisture and keep the roots cool during the first critical weeks of growth. Consistent monitoring of moisture levels is essential during the first full growing season to ensure the plant doesn’t dry out.
More articles on this topic
Propagation through softwood cuttings
Taking softwood cuttings is a highly effective way to create new Japanese kerria plants during the active growing season. You should collect your cuttings in late spring or early summer when the new growth is still flexible but has started to firm up slightly. Choose healthy, vigorous stems that show no signs of pests or disease and have plenty of leaves. Using sharp, sterilized bypass pruners will ensure clean cuts that heal quickly and minimize the risk of infection.
Each cutting should be about four to six inches long and taken just below a leaf node, where the concentration of growth hormones is highest. You should remove the leaves from the bottom half of the cutting to expose the nodes that will eventually produce roots. If the remaining leaves are very large, you can cut them in half to reduce moisture loss through transpiration. This simple trick helps the cutting stay hydrated while it lacks a functional root system to draw up water.
Dip the base of each cutting into a rooting hormone powder or gel to stimulate faster and more reliable root development. You should then insert the cuttings into a well-draining propagation medium, such as a mix of perlite and peat moss or a specialized seed-starting soil. Place the container in a warm, bright location but away from direct sunlight, which can quickly overheat the young tissues. Maintaining high humidity around the cuttings, perhaps by using a clear plastic dome, will further increase your success rate.
You will know the cuttings have successfully rooted when you see new leaf growth or feel resistance when you give them a very gentle tug. This process usually takes about four to six weeks depending on the temperature and humidity levels in your propagation area. Once the roots are well-established, you can gradually acclimate the young plants to outdoor conditions over a period of several days. Transplanting them into individual pots allows them to grow stronger before they are eventually moved into their permanent garden positions.
Propagation by division and suckers
The suckering habit of the Japanese kerria makes propagation by division one of the easiest and most reliable methods for home gardeners. You will notice new shoots emerging from the ground around the base of the parent plant, often several inches or even feet away. These suckers already have their own small root systems, which gives them a significant head start over cuttings. Late winter or early spring, while the plant is still dormant, is the absolute best time to perform this type of propagation.
To remove a sucker, you should first clear away any mulch or debris to locate the point where it attaches to the main root system. Use a sharp spade to slice vertically through the connecting root, ensuring you take a good portion of the lateral roots with the new shoot. Lift the young plant carefully, trying to keep as much soil around its small root ball as possible. This minimizes root disturbance and helps the new plant transition more smoothly to its new location.
If you are dealing with a very large and overgrown specimen, you can choose to divide the entire root mass into several smaller sections. You will need to dig up the whole plant and use a saw or a heavy-duty knife to cut through the tough, woody crown. Each division must have several healthy stems and a substantial amount of roots to be viable as an independent plant. This method is an excellent way to rejuvenate an old shrub while simultaneously expanding your garden collection.
Replant the divisions or suckers immediately at the same depth they were previously growing to prevent the stems from rotting. You should water them in thoroughly and provide extra care, such as temporary shade, if the weather turns unexpectedly warm. Because these plants have a pre-existing root structure, they often establish very quickly and may even bloom the following season. Propagation by division is a cost-effective and rewarding way to share this beautiful shrub with friends or fill empty spaces in your landscape.