Establishing common rue in your garden is a rewarding endeavor that begins with choosing the right method for your specific needs. Whether you choose to start from seeds or use vegetative propagation, understanding the biological requirements of the plant is essential. This species is known for its resilience, but the early stages of its life are when it is most vulnerable to environmental extremes. By following professional techniques, you can ensure a high success rate and healthy, vigorous plants.
Planting common rue is best done during the mild temperatures of spring or early autumn to avoid the stress of summer heat. If you are working with nursery-bought plants, ensure they are well-watered before they are moved into the ground. The planting hole should be twice as wide as the root ball but no deeper, as the plant needs to sit at the same level it was in the pot. Once the plant is in place, firm the soil gently around it to remove any large air pockets that could dry out the roots.
The initial location you choose will dictate the future health of the plant for many years to come. You must avoid areas where water tends to collect after a rain, as this will almost certainly lead to the death of the young rue. A sunny spot with at least six to eight hours of direct light is ideal for promoting strong stem development and vibrant leaf color. Giving the plant enough space—at least 18 to 24 inches from its neighbors—is crucial for proper air circulation and future growth.
Watering immediately after planting is necessary to help the soil settle around the roots and reduce transplant shock. However, you must be careful not to overwater in the following weeks, as the young plant needs to start searching for moisture to develop its taproot. Keep the soil slightly moist but never soggy, and gradually reduce the frequency as you see new growth appearing. This transition period is the only time common rue requires consistent attention to its hydration levels.
Sowing seeds for new growth
Starting common rue from seed is an economical way to produce many plants, though it requires a bit of patience and precision. The seeds can be sown indoors in late winter or directly into the garden bed once the danger of frost has passed. If sowing indoors, use a well-draining seed-starting mix and barely cover the seeds with a thin layer of soil or vermiculite. They require light to germinate, so placing them in a bright spot or under grow lights is a key factor for success.
More articles on this topic
Germination typically takes between 14 to 28 days, depending on the temperature and moisture levels provided. It is important to maintain a consistent temperature of around 20 degrees Celsius to encourage the seeds to break dormancy. Once the seedlings have developed their first set of true leaves, they should be thinned to prevent overcrowding and ensure each has enough resources. This early stage is when you must be most vigilant against “damping off,” a fungal disease that thrives in overly moist conditions.
Hardening off your seedlings is a vital step before they are permanently moved into the outdoor garden environment. Gradually expose the young plants to outdoor conditions over a period of a week or two, starting with a few hours in a sheltered spot. This process allows the leaf cuticles to thicken and prepares the plant for the intensity of direct sunlight and wind. Skipping this step often results in stunted growth or the loss of the tender young plants to environmental shock.
Direct sowing in the garden is also an option, provided the soil is warm and the area is kept free of aggressive weeds. You should clear the surface of the soil and press the seeds firmly into the earth without burying them deeply. Keeping the area misted until the seeds sprout will help maintain the necessary humidity at the soil surface. This method is often preferred by those who want the plants to develop their deep taproots immediately in their permanent location.
Propagating through stem cuttings
For those who want to replicate a specific specimen, taking stem cuttings is the most reliable and efficient method of propagation. This is best done in late spring or early summer when the plant is in its most active growth phase but before the stems become too woody. Select healthy, non-flowering shoots and cut a section about four to six inches long just below a leaf node. Using a sharp, sterilized knife or shears is essential to prevent crushing the delicate vascular tissue of the stem.
More articles on this topic
Remove the leaves from the bottom half of the cutting to reduce moisture loss and provide a clear area for root development. While common rue can root without hormones, dipping the base of the cutting in a rooting powder can significantly speed up the process. Insert the cutting into a pot filled with a mixture of perlite and peat moss, ensuring at least two nodes are buried below the surface. Firm the medium around the stem so that it stands upright and has good contact with the rooting material.
Maintain high humidity around the cuttings by covering the pot with a clear plastic bag or placing it in a propagation dome. However, you must ensure there is some ventilation to prevent the buildup of mold or rot on the foliage. Keep the cuttings in a bright, warm spot out of direct sunlight, which could overheat the enclosed environment and kill the developing roots. In about four to six weeks, you should feel some resistance when you gently tug on the cutting, indicating that roots have formed.
Once the cuttings have established a robust root system, they can be transplanted into individual pots with regular potting soil. Allow them to grow and strengthen for several months before moving them into their final positions in the garden. This method allows you to create many identical plants for a hedge or a repetitive design element at very little cost. It also ensures that the new plants will have the same hardy characteristics as the parent shrub.
Division and root management
While common rue is not typically divided like many other perennials due to its woody nature and taproot, it is occasionally possible with younger plants. If a young plant has developed multiple crowns, you can carefully lift the entire root ball in early spring before growth becomes too active. Using a sharp spade or knife, you can split the crown into two or three sections, ensuring each piece has a good portion of the root system. This is a high-risk procedure and should only be attempted if you are prepared to lose the plant.
The deep taproot of the rue makes it very difficult to move once it has reached maturity, often resulting in the death of the specimen. If you must move an established plant, you need to dig a very wide and deep hole to capture as much of the root system as possible. Be prepared to prune back the top of the plant significantly to compensate for the lost roots during the relocation process. Replanting should be done immediately, followed by thorough watering and careful monitoring for several months.
Root health is often the deciding factor in how well a newly planted or propagated rue will perform in the long run. When planting, always inspect the roots for any signs of rot or being “pot-bound,” where the roots circle the inside of the container. If the roots are circling, gently tease them outward to encourage them to grow into the surrounding garden soil. This simple step helps the plant establish a more stable and efficient base for gathering nutrients and water.
Understanding the limitations of the root system helps you avoid common mistakes during the planting phase. Because the roots are sensitive to being disturbed, it is always better to plant a young, small specimen rather than trying to install a large, mature one. Smaller plants adapt much faster to their new environment and will often surpass a larger, stressed transplant within two seasons. Patience in the beginning leads to a much more resilient and beautiful plant in the years that follow.
Site selection and preparation
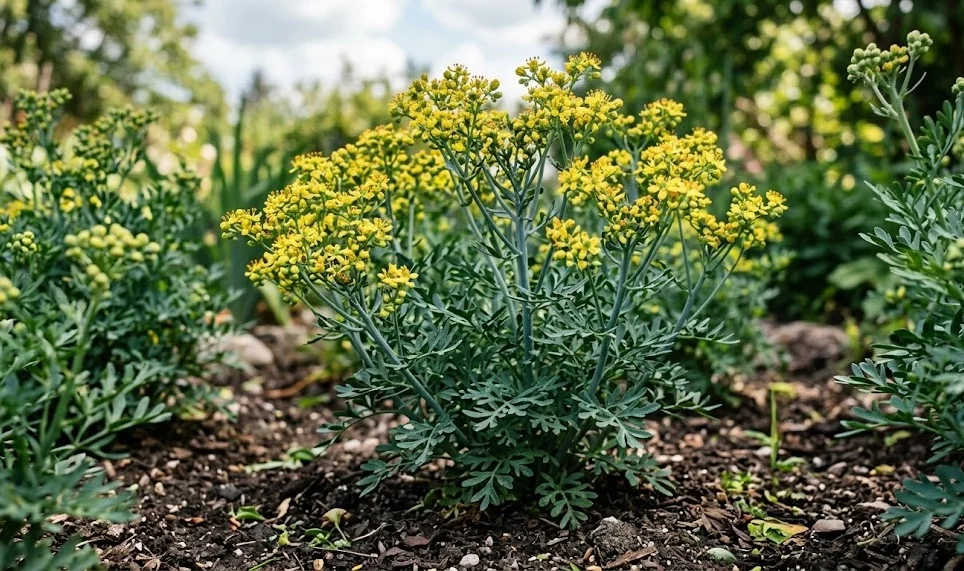
The success of your rue planting depends heavily on the initial site selection, which should mimic its native Mediterranean hillsides. Look for a location that is elevated or has a slight slope to ensure that water never pools around the base of the plant. If your garden is naturally flat and has heavy soil, consider building a small mound of earth and gravel to plant into. This provides the necessary drainage and also elevates the plant, making its blue-green foliage a more prominent feature.
Testing the soil for pH is a professional step that can save you a lot of trouble later on. Rue prefers a pH between 7.0 and 8.0, but it is quite tolerant of slightly different levels as long as the drainage is perfect. If your soil is very acidic, adding a handful of garden lime to the planting area can help bring it into the ideal range. You don’t need to be overly precise, as the plant is tough, but creating the best possible start will lead to faster growth.
Clear the planting area of any perennial weeds like dandelions or grasses that could compete with the young rue for nutrients. Because the rue will grow into a woody shrub, it is difficult to remove invasive weeds from its center once it is established. Taking the time to thoroughly clean the site before planting saves hours of tedious maintenance in the future. A clean start allows the rue to expand its canopy and naturally shade out many annual weeds as it matures.
Think about the visual and functional role the plant will play before you dig your first hole. Will it be a specimen plant in a rock garden, or part of a protective border around a vegetable patch? Consider its height and width at maturity to ensure it won’t block smaller plants or grow over walkways where people might brush against it. Good planning ensures that the rue becomes a permanent and valued member of your garden’s structure rather than an obstacle.