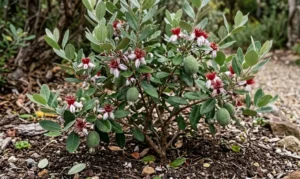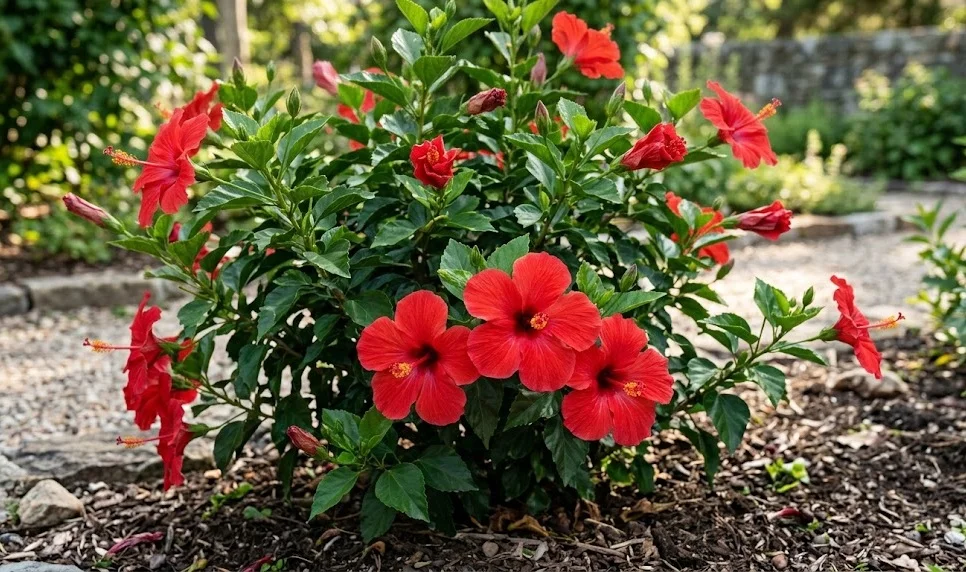
The successful cultivation of the Chinese hibiscus begins with a precise approach to planting and an understanding of the various methods available for propagation. Whether you are starting with a young nursery plant or attempting to create new individuals from an existing specimen, the techniques used during these initial stages are critical. A well-executed planting process ensures that the root system can establish itself quickly and efficiently in its new environment. This article provides professional insights into the mechanical and biological requirements for establishing and multiplying these spectacular tropical shrubs.
Selecting and preparing the planting site
Choosing the right location is the most important decision you will make when adding a Chinese hibiscus to your garden or home. This species requires a site that offers maximum sunlight exposure, ideally receiving at least six to eight hours of direct light daily to support its high energy demands. If you are planting outdoors, you must ensure the spot is protected from strong, damaging winds that can tear the delicate foliage. For indoor plants, a location near a large, unobstructed window is essential for maintaining the plant’s structural integrity and flowering potential.
The quality of the soil at the planting site must be carefully evaluated and amended before the hibiscus is introduced. These plants thrive in fertile, loamy soil that has been enriched with organic matter, such as well-rotted compost or leaf mold. If your garden soil is heavy clay, you should incorporate sand and organic material to improve drainage and prevent waterlogging. In contrast, sandy soils may require additional organic components to help retain the moisture and nutrients that the hibiscus needs to grow.
If you are planting the hibiscus in a container, the preparation involves selecting a high-quality, peat-based potting mix that is designed for flowering tropicals. You should never use plain topsoil or garden soil in a pot, as these materials will compact and suffocate the roots over time. Pre-moistening the potting mix before you begin the planting process will ensure that the roots do not encounter dry pockets of soil. This preparation creates a welcoming environment that reduces transplant shock and encourages immediate root exploration.
Spacing is another critical factor to consider when planting multiple hibiscus shrubs in a landscape or a large greenhouse. You should provide enough room between plants to allow for mature growth and adequate air circulation, which is vital for disease prevention. Generally, a distance of one to one and a half meters between plants is recommended to prevent the canopies from becoming overly crowded. Proper spacing also ensures that each plant receives its fair share of sunlight and soil nutrients without having to compete with its neighbors.
More articles on this topic
Mastering the planting process
When you are ready to move the hibiscus into its permanent home, the timing should coincide with a period of mild weather to minimize stress. Spring is the optimal season for planting, as the increasing light and warmth will support the rapid development of new roots. You should avoid planting during the peak heat of mid-summer or the cold temperatures of late autumn, as these extremes can hinder establishment. Cloudy days or late afternoon sessions are ideal for planting to prevent the sun from wilting the plant during the transition.
The actual technique of placing the plant into the soil requires precision to avoid damaging the delicate root system. You should dig a hole that is twice as wide as the current root ball but no deeper than the depth at which the plant was previously growing. Placing the plant too deep in the soil can lead to stem rot, while planting it too high can cause the roots to dry out. Once the plant is positioned, backfill the hole with the amended soil, pressing down gently with your hands to remove any large air pockets.
After the hibiscus is settled in its new spot, a thorough watering is necessary to help settle the soil around the roots. This initial watering should be deep and slow, ensuring that the entire root zone is saturated and that the soil makes direct contact with the root fibers. You may notice some slight wilting or leaf drop in the first few days after planting, which is a normal reaction to the change in environment. Keeping the soil consistently moist during the first few weeks will help the plant recover quickly and begin its active growth phase.
Applying a layer of organic mulch around the base of the plant can significantly improve the success of a new planting. Mulch helps to regulate soil temperature, retain moisture, and suppress weeds that would otherwise compete with the hibiscus for resources. You should apply a five-centimeter layer of shredded bark or wood chips, being careful to keep the mulch a few centimeters away from the main stem. This simple step provides a protective buffer that supports the health of the root system as it expands into the surrounding soil.
More articles on this topic
Propagation through stem cuttings
Propagating Chinese hibiscus from stem cuttings is the most popular and reliable method for creating exact clones of a favorite plant. You should select healthy, semi-hardwood stems that are roughly the thickness of a pencil and show no signs of pests or disease. The best time to take these cuttings is in late spring or early summer when the stems are actively growing but have begun to firm up. Using sharp, sterilized pruning shears is essential to make clean cuts that will heal quickly and resist infection.
Each cutting should be approximately ten to fifteen centimeters long and contain at least three or four leaf nodes. You must remove the lower leaves, leaving only two or three at the top to minimize moisture loss through transpiration. If the remaining leaves are very large, you can cut them in half to further reduce the surface area while still allowing for photosynthesis. Dipping the cut end into a rooting hormone powder can significantly increase the speed and success rate of root formation.
The cuttings should be placed into a well-draining rooting medium, such as a mix of perlite and peat moss or clean river sand. It is helpful to use a small propagator or cover the pot with a clear plastic bag to create a high-humidity environment around the stems. Place the cuttings in a warm spot with bright, indirect light, but avoid direct sunlight which can overheat the miniature greenhouse and kill the tender tissues. You should see signs of new growth or feel resistance when gently tugging the cutting within four to six weeks.
Once the cuttings have developed a robust set of roots, they are ready to be transplanted into individual small pots with regular potting soil. You should gradually acclimate the young plants to lower humidity by removing the plastic cover for longer periods each day. This hardening-off process is crucial for preparing the new hibiscus for the conditions they will face as independent plants. With proper care, these propagated cuttings can grow into flowering specimens within a single year, allowing you to expand your collection easily.
Air layering and seed propagation
Air layering is a more advanced propagation technique that is particularly useful for larger branches or varieties that are difficult to root from cuttings. This method involves wounding a healthy stem while it is still attached to the parent plant and encouraging roots to grow at the site of the wound. You begin by removing a small ring of bark from a branch and applying rooting hormone to the exposed area. The wound is then wrapped in damp sphagnum moss and encased in clear plastic to retain moisture and warmth.
The advantage of air layering is that the branch continues to receive water and nutrients from the parent plant while the new roots are forming. This process can take several months, but it results in a much larger and more established plant once it is finally detached. You can monitor the progress through the clear plastic, and once you see a dense network of white roots, the branch can be cut away. This new plant is then potted up and treated with the same care as a newly transplanted nursery specimen.
Propagation from seeds is also possible, although it is primarily used by breeders or hobbyists looking for unique and unpredictable new varieties. Because the Chinese hibiscus is a complex hybrid, the seeds will rarely produce a plant that looks exactly like the parent. You must harvest the seed pods once they have turned brown and dried on the plant, then extract the small, dark seeds from inside. Soaking the seeds in warm water for twenty-four hours before planting can help soften the hard outer coat and improve germination rates.
The seeds should be sown in a sterile seed-starting mix and kept consistently warm, ideally around twenty-five degrees Celsius. Germination can be erratic, with some seeds sprouting in a few days and others taking several weeks to appear. Once the seedlings have developed two sets of true leaves, they can be carefully moved into their own small containers. Growing hibiscus from seed requires patience, as it may take two or more years before the young plant produces its first flower, but the surprise of a new bloom makes it a rewarding endeavor.