Success in growing this vibrant ornamental plant begins with high-quality seeds and careful preparation of the starting environment. You should source your seeds from a reputable supplier to ensure a high germination rate and true-to-type foliage colors. It is often beneficial to soak the seeds in lukewarm water for a few hours before sowing to soften the outer hull. This simple step can significantly speed up the germination process and lead to more uniform growth across your seed trays.
The timing of your seed starting is crucial because these plants are highly sensitive to cold temperatures and frost. You should plan to start the seeds indoors about six to eight weeks before the last expected frost date in your region. Using a professional seed starting mix that is light and sterile will provide the best environment for the delicate new roots. This type of medium prevents common issues like damping-off, which can quickly kill young seedlings in their early stages.
Providing consistent bottom heat can drastically improve the germination success for these heat-loving tropical species. You can use a dedicated seedling heat mat set to a temperature of around twenty-one to twenty-four degrees Celsius. This warmth mimics the tropical soil conditions and encourages the seeds to sprout much faster than they would in a cool room. Covering the seed trays with a clear plastic dome will also help to maintain the high humidity levels required for early growth.
Lighting is another critical factor that you must manage carefully once the first green shoots appear above the soil surface. You should place the trays under bright grow lights or in a very sunny south-facing window to prevent the seedlings from becoming leggy. Keep the lights close to the plants, moving them up as the seedlings grow to ensure they receive intense, direct illumination. Strong light from the very beginning creates stocky, healthy plants that are much better equipped for the eventual move outdoors.
Sowing and germination techniques
When you are ready to sow the seeds, you should focus on achieving the correct depth to ensure they have enough energy to reach the surface. These seeds are quite small, so they only need to be covered with a very thin layer of fine soil or vermiculite. A general rule of thumb is to bury them no deeper than twice the diameter of the seed itself. Pressing the soil down lightly after sowing will ensure good contact between the seed and the moist growing medium.
More articles on this topic
Watering the seed trays requires a gentle touch to avoid washing the tiny seeds away or burying them too deeply. You should use a fine mist sprayer to keep the surface of the soil consistently moist but never waterlogged. Overwatering at this stage can lead to rot and fungal issues that can decimate your entire crop before it even starts. Check the trays daily and add water as soon as the top of the soil begins to look slightly dry to the touch.
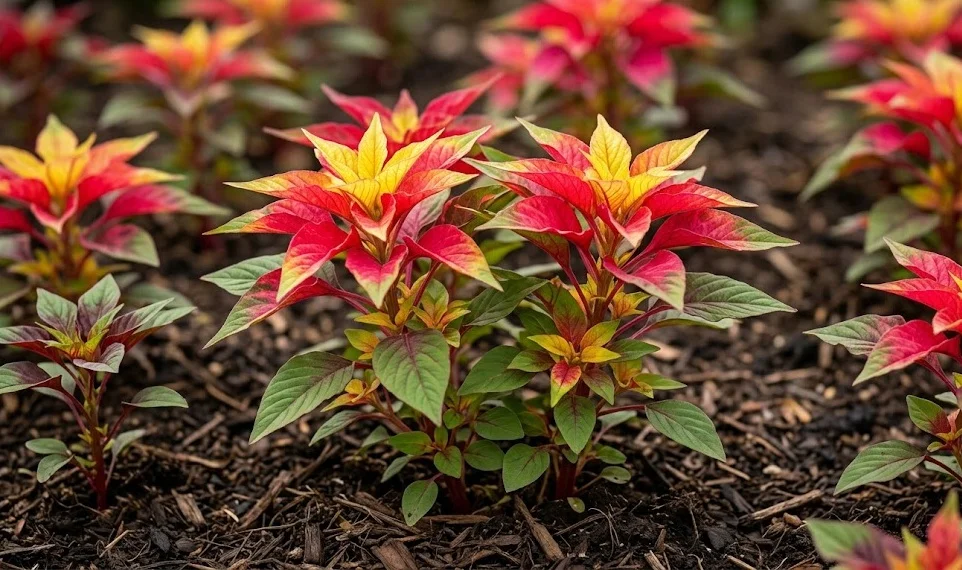
Germination typically occurs within seven to ten days if the conditions are optimal and the seeds are fresh. You will first see the two small embryonic leaves, which will soon be followed by the colorful true leaves that the plant is known for. Once most of the seeds have sprouted, you can remove the humidity dome to allow for better air circulation and to prevent mold growth. At this point, you can also slightly reduce the intensity of the bottom heat if you are using a heat mat.
Thinning the seedlings is an important step that ensures each plant has enough space and resources to thrive as it grows larger. If you have sown multiple seeds in a single cell or pot, you should remove all but the strongest-looking individual. Use a pair of small scissors to snip the unwanted seedlings at the soil level to avoid disturbing the roots of the remaining plant. This early selection process is key to growing vigorous specimens that will eventually make a big impact in your garden.
Transplanting to the garden
The process of moving your plants from the controlled indoor environment to the garden requires a gradual transition known as hardening off. You should start by placing the pots in a sheltered, shady spot outdoors for just a few hours each day. Gradually increase the amount of time they spend outside and the intensity of the sunlight they receive over a period of one week. This step allows the leaf cuticle to thicken and prepares the plant for the more variable conditions of the open garden.
More articles on this topic
Choosing the right day for transplanting can make a significant difference in how quickly the plants settle into their new home. You should aim for a cloudy or overcast day to reduce the initial transplant shock caused by intense direct sunlight. If the weather is consistently hot and sunny, try to plant in the late afternoon so the plants have the whole night to recover. Watering the seedlings thoroughly before you move them will also help the root ball stay together during the process.
Digging a hole that is slightly larger than the root ball will allow you to place the plant without cramping the roots. You should set the plant at the same depth it was growing in its original container to prevent stem rot issues. Firm the soil gently around the base of the stem to eliminate any large air pockets that could dry out the roots. Immediate watering after transplanting is essential to help the soil settle and to provide the roots with the moisture they need.
Spacing the plants correctly in the garden bed is vital for their long-term health and the overall aesthetic of your landscape. You should follow the recommendations for the specific variety you are growing, typically leaving thirty to fifty centimeters between each plant. This distance allows for the proper air flow that is necessary to minimize the risk of foliar diseases during the humid summer months. A well-spaced garden looks more professional and allows every individual plant to display its unique colors and form.
Propagation from cuttings and seeds
While starting from seed is the most common method, you can also propagate these plants from stem cuttings if you have a favorite specimen. You should select a healthy, non-flowering shoot and cut a piece about ten centimeters long just below a leaf node. Removing the lower leaves and dipping the cut end in rooting hormone can increase your chances of success. Place the cutting in a glass of water or a pot of moist perlite until new roots begin to form.
Maintaining high humidity around the cuttings is essential while they are developing their new root systems. You can create a simple mini-greenhouse by placing a clear plastic bag over the pot, supported by a few small sticks. Keep the cuttings in a warm spot with bright but indirect light to avoid overheating the delicate tissues. Once you see significant root growth, you can carefully transplant the new plants into individual pots with regular potting soil.
Saving your own seeds is a sustainable way to ensure you have plenty of plants for the next growing season without extra cost. You should allow several of your best-looking plants to go to seed and wait for the flower heads to dry completely. The seeds are ready when they turn dark and can be easily shaken from the husks into a container. Cleaning the seeds by winnowing or using a fine sieve will remove the unwanted chaff and debris before storage.
Proper storage of the harvested seeds is the final step in the propagation cycle for this annual plant. You must ensure the seeds are perfectly dry before placing them in labeled paper envelopes or small airtight glass jars. Storing the containers in a cool, dark, and dry location will maintain the viability of the seeds for several years. This practice allows you to build up a collection of your favorite colors and habits, creating a unique strain for your specific garden conditions.