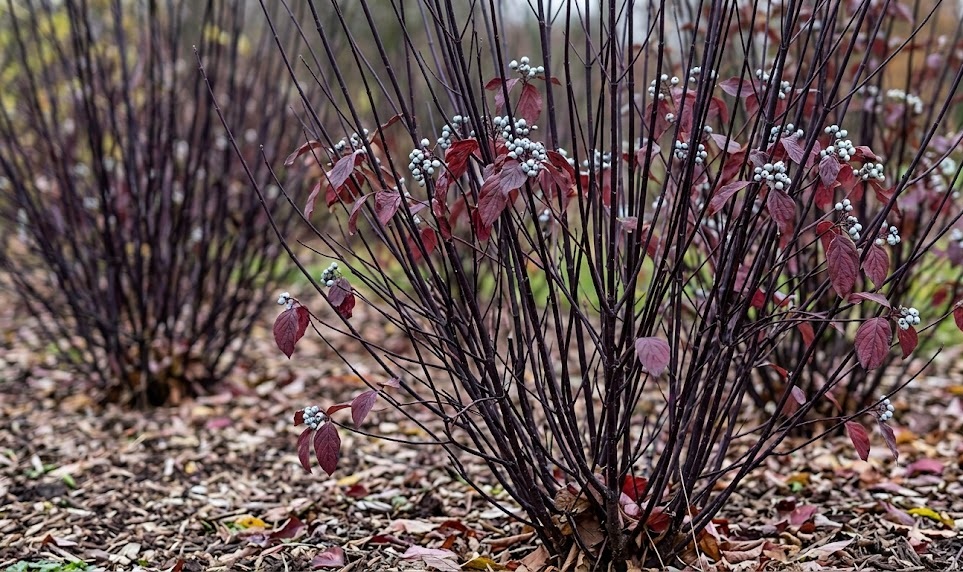
Successful cultivation of the black-stemmed dogwood starts with a deep understanding of the planting process and the various methods of propagation available. Whether you are adding a single specimen to your yard or looking to create a long hedge, the initial steps are crucial for survival. These shrubs are remarkably adaptable, yet they respond best to careful handling during their early stages of development. By following professional standards, you can ensure your new plants establish themselves quickly and produce the stunning dark bark that is their trademark.
Selecting and preparing the site
Choosing the right location is the first and most critical step in ensuring the success of your new dogwood. You should look for a spot that receives at least six hours of sunlight to encourage the most intense stem coloration. The soil should be well-draining but capable of holding enough moisture to prevent the roots from drying out completely. Avoid areas where water tends to pool after a storm, as this can lead to issues with root health.
Before you begin digging, it is a good idea to clear the area of any weeds or existing grass that might compete for nutrients. You can incorporate a generous amount of organic compost into the planting area to improve the soil structure and fertility. If you are dealing with very heavy clay, adding some coarse grit can help facilitate better drainage for the young roots. Proper site preparation saves a significant amount of time and effort in the long run by giving the plant a head start.
Consider the ultimate size of the shrub when determining the spacing between individual plants or other garden features. While they may look small in their nursery containers, these dogwoods can spread several feet wide as they reach maturity. Give them enough room to breathe and grow without being crowded by fences, walls, or neighboring shrubs. Planning for the future ensures that the plants will have a balanced shape and healthy airflow throughout their lives.
Finally, check for any underground utilities or pipes before you start any significant digging in your garden or yard. It is always better to be safe and aware of what lies beneath the surface before you begin the planting process. Once you have identified a safe and suitable spot, you can proceed with confidence to the next phase of the project. A well-chosen site is the foundation of a healthy and beautiful landscape feature for years to come.
More articles on this topic
Planting techniques for success
The best time to plant your black-stemmed dogwood is during the dormant season, either in late autumn or very early spring. Dig a hole that is twice as wide as the root ball but no deeper than the container the plant came in. This allows the roots to spread easily into the surrounding loosened soil while keeping the crown at the correct level. Placing the plant too deep in the ground can lead to stem rot and other health complications.
Gently remove the shrub from its pot and check for any circling roots that might have become constricted over time. If the plant is root-bound, use your fingers or a small tool to carefully loosen the outer layer of the root system. Place the shrub in the center of the hole and ensure it is standing upright and straight from all angles. Gradually fill the hole with the amended soil, firming it down gently with your hands to remove any large air pockets.
Once the hole is filled, give the plant a thorough watering to settle the soil and provide immediate hydration to the roots. You might see the soil level drop slightly after the first watering, which is normal and can be corrected with a bit more earth. Applying a layer of mulch around the base will help retain this moisture and keep the roots cool as they settle. Avoid piling the mulch directly against the bark to maintain good air circulation around the lower stems.
Monitor the newly planted shrub closely for several weeks to ensure it is not showing signs of transplant shock. You may need to water it more frequently during the first growing season until the root system is fully established in the garden. Providing a little extra care during this initial phase will pay off with much faster growth and better health in the future. Patience and attention to detail during the planting process are the keys to a thriving shrub.
More articles on this topic
Propagation through hardwood cuttings
Propagating the black-stemmed dogwood from hardwood cuttings is a reliable and cost-effective way to increase your plant collection. This process is typically performed in late autumn or winter when the plant is fully dormant and the leaves have fallen. You should select healthy, straight stems from the current year’s growth that are roughly the thickness of a pencil. Using sharp, clean pruners, take cuttings that are about six to ten inches long for the best results.
Make a straight cut just below a bud at the base of the cutting and a slanted cut just above a bud at the top. This slanted cut helps you identify which end is up and allows water to run off the top of the cutting. You can dip the bottom end in a rooting hormone to encourage faster root development, though dogwoods often root well without it. Prepare a trench in a sheltered spot with sandy soil or use deep pots filled with a well-draining cutting mix.
Insert the cuttings into the soil so that only about one-third of their length is visible above the surface. Space them several inches apart to allow for root growth and to prevent them from shading each other out. Keep the soil consistently moist throughout the winter and spring, but be careful not to let it become waterlogged. By the following autumn, the cuttings should have developed enough of a root system to be moved to their permanent home.
This method is highly rewarding because it allows you to create exact clones of your favorite parent plant for free. It is a great way to produce enough shrubs for a long hedge or to share with friends and fellow gardeners. Watching a simple stick transform into a vibrant, leaf-bearing shrub is one of the most satisfying parts of propagation. With a little bit of effort, you can significantly expand the presence of these beautiful plants in your landscape.
Propagation through layering techniques
Layering is another effective propagation method that takes advantage of the dogwood’s natural tendency to root where its stems touch the ground. This technique is often more successful for beginners because the new plant remains attached to the parent while it develops roots. Choose a low-growing, flexible branch that can easily be bent down to reach the surface of the soil. The best time to start this process is in the early spring just as the growth begins.
In the spot where the branch will touch the ground, dig a shallow hole and amend the soil with some compost or peat. Gently wound the underside of the branch by scraping away a small bit of the bark with a knife. This injury stimulates the plant to produce roots in that specific area as it tries to heal itself. Pin the branch firmly into the soil using a U-shaped wire or a heavy stone to ensure it stays in constant contact with the earth.
Cover the wounded section of the branch with soil and keep the area well-watered throughout the growing season. You can leave the tip of the branch exposed so that it can continue to grow and photosynthesize for the new plant. It usually takes a full year for a strong enough root system to develop for the layer to survive on its own. Check the progress the following spring by gently tugging on the branch to see if it feels anchored.
Once you are confident that the roots are established, you can sever the connection to the parent plant with sharp pruners. It is best to leave the new plant in place for a few more weeks to ensure it can thrive independently before transplanting it. This method produces a larger plant more quickly than cuttings and is very reliable for many species of dogwood. Layering is a natural and gentle way to work with the inherent growth habits of your shrubs.