Successfully introducing black mondo grass into your landscape starts with a thoughtful approach to site selection and soil preparation. This plant is a long-term investment in your garden’s aesthetic, so taking the time to create the perfect environment from day one is crucial. Because it expands slowly through underground rhizomes, the initial spacing and soil quality will dictate how quickly you achieve a lush, dark carpet of foliage. By following professional planting techniques, you ensure that each individual clump has the best possible start for a long and healthy life in your outdoor space.
The ideal location for this plant provides a balance of light and protection that suits its unique physiological requirements for color production. You should look for a spot that receives bright, indirect light or filtered shade, especially during the hottest parts of the day in mid-summer. While it can tolerate a variety of light levels, extreme deep shade might result in greener foliage, whereas too much sun can cause leaf scorch. Finding that “sweet spot” in your garden will help the plant maintain its deep, signature black color without the risk of environmental stress.
Soil preparation is the next critical step in the planting process, as the roots require a specific texture to spread effectively. You must ensure the ground is loose and friable, allowing the delicate rhizomes to push through the soil without meeting heavy resistance. Incorporating plenty of organic matter, such as well-aged leaf mold or compost, will provide the necessary structure and nutrient base. If your garden has heavy clay or very sandy soil, these amendments are even more important to balance the moisture-holding capacity and drainage.
Before you actually place the plants in the ground, it is helpful to lay them out in their pots to visualize the final density of the planting. Standard professional advice suggests spacing the clumps about four to six inches apart if you want to achieve full coverage within a couple of years. If you are working with a tighter budget or have more patience, spacing them further apart is fine, but you will need to manage the gaps with mulch in the meantime. Once you are satisfied with the arrangement, you can proceed to the actual digging and planting phase with a clear plan in mind.
Site selection and preparation
Analyzing the drainage patterns of your chosen site is a non-negotiable part of the preparation process for any Ophiopogon species. You can perform a simple perk test by digging a small hole, filling it with water, and observing how quickly it drains away into the surrounding soil. If the water lingers for more than an hour, you will need to raise the planting bed or install drainage solutions to protect the plant’s roots. These plants are exceptionally hardy, but they will quickly succumb to root rot if they are forced to sit in waterlogged conditions.
More articles on this topic
Clearing the area of perennial weeds is another vital task that should be completed before the first black mondo grass clump goes into the ground. Because this grass grows so slowly, it can easily be overwhelmed by aggressive weeds that compete for light, water, and soil nutrients. Hand-pulling existing weeds and removing as much of their root systems as possible will save you hours of difficult maintenance work later on. Some professionals recommend preparing the bed a few weeks in advance to allow any dormant weed seeds to germinate so they can be removed before planting.
The orientation of the planting site in relation to the sun’s path will influence the microclimate that the plants experience throughout the year. South-facing walls might reflect too much heat and light, potentially stressing the dark foliage during the peak of the summer season. Conversely, a north-facing site under a dense tree canopy might be too dark for the plant to produce its best color. A west-facing or east-facing position often provides the most stable environment where the plants get enough light without the intensity of the midday sun.
Finalizing the soil’s nutrient profile can be done by mixing in a small amount of slow-release, balanced organic fertilizer during the final raking of the bed. This provides a gentle supply of nutrients that will be available as the roots begin to explore their new home after planting. Avoid using high-nitrogen chemical fertilizers at this stage, as they can cause a flush of weak growth that is susceptible to pests. A natural, holistic approach to soil fertility will always yield the most resilient and beautiful plants in the long run.
The planting procedure
When you are ready to plant, dig a hole for each clump that is slightly wider than the root ball but no deeper than the original pot. It is essential to keep the crown of the plant at the same level as the soil surface to prevent rot or drying out of the main growing point. If you plant it too deep, the lack of oxygen can kill the plant, while planting too shallow can leave the roots vulnerable to temperature extremes. Gently tease out any circling roots from the bottom of the root ball to encourage them to grow outward into the new soil.
More articles on this topic
Fill the space around the root ball with your prepared soil mix, tamping it down lightly with your hands to remove any large air pockets. You want the soil to be in firm contact with the roots, but you should avoid stepping on the area, which can lead to excessive compaction. After the hole is filled, the surface should be level and the plant should feel secure and upright in its new position. This careful attention to detail during the backfilling process ensures that the roots can immediately begin absorbing water and nutrients.
Immediate irrigation is required after planting to settle the soil further and reduce the shock of the transition for the plant. Use a gentle spray or a watering can to thoroughly soak the area without washing away the top layer of loose soil. This initial watering helps to close any remaining small air gaps and ensures that the root system is fully hydrated. Monitor the plants daily for the first two weeks, as the small root balls can dry out much faster than the surrounding garden soil.
The final step of the planting process is to apply a two-inch layer of organic mulch around the base of the new plants. This mulch serves multiple purposes, including moisture retention, temperature regulation, and the suppression of opportunistic weed growth. Be very careful to keep the mulch away from the direct center of the plant to allow for proper air circulation around the crown. Using a dark-colored mulch, such as composted bark, can also help the black foliage stand out visually while it is still in the process of establishing itself.
Propagation by division
The most effective and common way to propagate black mondo grass is through the division of established clumps every few years. This process is best performed in the early spring just as the plant begins its new growth cycle for the season. You will need to dig up an entire mature clump, taking care to get as much of the root system and rhizomes as possible. A sharp garden spade or a dedicated transplanting fork is the best tool for lifting the plant with minimal damage to the delicate structures.
Once the clump is out of the ground, shake off the excess soil so you can clearly see the individual fans of leaves and their attached roots. You can often pull the clumps apart by hand, but for older, more congested plants, you may need a sharp knife or hori-hori to slice through the rhizomes. Ensure that each new division has at least three to five healthy fans of leaves and a substantial portion of the root system. This ensures that the new plants have enough stored energy to recover quickly and begin growing independently.
While you are dividing the plants, take the opportunity to inspect the health of the internal root system for any signs of pests or disease. Discard any sections that look mushy, hollow, or otherwise unhealthy to ensure that you are only replanting the strongest specimens. It is also a good practice to trim back any excessively long roots to encourage the development of new, more efficient feeder roots. Keep the divisions in a shaded area and keep them moist until you are ready to place them back into their permanent positions in the garden.
Replanting the divisions follows the same basic procedure as planting new nursery stock, with an emphasis on proper depth and spacing. Because these divisions already have a mature root system, they often establish themselves much faster than young plants from a garden center. You can use these new plants to expand your existing drifts or to start new features in different parts of your landscape. This self-sustaining method of propagation is not only cost-effective but also ensures that the new plants are already well-adapted to your local environment.
Establishing young colonies
During the first full growing season after planting or division, your primary goal is to support the development of a strong root system. You should prioritize consistent moisture over everything else, as young plants do not yet have the deep roots needed to survive periods of drought. Avoid the temptation to move or disturb the plants during this critical period of establishment, as this will only set back their growth. Patience is required, as you may not see much top growth in the first few months while the plant focuses its energy underground.
Feeding young colonies should be done sparingly to avoid over-stimulating the plants before they have the root structure to support rapid growth. A light application of a diluted organic liquid fertilizer in late spring can provide a gentle boost without the risk of salt buildup or leaf burn. Focus on products that promote root health, such as those containing seaweed or humic acids, rather than high-nitrogen formulas. As the plants mature and the root systems become more extensive, you can gradually move toward a more standard fertilization schedule.
Weed management remains a top priority during the establishment phase because any competition can significantly slow down the expansion of the mondo grass. Check the area once a week and remove any weeds by hand while they are still small and easy to pull without disturbing the grass roots. Maintaining a clean planting bed allows the rhizomes of the black mondo grass to spread into the surrounding soil without having to navigate through a thicket of weed roots. Over time, as the grass fills in and creates a dense mat, the need for weeding will naturally decrease as the sun is blocked from the soil surface.
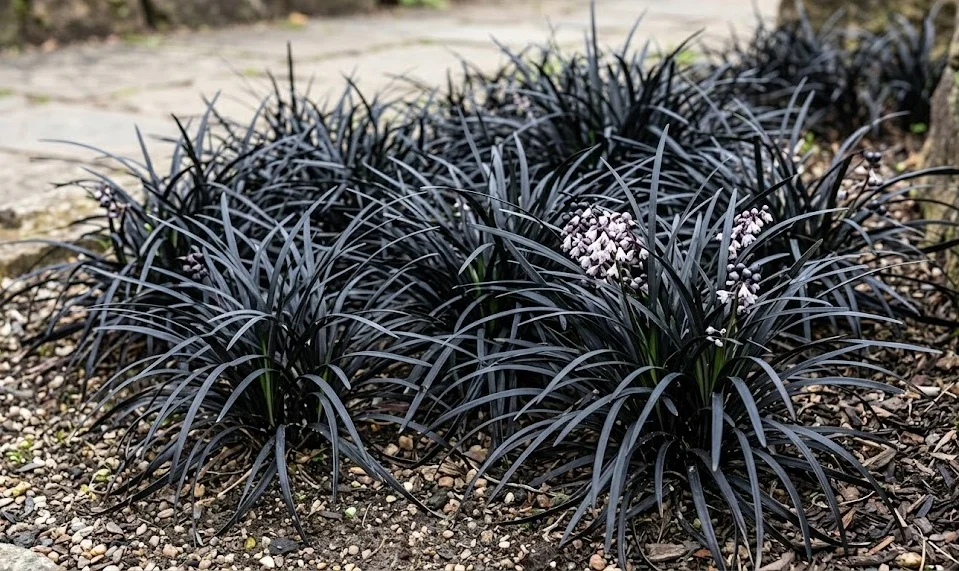
By the end of the second year, you should start to see the individual clumps beginning to merge and form a more cohesive groundcover. This is the stage where the true beauty of the black mondo grass becomes apparent as it creates a solid sea of dark, textured foliage. You can now begin to treat the colony more like an established feature of the garden, though continued monitoring for water and mulch remains beneficial. Celebrating the successful establishment of your black mondo grass is a rewarding moment for any gardener who appreciates the unique elegance of this plant.