Successful establishment of this shrub begins with choosing the right moment and the most suitable location in your garden. The process of putting down roots requires a careful balance of soil preparation and environmental considerations to ensure long-term health. Propagation offers a rewarding way to expand your collection or share this beautiful species with other gardening enthusiasts. Whether you are starting from a young nursery plant or attempting to grow from scratch, attention to detail is key.
Site selection and soil preparation
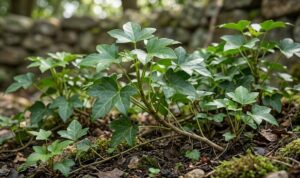
The first step in planting is finding a spot that provides the dappled shade this species naturally enjoys. While it can tolerate some morning sun, the intense heat of the afternoon can stress the young foliage. You should look for a location that remains relatively cool and protected from strong, drying winds. This initial choice will dictate how much maintenance the plant requires as it matures over the years.
Soil quality is the foundation of a healthy plant, so you must prepare the ground thoroughly before planting. The soil should be well-drained but capable of retaining a consistent level of moisture during the summer. You can improve heavy clay or sandy soils by incorporating plenty of well-rotted organic matter or leaf mold. This creates a rich, loamy environment that mimics the forest floor where these plants thrive.
Testing the soil acidity is also a wise move, as this shrub prefers a neutral to slightly acidic environment. If your soil is very alkaline, you might need to add some sulfur or use ericaceous compost to balance it. Preparing a wide area rather than just a small hole allows the roots to spread out easily. This encourages a more stable and resilient plant that can withstand periods of environmental stress.
Clearing the planting area of any perennial weeds is essential to prevent competition for nutrients and water. You should dig over the site several weeks in advance to allow the soil to settle and any dormant seeds to germinate. Removing large stones and breaking up clumps will create a fine texture for the new roots to penetrate. This preparation time is an investment in the future vitality and growth rate of your shrub.
More articles on this topic
The planting process
The best time to plant is during the autumn or early spring when the soil is moist and the temperatures are mild. You should dig a hole that is twice as wide as the root ball but no deeper than the original container. This allows the roots to expand horizontally into the loosened soil without the risk of the plant sinking too deep. Proper depth is critical for preventing rot at the base of the main stem.
Before placing the plant in the hole, gently tease out any roots that have become circled in the pot. This encourages them to grow outward into the surrounding soil rather than continuing to grow in a tight loop. Place the shrub in the center of the hole and check that it is standing straight from all angles. This attention to detail ensures a balanced and attractive appearance as the plant grows larger.
Fill the hole with a mixture of the original soil and some high-quality compost to provide an initial boost. Firm the soil down gently with your hands or feet to remove any large air pockets around the roots. You must be careful not to pack the soil too tightly, as this can restrict water movement and oxygen. A gentle firming is all that is needed to stabilize the plant and ensure good root contact.
Water the new planting thoroughly immediately after you have finished filling the hole and firming the ground. This helps the soil settle and ensures that the roots have immediate access to the moisture they need to recover. Adding a layer of mulch around the base will help keep the moisture in the ground and suppress any new weeds. Your new shrub is now ready to begin its journey in its permanent home.
More articles on this topic
Propagation from seeds
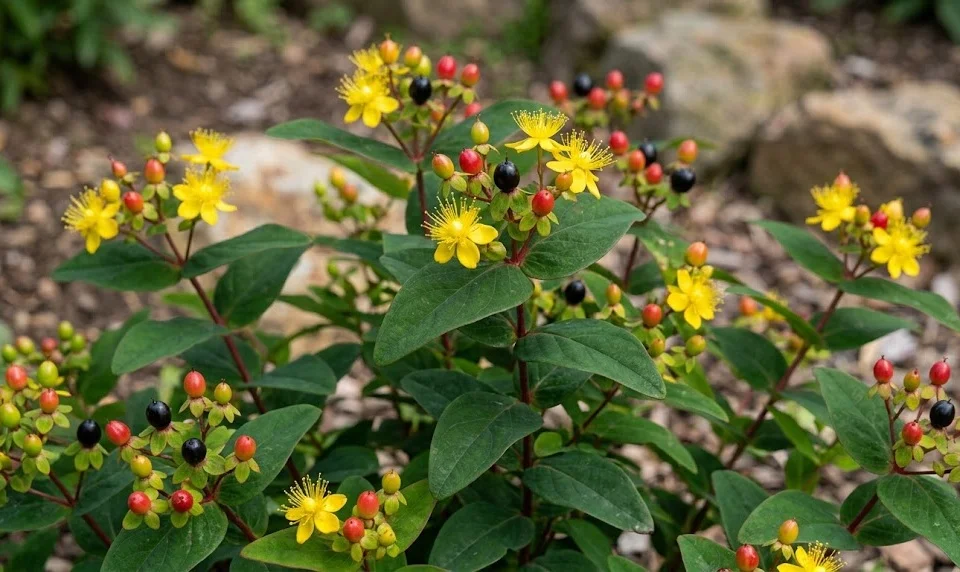
Growing from seed is a patient but fulfilling way to create many new plants for a large-scale garden project. You should collect the berries in late autumn when they have turned completely black and are slightly soft. The seeds inside must be cleaned of all fruit pulp before they are dried or prepared for sowing. This cleaning process prevents fungal issues that could kill the young seedlings during the germination phase.
The seeds usually require a period of cold stratification to break their natural dormancy before they will sprout. You can achieve this by placing them in a container of damp sand in the refrigerator for several weeks. Alternatively, sowing them in a cold frame over the winter allows nature to take care of the chilling process. This mimicry of winter conditions signals to the seeds that it is time to grow when spring arrives.
Sow the seeds in a tray filled with a fine seed-starting mix and cover them with a very thin layer of grit. They need a bright spot but should be kept out of direct sunlight to prevent the soil from drying out too quickly. You must keep the compost consistently moist but never soaking wet during the entire germination period. Patience is required, as some seeds can take several months to show any signs of life.
Once the seedlings have developed their first set of true leaves, they can be moved into individual small pots. You should handle them carefully by the leaves rather than the stems to avoid causing any physical damage. Grow them on in a sheltered spot for their first year before considering moving them into the garden. This extra care ensures that the young plants are strong enough to survive on their own.
Cuttings and division techniques
Taking semi-hardwood cuttings in late summer is one of the most reliable ways to propagate this specific shrub. You should select healthy, non-flowering shoots that have started to become slightly firm at the base. Cuttings should be about ten centimeters long and stripped of their lower leaves before being placed in a pot. Using a rooting hormone can increase the success rate, although it is not strictly necessary for this species.
Place the cuttings in a mixture of peat-free compost and perlite to ensure excellent drainage and aeration. You should keep the pots in a humid environment, such as a covered propagator or a simple plastic bag. The cuttings need to be kept in a bright, warm spot but away from the direct rays of the sun. In a few weeks, you should notice new growth, which indicates that roots have successfully formed.
Division is another option for older, established plants that have developed multiple stems from the base. You can carefully lift the entire plant in early spring and use a sharp spade to divide the root mass. Each section must have a good amount of healthy roots and at least one or two strong stems. This method gives you large, independent plants almost immediately without the long wait of seeds or cuttings.
Replant the divided sections immediately into their new positions and water them in very well to reduce transplant shock. You might need to trim back some of the top growth to balance the loss of some of the root system. Division also helps rejuvenate old shrubs by giving them more space and fresh soil to grow into. This technique is a great way to maintain the health of your garden while increasing your plant count.