Ensuring that your perennials survive the harsh conditions of winter is a critical part of the yearly gardening cycle. While these plants are generally cold-hardy, they can still be damaged by extreme temperature fluctuations or excessively wet soil during the dormant months. Your preparation in the late autumn will provide a protective shield that helps the roots stay healthy until spring. A successful overwintering strategy will result in a much faster and more vigorous start when the weather finally warms up.
The primary goal of overwintering is to protect the crown and the root system from the physical damage caused by the freeze-thaw cycle. You should focus on stabilizing the ground temperature so that the soil does not expand and contract too violently. This movement can actually heave the plants out of the ground, exposing the delicate roots to the freezing air and drying winds. Your efforts to insulate the soil will prevent this common winter problem from occurring.
Water management remains important even as the plants enter their dormant phase and stop their active growth. You should ensure that the area has excellent drainage so that melting snow and ice do not sit in stagnant pools around the base of the plant. Wet feet in winter are one of the most common causes of death for these flowers, as the water can freeze and crush the root tissue. Your site preparation during the planting phase will pay off during these challenging months.
Final cleanup of the garden beds is the last major task you must complete before the first significant snow arrives. You should remove all dead and decaying plant material that could harbor pests or fungal spores throughout the winter season. Leaving the area clean reduces the risk of early spring infections and makes the garden look much neater during the dormant months. Your discipline in the fall will save you a lot of work when the busy spring season begins.
Preparing for the first frost
The arrival of the first frost is a clear signal that it is time to begin your final preparations for the winter season. You should watch the weather forecast closely and complete your cleanup tasks before the ground officially freezes solid. Any tender new growth that appeared late in the season will be killed by the cold, so you should not encourage growth with late-season fertilizing. Your timing is essential for helping the plant naturally shut down and store its energy.
More articles on this topic
Cutting back the stems to about two or three inches above the ground is the standard practice for most varieties of these perennials. You should use sharp, clean pruners to make the cuts and remove all the old flowering stalks and large leaves. This reduces the surface area where snow and ice can accumulate, which prevents the crown from being crushed under the weight. Your plants will look like neat little mounds that are ready to be tucked in for their winter sleep.
Providing one final, deep watering before the ground freezes is a technique that many successful gardeners use to help their plants. Moist soil holds heat much better than dry soil, providing a more stable environment for the roots during the early cold snaps. It also ensures that the plant is well-hydrated before it enters a period where it cannot easily take up water from the frozen earth. Your final hydration session will give the roots a much better chance of surviving the long winter ahead.
Marking the location of your plants with small stakes or labels is a practical step that will help you in the early spring. It is very easy to forget exactly where each clump is located when there are no green shoots visible above the brown soil. This prevents you from accidentally digging them up or stepping on the crowns when you are doing your early spring cleanup. Your organization will ensure that your garden layout remains intact year after year.
Mulching for root protection
A thick layer of organic mulch is the best insulation you can provide for your plants during the coldest months of the year. You should wait until the ground has actually frozen before applying the mulch to prevent mice and other rodents from nesting inside. A layer of four to six inches of straw, pine needles, or shredded bark is usually sufficient for most temperate climates. Your mulch will act like a warm blanket that protects the roots from the most extreme temperature drops.
More articles on this topic
The choice of mulching material can affect the moisture levels and the acidity of the soil as it breaks down over time. You should avoid using heavy, wet leaves that can mat down and suffocate the crown of the plant during the winter. Pine needles are an excellent choice because they stay loose and allow air to circulate even when they are covered in snow. Your attention to the quality of the mulch will ensure that it provides protection without causing secondary problems.
In areas where winters are particularly long and cold, you might need to add even more protection to your most prized plants. You can use evergreen boughs or even an extra layer of loose soil to provide a more substantial thermal barrier for the roots. This is especially important for young plants that have not yet developed a massive and deep root system to sustain them. Your extra effort in these extreme cases will guarantee the survival of your newest garden additions.
When the snow begins to melt in late winter, you should check the mulch layer to ensure it is still in place and doing its job. Strong winds or hungry animals can sometimes disturb the protective layer and expose the soil to the cold air once again. Simply smoothing out the mulch and adding a little more if necessary will maintain the integrity of your winter protection strategy. Your vigilance during the final weeks of winter will ensure a smooth transition into the spring growing season.
Winter drainage considerations
The physical structure of your garden bed is tested the most during the winter when water cycles through freezing and melting phases. You must ensure that the soil is not so compacted that it prevents the winter moisture from draining away from the plant’s crown. If you notice large puddles forming after a mid-winter thaw, you may need to dig small trenches to lead the water away. Your active management of the water flow will prevent the roots from rotting in the cold, anaerobic mud.
Raised beds are an excellent way to solve many of the drainage issues associated with overwintering these perennials. By lifting the plants above the surrounding grade, you ensure that gravity will pull excess moisture away from the sensitive root zones. This naturally creates a drier and healthier environment that is much more conducive to winter survival for many different species. Your investment in garden infrastructure will reduce the risk of losing plants during a particularly wet winter.
Using a layer of gravel or coarse sand around the crown of the plant can also help improve the drainage right where it matters most. You should incorporate these materials into the top few inches of soil during the planting phase to provide a more porous environment. This prevents water from sitting against the stems and causing the dreaded crown rot that can kill even the heartiest clumps. Your foresight in soil preparation is the best defense against the challenges of a damp and cold climate.
Observing how the snow accumulates and melts in your yard will give you valuable information about the microclimates in your garden. You should notice which areas stay wet longer and which ones dry out quickly in the early spring sun. This data will help you decide where to place your most sensitive plants and where you might need to improve the drainage in the future. Your understanding of the unique physical characteristics of your land is a key part of your success as a gardener.
Early spring recovery steps
The process of waking your garden up in the spring is just as important as the steps you took to put it to sleep in the fall. You should wait until you see the first signs of new green growth before you begin to remove the protective mulch layer. Removing it too early can expose the tender young shoots to a late-season frost that could set the plant back for weeks. Your patience during the early spring will ensure that the plants transition safely into their active growing phase.
Once you have removed the mulch, you should gently loosen the soil around the base of the plant to improve aeration and warmth. You must be very careful not to damage the emerging shoots or the shallow roots that are just starting to grow again. This is also a great time to apply a light layer of fresh compost to provide a boost of nutrients for the coming season. Your gentle touch in the spring will encourage the plants to grow quickly and strongly from the very beginning.
Any dead stems or foliage that survived the winter should be trimmed back to make room for the new growth that is pushing up. You should look for any signs of disease or pests that might have overwintered in the mulch and treat them immediately if necessary. Cleaning up the area around the plants will also help prevent the spread of fungal spores as the humidity begins to rise. Your early spring hygiene will set the stage for a healthy and beautiful floral display all summer long.
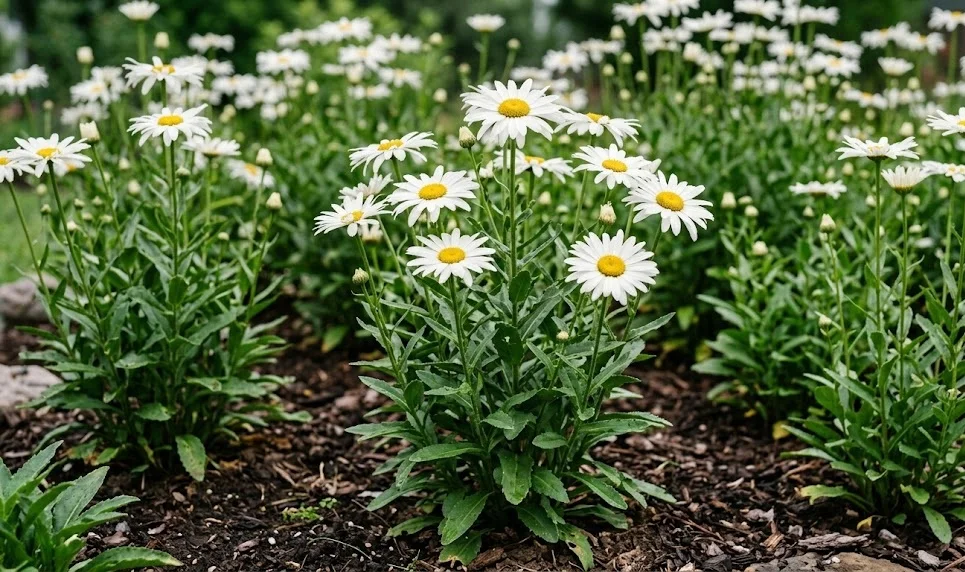
Finally, you should begin to monitor the moisture levels in the soil as the sun gets stronger and the plants start to use more water. The transition from winter dormancy to spring growth requires a lot of energy and a steady supply of hydration and nutrients. You should avoid overwatering while the soil is still cool, but don’t let the new shoots wilt in a sudden spring heatwave. Your careful management of this critical growth phase will ensure that your shasta daisies thrive and bloom for another wonderful year.