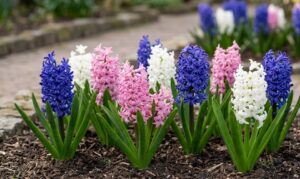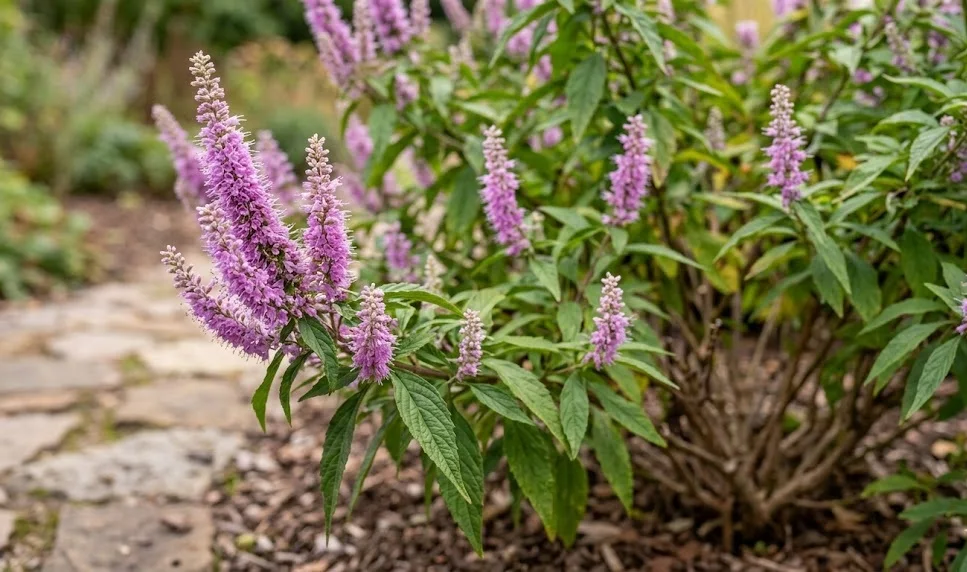
Selecting the right spot for your new mint shrub is the most critical decision you will make in the planting process. This deciduous plant requires a specific combination of light, soil texture, and space to reach its full aesthetic and biological potential. You should look for an area that receives at least six to eight hours of direct sunlight each day to ensure strong stems. Without adequate light, the plant will likely become leggy and produce fewer of its signature aromatic flower spikes.
The soil in your chosen location must be capable of draining efficiently to prevent the roots from sitting in stagnant water. While the mint shrub enjoys consistent moisture, it is highly susceptible to root rot in heavy, compacted clay environments. You can test the drainage by digging a small hole and filling it with water to see how quickly it disappears. If the water lingers for more than an hour, you should consider amending the soil or choosing a different site.
Proximity to other plants is also a factor because the mint shrub needs plenty of room for air to circulate through its branches. Proper spacing helps to minimize the risk of powdery mildew and other fungal issues that thrive in damp, still conditions. You should aim to leave about one meter of space between the center of the shrub and its nearest neighbors. This distance allows the plant to develop its natural rounded shape without being hindered by competing root systems.
Think about the visual impact the plant will have once it reaches its mature height of over one meter. It works exceptionally well as a backdrop for shorter perennials or as a focal point in a mixed shrubbery border. You should also consider how the minty fragrance of the leaves will interact with the surrounding environment when you walk past. Placing it near a patio or a frequently used garden path allows you to enjoy its sensory benefits to the fullest.
Planting techniques for success
The best time to plant a late mint shrub is during the early spring or the mid-autumn when the temperatures are mild. Planting during these windows allows the root system to establish itself before the stress of extreme summer heat or winter cold arrives. You should prepare the planting hole so that it is twice as wide as the current root ball but no deeper. This encourages the roots to spread out horizontally into the loosened soil, providing better stability for the plant.
More articles on this topic
Before placing the shrub in the hole, you should gently loosen any circling roots that have formed in the nursery container. This step is vital for preventing the roots from girdling the plant as it grows larger in the future. Once the plant is positioned, fill the space with a mixture of original garden soil and a small amount of high-quality compost. You must ensure that the top of the root ball is level with the surface of the surrounding ground.
Firm the soil down gently with your hands to remove any large air pockets that could cause the roots to dry out. Avoid using your feet to stomp the soil, as this can lead to over-compaction and hinder the movement of water and oxygen. After the soil is in place, create a small basin around the base of the plant to help hold water during the initial irrigation. This directed watering ensures that the moisture reaches the root zone where it is needed most.
Complete the planting process by applying a layer of organic mulch, such as wood chips or leaf mold, around the base. The mulch should be about five to eight centimeters thick, but it should not directly touch the bark of the main stems. This protective layer helps to regulate soil temperature and keeps the new roots cool and moist during the establishment phase. Water the plant thoroughly immediately after mulching to settle the soil and activate the organic matter.
Propagation from softwood cuttings
Taking softwood cuttings is one of the most effective ways to create new clones of your favorite mint shrub specimens. This process is best performed in the late spring or early summer when the new growth is still flexible but firm enough to handle. You should look for healthy stems that do not have any flower buds forming at the tips for the best results. Using sharp, sterilized pruning shears will ensure a clean cut that heals quickly and minimizes the risk of infection.
More articles on this topic
Each cutting should be approximately ten to fifteen centimeters long and include at least two or three sets of leaves. Remove the lower leaves from the bottom half of the stem to expose the nodes where new roots will eventually emerge. You can dip the cut end into a rooting hormone powder to speed up the development process, although it is not strictly necessary. The prepared cuttings should be inserted into a moist, sterile potting medium that provides excellent aeration and drainage.
To maintain the high humidity required for rooting, you should cover the cuttings with a clear plastic dome or a plastic bag. Place the containers in a bright location but out of direct sunlight to prevent the cuttings from overheating and wilting. You must check the moisture levels daily and mist the leaves if the environment appears too dry for the young plants. Most cuttings will begin to develop a functional root system within four to six weeks under these controlled conditions.
Once you feel resistance when gently tugging on a cutting, it is a sign that the roots have successfully formed. You should then begin to gradually acclimate the young plants to the lower humidity and higher light levels of the outside world. This hardening-off process takes about a week and prepares the new shrubs for transplanting into larger pots or their permanent garden spots. Propagating your own plants is a rewarding way to expand your collection and share this beautiful species with others.
Growing from seeds and division
While cuttings are more common, you can also grow the late mint shrub from seeds collected after the autumn blooming period. The seeds require a period of cold stratification to break their natural dormancy and prepare for germination in the spring. You can achieve this by sowing them in a cold frame or by placing them in a refrigerator for several weeks. Once the temperatures begin to rise, the seeds will sprout and produce tiny seedlings that require careful handling and consistent moisture.
Growing from seed is a slower process, but it allows for potential genetic variation and a larger number of plants for a lower cost. You should transplant the seedlings into individual pots once they have developed their first set of true leaves and appear sturdy. Keep the young plants in a sheltered nursery area for their first year to protect them from extreme weather conditions. By the second year, they will usually be strong enough to be moved to their final locations in the garden.
Division is another propagation method that can be used on older, well-established mint shrubs that have become too large for their space. This technique is best done in the early spring just as the new growth is beginning to emerge from the base. You should carefully dig up the entire root ball and use a sharp spade or garden fork to split it into two or three sections. Each section must have a healthy portion of roots and at least one or two vigorous stems to survive.
Replant the divided sections immediately into prepared soil and water them heavily to reduce the shock of the transition. Division not only gives you new plants but also rejuvenates the original specimen by removing older, less productive wood. This method is particularly useful for maintaining the health of a garden that has been established for many years. With these various propagation techniques, you can ensure that the late mint shrub remains a permanent fixture in your landscape.