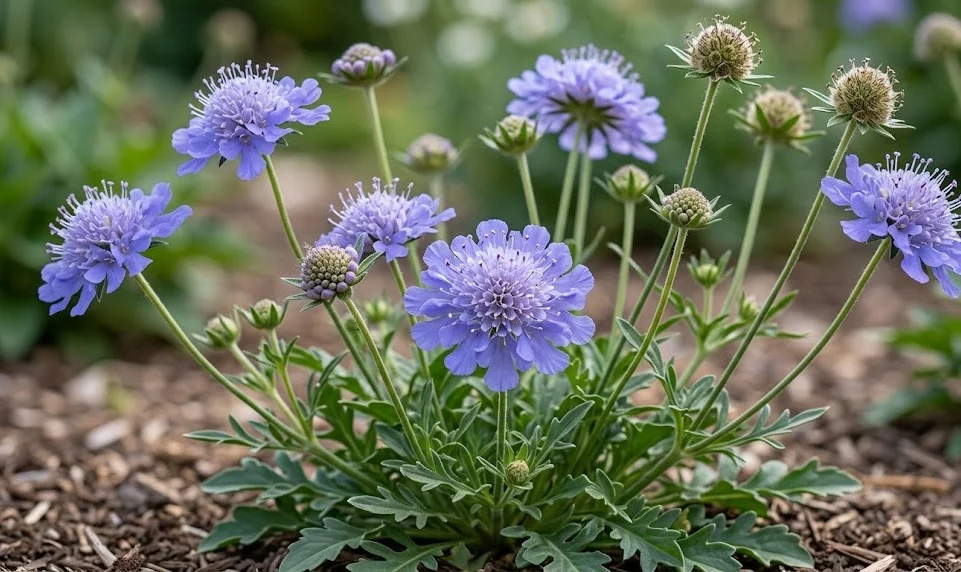
Choosing the right location is the most important decision you will make when planting the Caucasian pincushion flower in your landscape. This perennial requires a spot that receives at least six to eight hours of direct sunlight every day to produce its iconic blooms. You should also consider the wind patterns in your garden, as very exposed sites might damage the tall flower stalks. A location with slightly sheltered conditions but plenty of light will yield the healthiest and most vibrant plants.
The quality of the soil at your chosen site will directly influence how well the plant establishes its root system. You need to ensure that the ground is well-draining and free from any compaction that might trap excess water. If you are dealing with heavy soil, digging in some coarse sand or fine gravel can significantly improve the drainage capacity. The goal is to create a medium that holds just enough moisture to sustain the plant without ever becoming soggy.
Before you begin the planting process, it is wise to clear the area of any perennial weeds that might compete for resources. Turning the soil over to a depth of about twelve inches will help loosen it up and allow for easier root penetration. You can also incorporate a small amount of balanced, slow-release fertilizer into the planting hole to provide initial nourishment. A clean and well-prepared bed sets the stage for a long-lived and productive perennial plant.
Spacing is another critical factor that you must address during the initial planting phase of your project. You should place individual plants about fifteen inches apart to ensure they have enough room to reach their full mature size. This distance also facilitates proper air movement, which is essential for preventing the fungal diseases that often plague crowded gardens. Planning the layout beforehand will save you the trouble of having to move the plants once they have started to grow.
The process of planting out
Once you have prepared the site and acquired your plants, the actual planting process should be done with care. You should dig a hole that is twice as wide as the current root ball but no deeper than the container the plant came in. It is essential to keep the crown of the plant—where the stems meet the roots—at the same level as the soil surface. Planting too deeply can lead to crown rot, while planting too shallowly may cause the roots to dry out too quickly.
More articles on this topic
Carefully remove the plant from its pot and gently loosen any roots that may have started to circle the bottom. You should place the plant in the center of the hole and fill in the gaps with the amended soil you prepared earlier. Press the soil down firmly with your hands to remove any large air pockets that might interfere with root-to-soil contact. Be careful not to pack the soil so tightly that you crush the delicate roots or impede water penetration.
Immediately after planting, you must water the area thoroughly to settle the soil and hydrate the new transplant. This initial watering helps the roots establish themselves in their new home and reduces the shock of the transition. You might need to water more frequently during the first few weeks, especially if the weather is particularly warm or dry. Monitoring the moisture levels closely during this establishment phase is a hallmark of professional garden management.
Adding a thin layer of organic mulch around the base of the plant can help retain moisture and suppress weed growth. You should keep the mulch a few inches away from the stems to prevent moisture from sitting against the crown of the plant. As the mulch breaks down, it will contribute to the overall health of the soil and provide a slow source of nutrients. This final step completes the planting process and gives your Caucasian pincushion flower the best possible start.
Propagation through seed sowing
Propagating the Caucasian pincushion flower from seed is a rewarding way to increase your plant count without spending a lot of money. You can start the seeds indoors in late winter or early spring to give them a head start on the growing season. Use a high-quality seed-starting mix that is light, airy, and free from pathogens to ensure the best germination rates. Sowing the seeds on the surface and pressing them lightly into the soil is usually more effective than burying them deeply.
More articles on this topic
The seeds require a consistent temperature and a bit of light to trigger the germination process successfully. You might want to use a heat mat or place the trays in a warm, bright spot like a windowsill or under grow lights. Keep the soil consistently moist but not soaking wet by using a fine mist sprayer rather than a heavy watering can. You can expect to see the first green shoots appearing within two to three weeks under the right environmental conditions.
Once the seedlings have developed their first set of true leaves, you should thin them out to prevent overcrowding in the trays. When they are large enough to handle, transplant the individual seedlings into larger pots to allow their root systems to expand. It is important to “harden off” the young plants by gradually exposing them to outdoor conditions over a period of seven to ten days. This process prevents transplant shock and prepares the delicate foliage for the intensity of direct sunlight and wind.
Planting the home-grown seedlings into their permanent garden positions should occur after all danger of frost has passed in the spring. You should treat these young plants with the same care as nursery-bought specimens, ensuring proper spacing and initial watering. While plants grown from seed may not flower in their first year, they will develop a robust root system for the future. This patience is often rewarded with exceptionally hardy and well-adapted plants in the subsequent growing seasons.
Propagation by division and cuttings
Division is perhaps the most common and effective method for propagating established Caucasian pincushion flowers in a garden setting. You should perform this task every few years in early spring when the first signs of new growth appear. Carefully dig up the entire clump with a garden fork, being sure to lift as much of the root system as possible. You can then use a sharp knife or a spade to split the clump into smaller sections, each with a healthy portion of roots and shoots.
Replanting the divisions immediately is crucial to prevent the roots from drying out and causing undue stress to the plant. You should prepare the new planting sites in advance so that the transition is as quick and seamless as possible. This method not only provides you with new plants but also rejuvenates the original specimen by removing old, unproductive wood. It is a professional technique that keeps your perennial borders looking fresh and vigorous year after year.
Taking basal cuttings is another viable propagation method, though it requires a bit more technical skill and attention to detail. In early spring, you can remove young, vigorous shoots from the base of the plant before they start to produce flower buds. Dip the cut ends in a rooting hormone and place them in a pot filled with a well-draining potting medium. Covering the pot with a plastic bag can help maintain the high humidity levels needed for the cuttings to develop roots.
Once the cuttings have established a strong root system, which usually takes several weeks, they can be potted on and eventually moved to the garden. This method allows you to create exact clones of your favorite plants, ensuring that specific flower colors or growth habits are preserved. Whether you choose division, seeds, or cuttings, propagation is a vital skill for any serious gardener or agriculturist. Expanding your garden through these methods is both ecologically responsible and personally satisfying.