Establishing a Wintergreen barberry in your landscape begins with a strategic approach to planting and an understanding of its reproductive habits. This evergreen shrub is prized for its versatility, but its initial success is highly dependent on how it is introduced to its new environment. Whether you are creating a long-standing hedge or a solitary ornamental feature, the steps you take during the first few weeks are critical for long-term survival. The following guide details the professional methods for planting and the various ways you can propagate this species to expand your garden collection.
Proper timing is the first consideration for any successful planting project involving woody shrubs like the barberry. The ideal windows are during the early spring before new growth starts or in the late autumn when the plant is entering a period of dormancy. Planting during these cooler seasons allows the root system to establish itself without the intense stress of summer heat or the immediate demand for foliage production. A well-timed start ensures that the plant has the structural foundation necessary to withstand the challenges of its first full year in the ground.
The preparation of the planting site is just as important as the timing, as the barberry requires specific soil conditions to truly flourish. You should dig a hole that is at least twice as wide as the root ball but no deeper than the container the plant came in. This allows the roots to spread easily into the loosened surrounding soil while ensuring the crown of the plant remains at the correct level. Burying the stem too deeply can lead to rot, while planting it too high can cause the roots to dry out prematurely, both of which are common mistakes for beginners.
Once the plant is in the ground, the immediate aftercare focuses on stabilizing the moisture levels and providing a gentle transition. A thorough watering right after planting helps to settle the soil and remove any air pockets that might have formed around the roots. Adding a layer of organic mulch around the base, keeping it a few inches away from the trunk, will help maintain a consistent environment. This initial investment of time and effort pays dividends as the Wintergreen barberry begins to anchor itself and show signs of new, healthy growth in the coming months.
Professional planting techniques
When you are ready to place your Wintergreen barberry into its permanent home, start by assessing the drainage of your chosen spot. You can perform a simple test by digging a small hole, filling it with water, and observing how long it takes to disappear completely. If the water lingers for several hours, you may need to elevate the planting site or add gravel to the bottom of the hole to prevent root rot. This species is quite hardy, but it will never reach its full potential if the roots are constantly submerged in standing water.
More articles on this topic
The use of soil amendments can significantly enhance the early growth stages of your new shrub. Mixing the native soil with a bit of aged compost or leaf mold provides a nutrient-dense medium that encourages rapid root expansion. Avoid using high-nitrogen fertilizers directly in the planting hole, as this can burn the sensitive young roots before they have a chance to settle. Instead, focus on creating a friable, crumbly soil texture that allows for easy penetration and good gas exchange between the roots and the atmosphere.
Spacing is a critical factor, especially if you are planting a row of barberries to form a functional security hedge. For a dense, interlocking barrier, you should space the individual plants roughly three to four feet apart from center to center. This allows each plant enough room to grow while ensuring they eventually grow together to form a seamless wall of green. If you are planting them as individual specimens, give them at least six feet of space to allow their natural arching form to develop without being crowded by other garden elements.
After the shrub is positioned in the hole, backfill it with the modified soil and firm it down gently with your hands to provide stability. It is often helpful to create a small “basin” or rim of soil around the edge of the planting area to hold water and direct it toward the root zone. This ensures that every drop of irrigation or rainfall reaches the part of the plant that needs it most during the establishment phase. Once the planting is complete, a final deep watering is the best way to welcome the Wintergreen barberry to its new home in your garden.
Propagation through stem cuttings
One of the most effective ways to multiply your collection of Wintergreen barberry is through the use of semi-hardwood cuttings. This process is best performed in late summer or early autumn when the current year’s growth has begun to firm up but is still somewhat flexible. You should select healthy, disease-free stems and cut a section approximately six inches long, ideally just below a leaf node. Using a sharp, sterilized knife or shears is essential to ensure a clean cut that heals quickly and resists infection.
More articles on this topic
Preparing the cuttings involves removing the leaves from the bottom half of the stem to expose the nodes where roots will eventually form. It is highly beneficial to dip the base of the cutting into a rooting hormone powder or gel to stimulate faster and more reliable root development. You should then place the cuttings into a pot filled with a well-draining medium, such as a mix of peat moss and perlite or coarse sand. Keeping the medium consistently moist but not dripping wet is the key to preventing the stems from rotting before they can produce roots.
To maintain the high humidity levels required for successful rooting, you can cover the pot with a clear plastic bag or place it in a specialized propagation chamber. Position the cuttings in a bright location but out of direct sunlight, as too much heat can wilt the tender stems before they have established a support system. You should check the cuttings every few days for signs of growth or any mold that might be developing on the soil surface. After several weeks, you can gently tug on the stems; if you feel resistance, it means that roots have begun to form.
Once the roots are well-established, usually after a few months, you can transition the young plants into individual pots with standard potting soil. It is important to let them grow and strengthen in a protected environment for at least one full season before transplanting them into the garden. This “nursery” phase allows the small barberries to develop a robust root system that can handle the more variable conditions of the open landscape. Propagating your own plants is not only cost-effective but also a deeply satisfying way to participate in the life cycle of your garden.
Growing from seeds and stratification
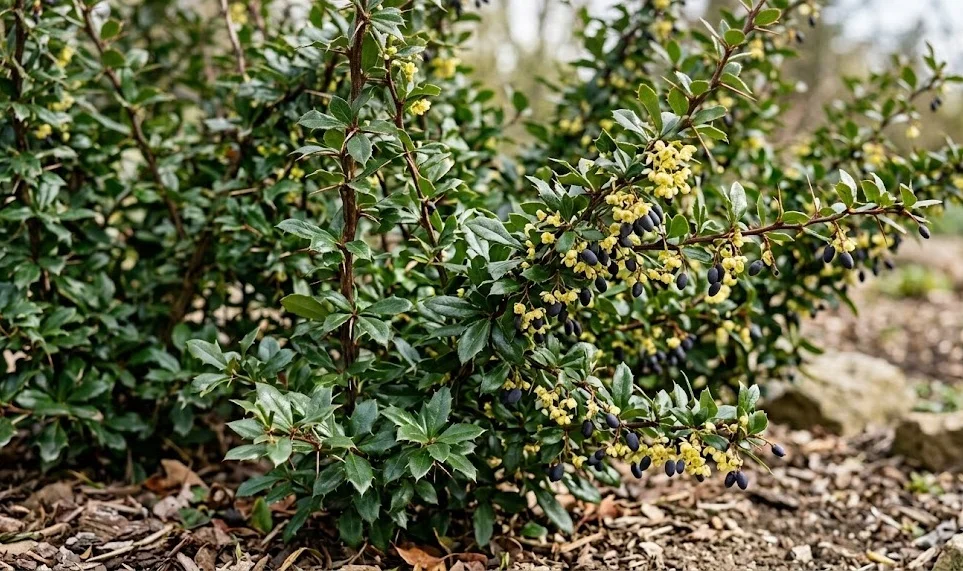
While more time-consuming than cuttings, growing Wintergreen barberry from seeds is a viable method for those who enjoy the challenge of starting from scratch. The seeds are found within the small, dark berries that appear on the plant in late autumn after the flowering season has ended. You must harvest these berries when they are fully ripe and remove the fleshy outer pulp to reveal the hard seeds inside. Cleaning the seeds thoroughly is an important step to prevent mold and to remove any natural growth inhibitors present in the fruit.
Barberry seeds generally require a period of cold stratification to mimic the natural winter cycle and break their dormancy. You can achieve this by placing the cleaned seeds in a bag with moist sand or vermiculite and storing them in the refrigerator for about three months. This process signals to the seed that winter has passed and it is safe to begin the germination process when temperatures eventually rise. Without this cold treatment, the germination rate is often very low, as the seeds are programmed to wait for the right seasonal cues.
In the spring, you can sow the stratified seeds in a seed-starting tray filled with a light, airy compost mix. They should be buried just slightly below the surface and kept in a warm, brightly lit area to encourage the first green shoots to emerge. Germination can be uneven, so do not be discouraged if some seeds take much longer than others to sprout. Patience is a requirement for this method, as it will take several years for a seedling to reach the size of a commercially available nursery plant.
As the seedlings grow, they will need to be thinned out to ensure the strongest individuals have enough space and resources to thrive. You should move them to larger containers as they outgrow their initial trays, providing them with a balanced liquid fertilizer every few weeks. Keeping the young plants protected from extreme weather and hungry pests is crucial during their first year of life. While it is a slow journey, watching a tiny seed transform into a formidable, thorny shrub is one of the great rewards of dedicated horticulture.
Division and transplanting mature shrubs
For older, well-established barberries, division is sometimes an option if the plant has developed multiple crowns or suckers near the base. This is a more physically demanding process that involves digging up a portion of the root system and carefully separating it from the main plant. It is best done in the early spring while the plant is still dormant to minimize the shock to both the parent and the new division. Each new section must have a healthy portion of roots and at least one or two strong stems to ensure it can survive on its own.
Transplanting a mature Wintergreen barberry requires careful planning and a bit of muscle, as the root ball can be quite heavy and the thorns are unforgiving. You should aim to dig up as much of the root system as possible, usually extending the hole to the edge of the foliage canopy. Having the new planting hole prepared in advance is essential so that the roots are exposed to the air for the shortest time possible. Using a tarp to slide the plant to its new location can help prevent the root ball from breaking apart during the move.
Once the transplanted shrub is in its new position, it will require extra attention for the remainder of the growing season. Because many of the fine feeder roots are inevitably lost during the move, the plant’s ability to take up water will be temporarily compromised. Regular deep watering and perhaps a bit of temporary shade during the hottest part of the day can help the shrub recover from the transition. Avoid the temptation to prune the top of the plant too heavily after transplanting, as the leaves are needed to produce the energy required for root repair.
Successful transplanting or division can give a second life to a plant that was poorly positioned or has become too large for its original space. It is a useful skill for anyone looking to renovate an older garden or rearrange their landscape design without purchasing new stock. With proper technique and a bit of aftercare, these resilient shrubs can be moved and settled into new locations with a very high success rate. Always remember to wear protective gear during these operations, as the barberry will not hesitate to defend itself with its sharp spines.