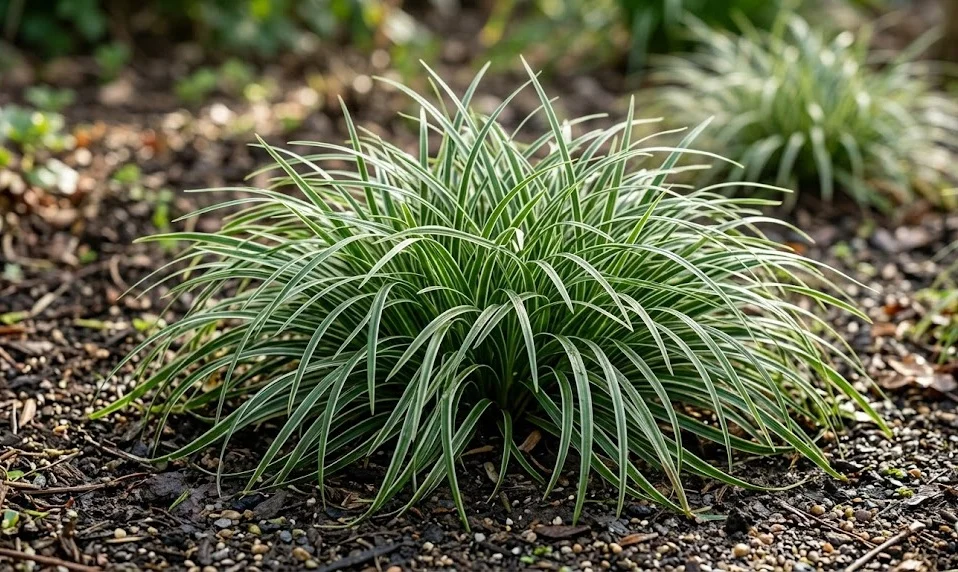
Planting and propagating japanese sedge is a rewarding process that allows you to expand your garden’s greenery with relative ease. This versatile plant is best handled during the cooler months of the year when the environmental stress is at its lowest point. You will find that establishing a new sedge requires attention to detail regarding soil contact and initial hydration levels. By following the correct steps, you can ensure that each new addition to your landscape develops a strong and healthy root system.
The best time to start the planting process is during the early spring or the middle of autumn when the soil is still warm but the air is cool. Planting during these windows allows the sedge to focus its energy on root development rather than trying to survive the summer heat. You should avoid planting during the peak of summer or when the ground is frozen, as these extremes can shock the plant. A well-timed planting gives the sedge a head start, ensuring it is well-established before the next major seasonal shift occurs.
When selecting a specimen for planting, you should look for a healthy plant with vibrant leaves and no signs of pests or disease. Inspect the root ball to ensure it is not overly constricted or “root-bound,” which can hinder its ability to spread in the new soil. If the roots are tightly coiled around the bottom of the pot, you should gently loosen them with your fingers before placing them in the ground. Choosing a high-quality plant from the beginning is the simplest way to ensure success in your propagation and planting efforts.
Site preparation is the foundation of a successful planting, and it involves more than just digging a hole in the ground. You should clear the area of any perennial weeds or grass that might compete with the young sedge for water and nutrients. Amending the planting site with organic matter will create the loose, fertile environment that the plant needs to thrive. Taking the time to prepare the soil properly will pay off in the form of faster growth and a more resilient plant in the years to come.
Professional techniques for planting sedge
To begin the actual planting, you should dig a hole that is twice as wide as the current root ball but no deeper than the pot it came in. Placing the plant too deep can lead to crown rot, as the base of the stems should remain at the same level as the soil surface. You can use the removed soil to create a small mound at the bottom of the hole to support the root system. This ensures that the roots have plenty of loose soil to grow into while keeping the plant’s crown at the correct elevation.
More articles on this topic
Once the plant is positioned in the hole, you should backfill the space with a mixture of native soil and high-quality compost. Gently firm the soil around the base of the plant with your hands to remove any large air pockets that could dry out the roots. You must be careful not to pack the soil too tightly, as this can impede water penetration and restrict the growth of new roots. A balance between stability and aeration is the goal during this stage of the planting process.
After the soil is in place, the immediate next step is to provide a thorough watering to settle the earth and hydrate the plant. You should apply water slowly at the base of the plant until the entire root zone is deeply saturated and the moisture reaches the bottom of the hole. This initial watering is critical for establishing a good connection between the roots and the surrounding soil particles. It also helps to collapse any remaining small air pockets that you might have missed during the backfilling process.
Finalizing the planting involves applying a layer of organic mulch around the base of the sedge, keeping it a few centimeters away from the stems. Mulch helps to conserve moisture, regulate soil temperature, and prevent weed seeds from germinating in the disturbed soil. You can use shredded bark, wood chips, or pine needles, depending on the aesthetic of your garden and the local availability of materials. This protective layer acts as an insulation blanket, giving the new plant the best possible conditions for its initial growth phase.
Division as a method of propagation
Dividing an established clump is the most effective and common way to propagate japanese sedge for use in other parts of your garden. You should choose a mature plant that has become quite large and appears healthy and vigorous throughout its entire structure. The ideal time for division is every three to four years, which also helps to rejuvenate the parent plant and prevent the center from dying out. This process essentially gives you multiple new plants for free while maintaining the health of your original specimen.
More articles on this topic
To start the division, you must carefully dig up the entire clump, making sure to keep as much of the root system intact as possible. You can use a sharp spade or a garden fork to lift the plant out of the ground, working in a circle around the perimeter of the foliage. Once the plant is out of the ground, shake off any excess soil so you can see the structure of the roots and the crown. This visibility is important for determining the best places to make your cuts and ensure each new piece has adequate resources.
Using a clean, sharp knife or a specialized root saw, you can slice the clump into smaller sections, ensuring each piece has several healthy leaves and a good portion of roots. You should aim for divisions that are roughly the size of a standard nursery pot to give them enough mass to recover quickly. If the center of the original plant is woody or dead, you should discard that portion and only use the younger, more vibrant outer sections. Working quickly during this phase prevents the exposed roots from drying out in the air.
The new divisions should be replanted immediately into their new locations or into temporary pots filled with a high-quality potting mix. You must treat these divisions as if they were brand new plants, providing them with plenty of water and a sheltered location while they recover from the stress of being moved. It is normal for the leaves to look a bit wilted for a few days, but they should bounce back once the roots start to take hold in the new soil. Consistent care during the first few weeks is the key to successfully propagating sedge through division.
Establishing young plants for long-term success
The first growing season is the most critical time for any newly planted or divided japanese sedge in your garden. You should monitor the soil moisture levels frequently, as the young root systems are not yet deep enough to access water from lower soil layers. In the absence of rain, a twice-weekly deep watering is usually sufficient to keep the plants healthy and growing. You should observe the foliage for any signs of stress, such as yellowing or drooping, which might indicate a need for more frequent hydration.
Avoid the temptation to apply heavy fertilizers to newly planted sedges, as this can lead to an overabundance of soft growth that is susceptible to pests. The nutrients already present in the soil and the compost you added during planting are usually more than enough for the first year. You want the plant to focus on building a strong root foundation rather than producing a massive amount of foliage too quickly. A slow and steady approach to growth will result in a much more resilient and long-lived plant in the future.
Weed management around your new plants is essential because young sedges can easily be overwhelmed by more aggressive garden invaders. You should manually remove any weeds that appear through the mulch to prevent them from stealing water and nutrients from the sedge. Be careful not to disturb the soil too deeply when weeding, as the shallow roots of the sedge are easily damaged by garden tools. Keeping the area clean allows the sedge to expand its footprint without competition, leading to a faster transition into a full, mature mound.
As the plant reaches the end of its first year, you can begin to treat it like a regular part of the garden landscape. It should now have a sufficient root system to handle brief periods of dry weather and typical seasonal changes. You will see the first significant expansion of the clump in its second spring, which is a sign that the planting or propagation was a total success. From this point on, the sedge will continue to provide beauty and structure to your garden with only minimal annual maintenance.