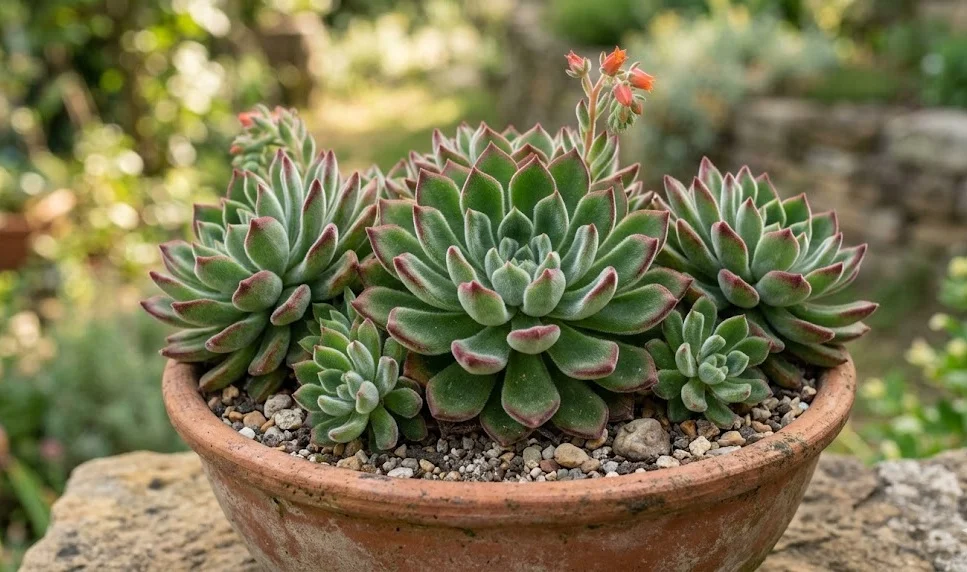
Planting this velvet-textured succulent is a process that begins with selecting the most appropriate substrate for its unique root system. You must understand that these plants are adapted to arid environments where water disappears quickly after a rare rainfall. Therefore, using a standard potting soil designed for tropical plants will likely lead to failure and root rot. You should aim for a mix that is at least fifty percent inorganic material like perlite or pumice.
When you are ready to place the plant into its new home, you should handle the root ball with extreme gentleness to avoid breaking the fine feeder roots. You can start by filling the bottom of the pot with a small amount of your prepared soil mix. Place the plant in the center and slowly add more soil around the edges until the base is stable. Make sure you do not bury the stem too deeply, as this can lead to moisture-related issues near the lower leaves.
After the initial planting is complete, you should resist the urge to water the succulent immediately as you might with other types of plants. You should allow the plant to sit in the dry soil for a few days to give any minor root damages time to callus over. This waiting period is a critical professional step that prevents bacteria from entering the plant through open wounds. Once a few days have passed, you can provide a light watering to help settle the soil around the roots.
The ideal time for planting or repotting is during the early spring when the plant is just starting its active growth phase. You will find that the plant recovers much faster and establishes itself more quickly when the temperatures are moderate. Avoid planting during the peak of winter or the height of a summer heatwave, as these extremes can cause unnecessary stress. By timing your planting correctly, you set the stage for a successful and vibrant growing season.
Mastery of leaf propagation techniques
Propagating the plush plant from a single leaf is one of the most rewarding experiences for a succulent enthusiast. You should begin by selecting a healthy, firm leaf from the middle of the rosette, ensuring it is not damaged. To remove the leaf, you must grasp it firmly and give it a gentle twist until it snaps cleanly away from the stem. It is essential that the entire base of the leaf remains intact, as this is where the new growth will emerge.
More articles on this topic
Once you have harvested your leaves, you must place them on a dry surface in a spot with indirect light for several days. You will notice a small callus forming over the wound, which acts as a protective barrier against rot and infection. This drying phase is non-negotiable if you want to achieve a high success rate with your propagation efforts. Do not be tempted to place the leaves on damp soil until the callus is fully developed and dry to the touch.
After the callus has formed, you can lay the leaves on top of a shallow tray filled with a fine-grained succulent soil mix. You should not bury the leaves; simply letting them rest on the surface is enough for the natural process to begin. In a few weeks, you will see tiny pink roots searching for the soil and a miniature rosette forming at the base. This transformation is a testament to the incredible regenerative powers of these resilient desert plants.
As the new plantlets grow, they will slowly draw moisture and nutrients from the original mother leaf until it shrivels up and falls off. You should provide very light misting to the soil around the roots once they have established themselves, but avoid getting the leaves wet. Once the new rosettes are large enough to handle, you can carefully transplant them into their own individual small pots. This method allows you to grow a large collection of plants from just a few starting specimens.
Stem cuttings for faster establishment
If you prefer a quicker way to create a new, mature-looking plant, stem cuttings are a highly effective alternative. You should identify a healthy branch or the main head of the plant if it has become too tall or leggy. Use a sharp, sterilized knife or garden shears to make a clean cut across the stem. This technique is often used to rejuvenate older plants that have lost their compact shape over the years.
More articles on this topic
Just like with leaf propagation, the freshly cut stem must be allowed to dry and form a thick callus before it touches any soil. You should keep the cutting in a shaded area with good air circulation to prevent any mold from developing on the wound. Depending on the thickness of the stem, this drying process can take anywhere from three days to a full week. Patience during this stage is the hallmark of a professional gardener who understands the biology of succulents.
Once the stem is callused, you can insert it into a pot filled with a dry, well-draining succulent soil mixture. You should ensure the cutting is upright and stable, using small stakes or stones for support if necessary to prevent it from moving. Avoid watering the new cutting for at least a week to encourage the plant to send out roots in search of moisture. This dry start triggers the plant’s survival instincts and leads to a more robust root system in the long run.
Monitoring the cutting for signs of success involves looking for new growth at the center of the rosette or a firm resistance when you gently tug on the plant. You will see that the plant begins to look more vibrant once the roots have taken hold and can start absorbing nutrients. This method is particularly useful for creating “instant” plants for gifts or to quickly fill gaps in your garden. With the right care, a stem cutting can become a full-sized specimen in just a single growing season.
Advanced propagation through seed sowing
Growing this plush succulent from seeds is a slower and more technical process that requires a controlled environment and consistent attention. You should start by purchasing high-quality seeds from a reputable source to ensure a good germination rate and healthy offspring. Prepare a seed tray with a very fine, sterilized cactus mix that has been pre-moistened with distilled water. Sowing the seeds involves scattering them thinly across the surface and pressing them gently into the soil without covering them.
To maintain the high humidity required for germination, you should cover the tray with a clear plastic lid or a piece of glass. Place the tray in a warm location with bright, indirect light, but avoid direct sunlight which can overheat the delicate seedlings. You will need to ventilate the tray daily to prevent the growth of algae or fungus on the soil surface. This balance of moisture and fresh air is the most challenging part of growing succulents from seed.
Germination can take anywhere from a few days to several weeks, depending on the temperature and the freshness of the seeds. You will see tiny green dots appearing on the soil, which will eventually grow into recognizable succulent forms over several months. Once the seedlings have developed a few sets of leaves, you can begin to gradually reduce the humidity by leaving the cover off for longer periods. This hardening-off process prepares the young plants for the drier conditions of a typical home environment.
Transplanting the young seedlings requires a very steady hand and a great deal of patience to avoid damaging the microscopic root systems. You should wait until the plants are at least half an inch in diameter before moving them to their own small containers. Use a toothpick or a small spoon to lift the seedlings gently from the tray without disturbing the neighbors. While it takes much longer than other methods, growing from seed allows you to experience the full life cycle of the plant.