Starting your journey with these golden blooms begins with a clear understanding of the best practices for planting and expanding your collection. Whether you are starting from purchased nursery plants or attempting to grow them from scratch, the initial steps are crucial for long-term vitality. You will find that these plants are remarkably resilient, yet they respond beautifully to professional handling and proper technique from the very first day. This guide will walk you through the essential methods for establishing a thriving population of these versatile and stunning flowers.
Timing and soil preparation
The most important factor when planning your planting schedule is the local frost date, as these plants have no tolerance for freezing temperatures. You should wait until the soil has warmed up significantly and the nights are consistently above ten degrees Celsius before moving them outdoors. Planting too early can stunt the growth of the young seedlings and make them more vulnerable to soil-borne pathogens. If you are eager to get started, you can begin the process indoors or in a protected greenhouse several weeks before the last frost.
Choosing the right location involves more than just finding a sunny spot; you must also consider the quality and drainage of the ground. These plants prefer a light, well-aerated soil that allows for quick root penetration and easy access to oxygen. You should avoid areas where water tends to puddle after a rainstorm, as constantly wet “feet” will lead to root rot very quickly. Preparing the site by digging in some organic compost will improve both the nutrient profile and the structure of the soil.
If you are planting in containers, always start with a fresh, high-quality potting mix rather than recycled soil from previous years. This ensures that your new plants are not competing with old root systems or facing a buildup of salts and pests. You can enhance the drainage of your pots by adding a layer of small stones or broken pottery pieces at the bottom before filling them with soil. A professional-grade mix will also contain a small amount of starter fertilizer to help the plants establish themselves during the first few weeks.
Spacing is another critical consideration that affects the overall health and appearance of your floral display as the plants mature. Because of their vigorous and trailing nature, you should provide at least twenty to thirty centimeters of space between each plant. Giving them enough room to breathe ensures that sunlight can reach all parts of the foliage and prevents the air from becoming stagnant. Proper spacing also makes it easier to monitor each individual plant for any signs of stress or pests throughout the growing season.
More articles on this topic
Planting techniques for success
When you are ready to move your plants into their permanent homes, handle the root balls with extreme care to avoid unnecessary damage. You should dig a hole that is slightly larger than the current container to allow the roots to spread out naturally without being cramped. Gently loosen any roots that have started to circle the bottom of the nursery pot before placing the plant in the ground. Setting the plant at the same depth it was growing previously is vital for preventing stem rot near the soil line.
After placing the plant in the hole, fill in the surrounding space with soil and press down firmly but gently with your hands to remove any large air pockets. You want to ensure there is good contact between the roots and the soil without compacting the ground so tightly that water cannot penetrate. Watering the area immediately after planting helps settle the soil and provides the hydration needed to recover from the move. You might see a little bit of wilting for the first day or two, but the plants should perk up quickly as they settle in.
Mulching around the base of the plants can provide several benefits, including moisture retention and weed suppression during the early weeks. Use a light layer of organic material like bark chips or cocoa shells, making sure not to pile it directly against the stems of the plants. This protective layer keeps the soil temperature more consistent and reduces the amount of watering you will need to do. As the plants grow and begin to trail, they will eventually create their own living mulch with their dense foliage.
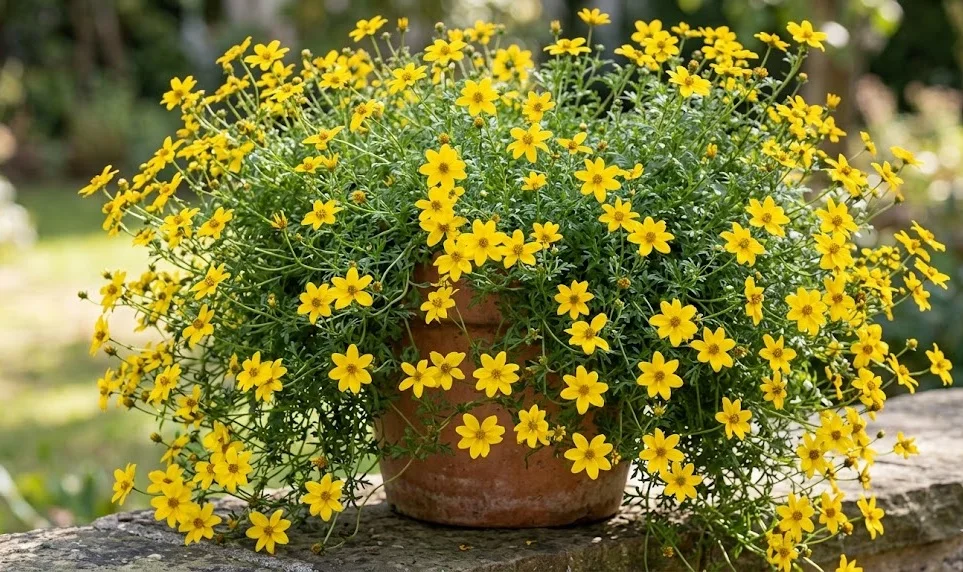
For those planting in hanging baskets, consider using a moisture-retentive liner like coconut coir to help manage water levels during the hot summer months. You can plant multiple specimens in one large basket to create an instant “ball of gold” effect that looks professional from day one. Be sure to use a sturdy hook and chain, as a fully watered and grown-out basket can become surprisingly heavy. Once planted, give the basket a thorough soaking until water runs out of the drainage holes to ensure the entire root zone is hydrated.
More articles on this topic
Propagation from cuttings
One of the most rewarding ways to increase your plant collection is through the use of softwood cuttings taken during the active growing season. You should select healthy, non-flowering stems that are about ten centimeters long for the best chance of success. Using a sharp, sterilized knife or scissors, make a clean cut just below a leaf node where the growth hormones are most concentrated. Removing the lower leaves will prevent them from rotting when the stem is placed in the rooting medium.
To speed up the rooting process, you can dip the base of the cutting into a rooting hormone powder or gel before planting. Insert the prepared stems into a small pot filled with a mix of perlite and peat moss, which provides the perfect balance of moisture and aeration. You should keep the cuttings in a warm, bright location but away from direct, harsh sunlight which could dry them out too quickly. Covering the pot with a clear plastic bag or a dome can help maintain the high humidity levels that young cuttings need.
Check your cuttings regularly for signs of new growth, which usually indicates that roots have begun to form beneath the surface. You can gently tug on a stem after two or three weeks; if you feel resistance, it means the root system is successfully developing. Once the roots are a few centimeters long, you can transplant the new plants into individual pots with regular potting soil. This method is an excellent way to create exact clones of your favorite varieties without spending extra money at the garden center.
Propagating from cuttings also allows you to save your best plants for the next year by starting new ones in the late summer or early autumn. These smaller “back-up” plants are much easier to manage indoors over the winter than large, fully grown specimens. You can keep them on a sunny windowsill and they will be ready to go back outside as soon as the weather warms up in the spring. This continuous cycle of propagation ensures that you always have a fresh supply of healthy plants for your balcony or garden.
Growing from seeds
Growing these plants from seeds is another viable option, although it requires a bit more patience and attention to detail than using cuttings. You should start the seeds indoors about six to eight weeks before the expected last frost date in your area. Sowing the seeds in a high-quality seed starting mix ensures that they have the right texture and lack of pathogens for delicate germination. Press the seeds lightly into the surface of the soil but do not cover them deeply, as they often need some light to trigger growth.
Maintaining a consistent temperature of around twenty degrees Celsius is ideal for getting the seeds to sprout within a week or two. You can use a heat mat underneath the seed trays to provide the bottom heat that many professional growers recommend for faster results. Once the first green shoots appear, move the trays to a very bright location or place them under grow lights to prevent them from becoming leggy. Proper light exposure is the most important factor in developing strong, sturdy seedlings that will thrive later on.
As the seedlings grow their first set of true leaves, you can begin to feed them with a very diluted liquid fertilizer to support their development. You should also start the process of “hardening off” the young plants by gradually exposing them to outdoor conditions over a period of a week or two. Start with just an hour or two in a sheltered spot and slowly increase the time and intensity of the exposure. This transition period is essential for toughening up the cell walls of the plant so they can handle wind and direct sun.
Once the seedlings are strong and the weather is reliably warm, they can be transplanted into their final containers or garden beds following the same steps as nursery plants. Growing from seed gives you access to a wider variety of flower colors and growth habits that might not be available at local stores. It is a deeply satisfying process to see a tiny seed transform into a massive, trailing display of golden flowers. With a little bit of practice, you can become an expert at starting your own garden from scratch every single year.