Successfully guiding your plant through the winter months and into the next growing season is one of the most rewarding challenges for any indoor gardener. While these plants are famous for their winter beauty, they require a specific set of conditions to survive the transition back to their green, vegetative state. You should view the post-holiday period not as the end of the plant’s life, but as the beginning of a new developmental phase. With patience and a clear understanding of the plant’s natural rhythm, you can ensure it remains a healthy part of your collection.
The first step in overwintering begins as the colorful bracts start to fade and the lower leaves may begin to drop. This is the plant’s way of signaling that it is entering a period of rest and requires less active management. You should reduce your watering frequency significantly during this time, allowing the soil to dry out more than you would during the blooming season. It is a natural process, so do not be alarmed if the plant looks a bit sparse compared to its holiday peak.
Temperature control is vital during the late winter and early spring to prevent the plant from becoming stressed. You should move the plant to a slightly cooler location, ideally around 15 to 18 degrees Celsius, once the flowering period is over. This cooler environment helps the plant conserve energy and prevents it from trying to put out weak, spindly growth in low-light conditions. Keep it away from both freezing drafts and the direct heat of home ventilation systems.
During this rest period, you should stop all fertilization to allow the plant to settle into its dormancy. Adding nutrients now would only confuse the plant’s biological clock and could lead to root damage since the plant is not actively growing. You only need to provide enough water to keep the stems from shriveling, which might mean watering only once every two weeks. This quiet phase is the foundation for the vigorous growth that will follow in the late spring.
Managing the spring revival
As the days begin to lengthen and the natural light becomes stronger in March or April, you will see signs of life returning to your plant. This is the time to transition the plant back into an active growing environment with more warmth and light. You should look for small green buds appearing along the stems, which indicate that the plant is ready to start its new season. Once this happens, you can gradually increase the frequency of your watering.
More articles on this topic
Pruning is an essential part of the spring revival process and helps the plant maintain a compact, bushy shape. You should cut back the stems to about ten to fifteen centimeters in height, making sure to leave a few leaves or buds on each branch. While it may feel drastic to remove so much of the plant, it is necessary to prevent it from becoming tall and legy. Always use clean, sharp shears to make precise cuts that will heal quickly and cleanly.
Once the plant has been pruned and the new growth is well-established, it is often the best time to repot into fresh soil. You should choose a container that is only one size larger than the current one to avoid giving the root system too much space. A fresh, high-quality potting mix will provide the aeration and nutrients the plant needs for its summer growth spurt. Gently loosen the outer roots if they have become pot-bound before placing the plant in its new home.
After repotting and pruning, you can begin a regular fertilization schedule again to support the new foliage. Start with a diluted liquid fertilizer every two weeks, gradually increasing the strength as the plant grows larger. Placing the plant in a very bright spot will ensure the new leaves are strong and the stems are sturdy. By mid-spring, your plant should be well on its way to becoming a lush, green shrub once again.
Outdoor care during the summer months
Many growers find that their plants benefit significantly from spending the summer months outdoors in a protected location. You should wait until all danger of frost has passed and the nighttime temperatures are consistently above 15 degrees Celsius. Start by placing the plant in a shaded area for a week to acclimate it to the outdoor air and light. Moving a houseplant directly into full sun will cause the leaves to burn and drop almost immediately.
More articles on this topic
Once acclimated, the plant will thrive in a spot that receives morning sun and afternoon shade. The increased light and natural air movement outdoors will lead to much thicker stems and darker green leaves than can be achieved indoors. You must be diligent about watering, as outdoor plants dry out much faster due to wind and sun. Check the soil daily, especially during hot July and August days, to prevent the plant from wilting.
Fertilizing is especially important during the outdoor phase because the plant is growing at its maximum rate. You should continue to use a balanced fertilizer every two weeks to provide the fuel needed for this expansion. Inspect the plant regularly for common outdoor pests like aphids or caterpillars that might be attracted to the lush growth. If you notice any issues, treat them promptly with organic insecticidal soap before the pests can cause major damage.
As summer comes to a close in late August, you should prepare the plant for its return indoors. This is a good time for a light trim if the plant has become too large or unruly during its time outside. You should also check the drainage holes of the pot to ensure that no soil-dwelling pests have moved in. Bringing the plant back inside before the temperatures drop too low will ensure a smooth transition and prevent cold shock.
Preparing for the next bloom cycle
To get your plant to produce its famous colorful bracts again, you must manage its exposure to light very strictly in the autumn. This process, known as photoperiodism, requires the plant to have at least 14 hours of total, uninterrupted darkness every night. You should begin this light treatment in late September or early October to ensure the plant is in full color by December. Even a small amount of light from a streetlamp or a hallway can disrupt this process and prevent blooming.
During the day, the plant still needs very bright light to provide the energy for the color change. You should place it in a sunny window during the daylight hours and then move it to a completely dark closet or cover it with a box at night. This daily routine must be followed consistently for about eight to ten weeks for the best results. Any inconsistency in the light schedule can lead to uneven coloring or a total failure to produce bracts.
The temperature should also be slightly cooler during the night-darkness phase, ideally around 15 to 18 degrees Celsius. This mimics the natural autumn environment in the plant’s native Mexico and encourages the pigmentation process. You should also reduce the amount of fertilizer you use during this time, switching to a formula lower in nitrogen. These environmental cues tell the plant that winter is coming and it is time to focus on its reproductive phase.
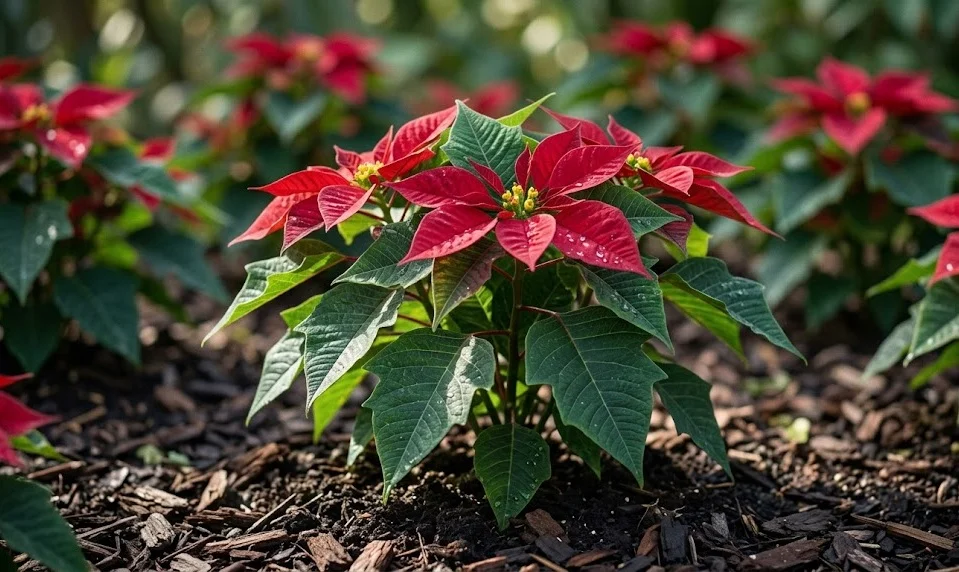
Once you see the small yellow flowers (cyathia) appearing in the center of the colored bracts, the light treatment is complete. You can then move the plant back to its permanent display spot and enjoy the fruits of your labor. The bracts should remain colorful for several months if you continue to provide the standard care discussed in earlier chapters. Successfully re-blooming a plant is the ultimate sign of a skilled and dedicated indoor gardener.