Starting your journey with a new plant begins with the critical process of planting and understanding how to create new life from cuttings. While most people buy these plants in full bloom, the real magic happens when you learn to propagate them yourself in a controlled environment. Successful planting requires a deep understanding of soil structure and the specific needs of the root system during its initial stages. You must approach this task with precision and the right materials to ensure the highest survival rate for your young plants.
The choice of potting medium is the first decision you must make when preparing to plant or repot your specimen. A standard garden soil is far too heavy and may contain pathogens that can harm the sensitive roots of these tropical shrubs. You should look for a mixture that includes peat moss, perlite, and perhaps a bit of pine bark for added structure. This combination ensures that the soil remains airy while still holding enough moisture to support active growth.
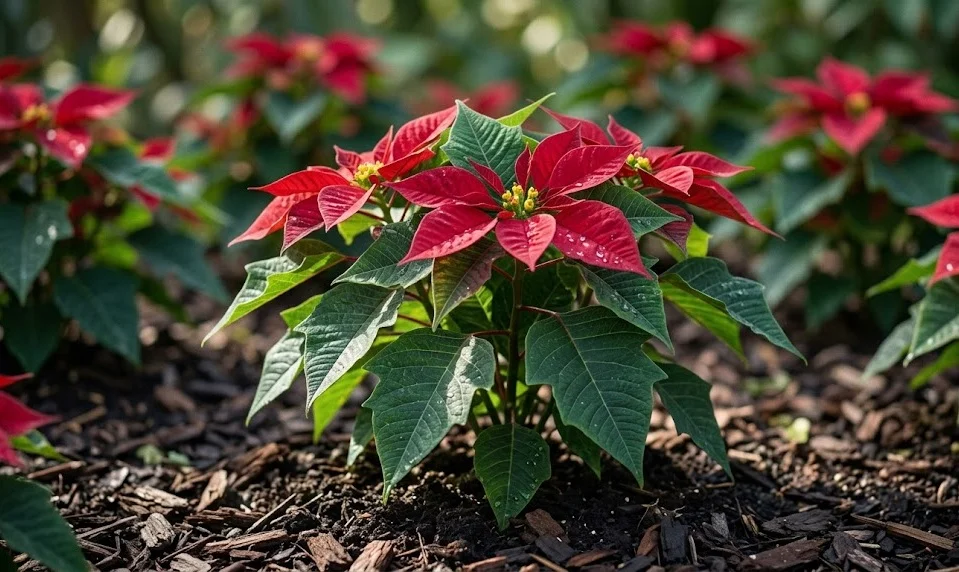
When it comes to the actual planting process, the depth at which you place the stem is of vital importance. Planting too deep can lead to stem rot, while planting too shallow may leave the plant unstable and prone to drying out. You should aim to keep the soil level at the same height it was in the original nursery container. Firm the soil gently around the base of the plant to remove any large air pockets without compacting the medium.
After the initial planting is complete, the environment must be carefully managed to help the plant establish its roots. You should place the newly potted plant in a warm, bright area but keep it out of direct sunlight for the first week. Watering should be done sparingly until you see signs of new growth, which indicates that the roots are starting to function. This period of acclimation is the most sensitive time in the life of a transplanted or newly propagated plant.
Mastering the art of stem cuttings
Propagating these plants is most successfully done through stem cuttings taken during the late spring or early summer. You should select healthy, non-flowering stems that are about ten to fifteen centimeters long for the best results. Using a sharp, sterilized knife is essential to ensure a clean cut that heals quickly and avoids infection. Each cutting should have at least two or three sets of leaves to provide the energy needed for root development.
More articles on this topic
Once you have taken the cutting, you will notice a milky white sap leaking from the wound, which is a natural characteristic of the species. You should immediately dip the cut end into lukewarm water or a bit of charcoal dust to stop the flow of this latex. Allowing the cutting to “callus” for an hour or two before planting can also help prevent rot once it is in the soil. This small step significantly increases the success rate of your propagation efforts.
The use of a rooting hormone can be a great help, although it is not strictly necessary for experienced growers. If you choose to use it, simply dust the bottom of the cutting before inserting it into the propagation medium. You should create a small hole in the soil with a pencil first so that the hormone is not rubbed off during insertion. Firm the medium around the stem to ensure good contact between the plant tissue and the soil.
Temperature and humidity are the final pieces of the puzzle when you are trying to get cuttings to take root. You should ideally maintain a bottom heat of around 21 to 24 degrees Celsius to stimulate root activity. Covering the cuttings with a plastic dome or a clear bag can help maintain the high humidity levels required to keep the leaves from wilting. With proper care, you should start to see new growth and stable roots within three to four weeks.
Choosing the right containers for growth
The container you choose for your young plants will have a lasting impact on their development and health. While decorative pots are attractive, functionality should always come first when you are planting for growth. You should ensure that every pot has multiple drainage holes at the bottom to prevent water from pooling around the roots. Without proper drainage, even the best soil mixture will eventually become waterlogged and toxic to the plant.
More articles on this topic
Size matters when selecting a pot, as a container that is too large can hold too much moisture for a young root system to handle. You should choose a pot that is only slightly larger than the root ball or the cutting’s requirements. This allows the plant to efficiently use the water and nutrients available in the soil without the risk of “sour” soil. As the plant grows, you can gradually move it into larger containers in small increments.
The material of the pot also plays a role in how the soil dries out and how the roots interact with the environment. Plastic pots are excellent for retaining moisture and are very easy to clean and reuse for future propagation. Terracotta pots allow for better air exchange but require more frequent watering because they are porous. You should decide which material fits your personal maintenance style and the environmental conditions of your growing area.
Cleanliness of the containers is a professional standard that you should never ignore when planting or propagating. Old pots can harbor diseases, fungal spores, and pest eggs that can quickly ruin a new planting. You should always wash used pots with a mild bleach solution or specialized horticultural soap before introducing a new plant. Starting with a sterile environment gives your young cuttings and transplants the best possible chance to thrive.
Establishing young plants for long-term success
Once your cuttings have developed a strong root system, the focus shifts to establishing them as independent plants. This involves a gradual transition from the high-humidity environment of the propagation tray to the standard air of your home. You should slowly increase the amount of time the plants spend uncovered over the course of a week. This “hardening off” process prevents the delicate new leaves from drying out too quickly and prevents shock.
Feeding your young plants is important, but you must be careful not to overdo it in the beginning. You should wait until you see significant new leaf development before applying a very diluted liquid fertilizer. A balanced formula will provide the nitrogen, phosphorus, and potassium needed for balanced growth. Early over-fertilization can burn the tender new roots and set the plant back by several weeks.
Light levels should be increased gradually as the plant becomes more established in its new container. While the cuttings needed shade, the young plants will require bright, indirect light to build strength and a compact shape. You should rotate the pots every few days to ensure that all sides of the plant receive equal light exposure. This prevents the plant from becoming “leggy” or leaning toward the light source.
Final establishment is achieved when the plant shows consistent growth and can withstand normal indoor variations. You should continue to monitor the soil moisture closely, as young plants have less of a reserve than older, established specimens. Once the plant has filled its first small pot with roots, it is ready for its final transplant into a decorative container. With this structured approach, you will have a collection of healthy, home-grown plants ready for the next season.