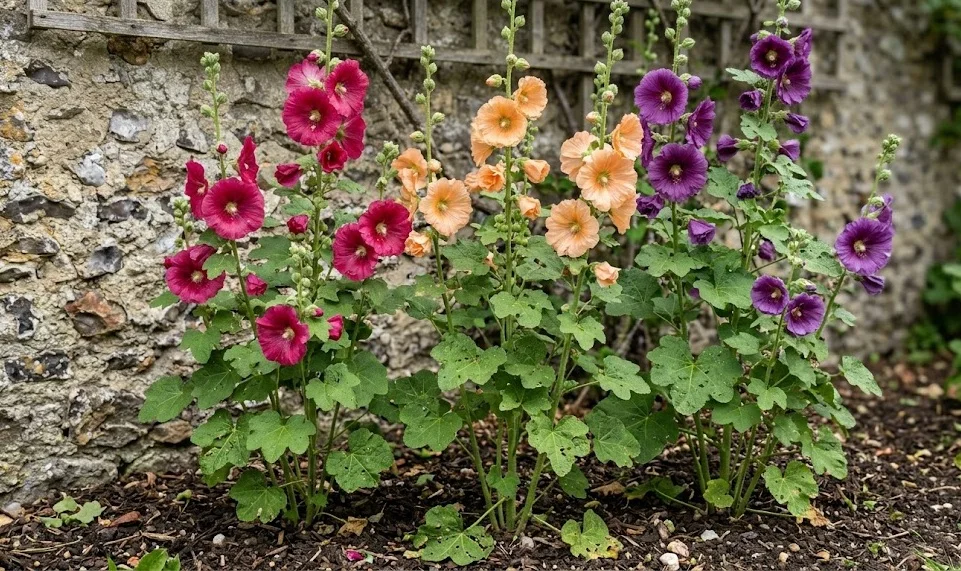
The successful establishment of hollyhocks in a landscape begins with a deep understanding of their unique reproductive habits and growth requirements. These stately plants are traditionally characterized by their biennial nature, meaning they spend their first year growing a lush rosette of leaves before blooming in the second. However, modern horticulture has introduced varieties that can bloom in their first year if planted early enough under specific conditions. Mastering the techniques of both planting and propagation allows a gardener to maintain a continuous, vibrant display of these architectural wonders.
Site selection and soil preparation
Choosing the right location is the most critical decision a gardener makes when planning to plant hollyhocks. These plants require a position that receives full sun for at least six to eight hours a day to produce strong, upright stalks. Without sufficient light, the stems will become “leggy” and weak, leaning toward the light source and eventually collapsing under the weight of the flowers. Furthermore, a site with good air circulation is essential to minimize the risk of fungal diseases, which are the primary nemesis of this species.
Soil quality and structure are equally important when preparing a permanent home for hollyhocks in the garden. They thrive in rich, well-draining soil that has been amended with a generous amount of organic matter, such as compost or aged manure. Because they develop a substantial taproot, the soil should be loosened to a depth of at least twelve to fifteen inches to allow for unimpeded root penetration. Avoid areas where water tends to pool after a rainstorm, as saturated soil will quickly lead to root rot and the eventual death of the plant.
Before putting any seeds or seedlings in the ground, it is wise to consider the long-term structural needs of the plant. Hollyhocks are best suited for the back of a border or against a fence where they can be easily supported as they grow. If you are planting in an open area, be prepared to install heavy-duty stakes at the time of planting to avoid disturbing the roots later in the season. Thinking ahead about the physical space a mature hollyhock will occupy—often up to three feet wide—will prevent overcrowding issues.
The final step in site preparation involves checking the chemical balance of the soil to ensure it meets the plant’s nutritional requirements. Hollyhocks prefer a soil pH that is neutral to slightly alkaline, typically ranging from 6.0 to 7.5. If your soil is naturally acidic, incorporating a small amount of garden lime can help bring the pH into the ideal range for nutrient availability. A well-prepared site acts as a foundation for the plant’s entire life cycle, significantly reducing the amount of corrective maintenance needed during the growing season.
More articles on this topic
Sowing seeds for maximum success
Sowing hollyhock seeds is a straightforward process, but timing and depth are key factors that determine the germination rate. For outdoor sowing, the best time is usually in late spring or early summer, allowing the plant enough time to establish a strong root system before winter. The seeds should be sown shallowly, covered with only about a quarter-inch of fine soil, as they require a bit of light to trigger germination. Keep the soil consistently moist but not waterlogged until the first green shoots appear, which typically takes ten to fourteen days.
Indoor seed starting offers a way to get a head start on the season, especially for varieties that are capable of blooming in their first year. If you choose this route, start the seeds approximately nine to ten weeks before the last expected frost in your area. Use individual biodegradable peat or paper pots to minimize root disturbance, as hollyhocks are notoriously sensitive to being moved. Place the pots in a warm, bright location or under grow lights to ensure the seedlings grow sturdy and compact rather than thin and weak.
Proper spacing during the sowing process is vital to ensure that each plant has enough resources to reach its full potential. When sowing directly in the garden, aim to space the seeds about eighteen to twenty-four inches apart to allow for the massive mature width of the foliage. If you sow more thickly to ensure a full stand, be prepared to thin the seedlings once they reach about four inches in height. Crowded plants will compete for water and nutrients, and the lack of airflow between them will inevitably lead to disease problems.
Hardening off is a crucial transitional phase for seedlings started indoors before they are permanently moved to the garden. This process involves gradually exposing the young plants to outdoor conditions over a period of seven to ten days. Start by placing them in a sheltered, shady spot for a few hours and slowly increase their exposure to direct sunlight and wind. This step toughens the plant’s cell structure and prevents transplant shock, ensuring that the hollyhocks continue to grow vigorously once they are in the ground.
More articles on this topic
Division and vegetative propagation
While seeds are the most common way to propagate hollyhocks, division is an effective method for multiplying specific perennial cultivars. This process is best performed in early spring as soon as the first signs of new growth emerge from the soil. Using a sharp, clean spade, carefully lift the entire root clump from the ground, taking care to preserve as much of the taproot as possible. Gently pull the crown apart into smaller sections, ensuring that each new division has at least one healthy growth bud and a substantial portion of the root system.
Vegetative propagation through basal cuttings is another professional technique used to clone prized hollyhock specimens. In the spring, when the new shoots are about three to four inches long, they can be carefully removed from the base of the parent plant. These cuttings should be taken with a small piece of the “heel,” or the woody part of the crown, attached to the bottom. Dipping the cut end in a rooting hormone can increase the success rate, although hollyhocks generally root quite well on their own in a sterile potting mix.
Once divisions or cuttings have been prepared, they need a dedicated space to establish themselves before being moved to their final garden positions. A nursery bed with dappled shade and consistent moisture is ideal for this recovery period, as it protects the young plants from the stress of full sun. Monitor these new plants closely for signs of wilting or rot, and provide supplemental water if the weather turns dry. After a few weeks of vigorous growth, they can be transplanted to their permanent home with a high degree of confidence.
The primary advantage of these vegetative methods is that they guarantee the offspring will be genetically identical to the parent plant. This is particularly important if you are growing a hybrid variety with a specific color or double-flower form that does not produce seeds that “come true.” By mastering division and cuttings, you can maintain the exact aesthetic characteristics of your favorite hollyhocks indefinitely. Furthermore, regular division can actually rejuvenate older plants, preventing the center of the crown from becoming woody and unproductive over time.
Long-term establishment and self-seeding
The final phase of planting hollyhocks involves managing their long-term presence in the landscape through controlled self-seeding. Once a hollyhock colony is established, it can theoretically sustain itself for decades if the gardener allows some seeds to fall naturally. In late summer, the flower spikes will produce large, circular seed pods that turn brown and papery as they ripen. By leaving a few of these pods on the stalk, you are ensuring that a new generation of seedlings will emerge in the spring to replace the older, spent plants.
Managing these self-sown seedlings requires a discerning eye during the early spring garden cleanup. You will likely find dozens of small, fuzzy green rosettes popping up around the base of the original plants. Decide which ones are in favorable positions and remove the rest to maintain the desired spacing and prevent overcrowding. These “volunteer” plants are often the hardiest in the garden because they have germinated and grown in harmony with the local soil and weather conditions from day one.
If you wish to move these self-sown seedlings to a different part of the garden, timing is absolutely critical. Because of the rapidly developing taproot, hollyhocks should be moved when they are still very small, ideally when they have only two or three true leaves. Dig deep and wide around the seedling to capture the entire root without breaking it, and transplant it immediately into a pre-dug hole. Watering the new transplant thoroughly and providing a few days of shade will help it overcome the trauma of being moved.
A successful hollyhock planting strategy ultimately combines intentional sowing with the plant’s natural reproductive cycle. By understanding how to start seeds, perform divisions, and manage self-seeding, you create a dynamic and resilient population of flowers. This approach ensures that your garden remains filled with these towering beauties year after year, regardless of the lifespan of any individual plant. Horticulture, at its best, is a partnership between the gardener’s intervention and the plant’s innate drive to survive and multiply.