The successful establishment of a cider gum begins with a well-planned planting strategy and a deep understanding of its propagation methods. Whether you are starting with a small sapling from a nursery or attempting to grow your own from seeds, the initial steps are crucial. This tree is known for its rapid growth and elegant appearance, but it requires a careful touch during its early developmental stages to thrive. By following professional guidelines, you can ensure that your planting efforts result in a healthy and long-lived specimen.
Choosing the right time to plant is the first major decision you will face in the process of adding this tree to your collection. Ideally, planting should occur during the spring or early autumn when the temperatures are mild and the soil is naturally moist. This timing allows the root system to become established before the stress of extreme summer heat or winter cold sets in. You should avoid planting during mid-summer unless you are prepared to provide intensive watering and shade protection for the young tree.
The site selection process involves evaluating the sun exposure, soil drainage, and available space for future growth. A sunny location is paramount, as the cider gum is a light-hungry species that will struggle in deep shade. You should also check for any underground obstructions like pipes or cables that could be damaged by the tree’s vigorous roots. Taking the time to properly assess the site now will save you a significant amount of trouble and potential expense in the future.
Before the tree even touches the ground, you must prepare the soil to give it the best possible start in its new home. Digging a hole that is at least twice as wide as the root ball encourages the roots to spread horizontally into the loosened soil. You can mix in some organic compost to improve the soil’s structure and nutrient content, but avoid over-fertilizing at this early stage. The goal is to create a welcoming environment that mimics the tree’s natural habitat as closely as possible.
Planting techniques for success
When you are ready to place the tree in the ground, handle the root ball with extreme care to avoid damaging the delicate fine roots. The tree should be planted at the same depth it was growing in its original container to prevent trunk rot or root exposure. If the tree is planted too deep, the lack of oxygen can suffocate the roots, while planting too shallow can cause them to dry out. Aim for a level where the top of the root ball is just slightly below the surface of the surrounding soil.
More articles on this topic
Once the tree is positioned correctly, backfill the hole with the original soil, tamping it down gently with your hands to remove any large air pockets. You should avoid using your feet to pack the soil, as this can lead to excessive compaction which restricts root growth and water penetration. As you fill the hole, you can add water periodically to help settle the soil naturally around the roots. This method ensures that there is good contact between the roots and the earth, which is vital for moisture uptake.
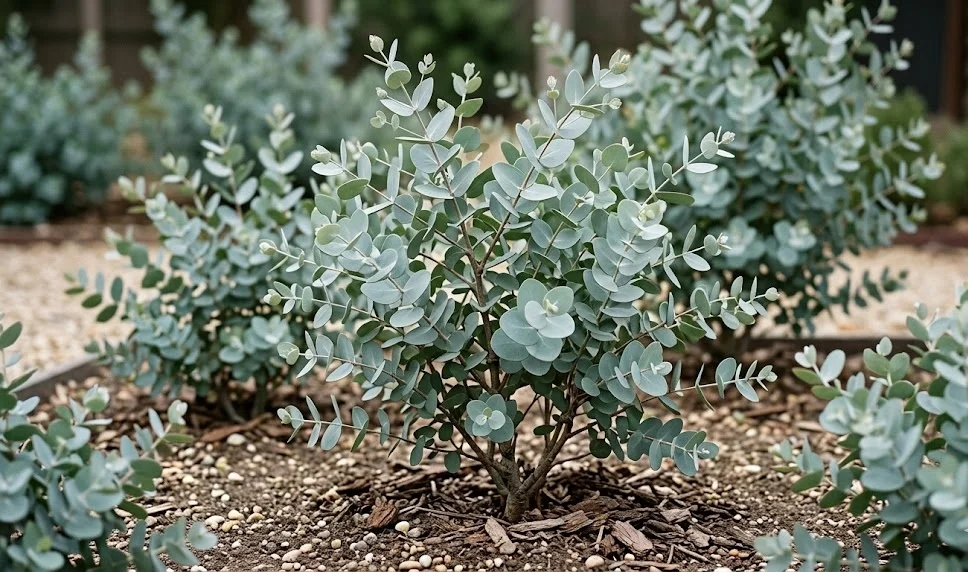
After the hole is filled, creating a small soil berm or basin around the base of the tree can help direct water toward the root zone. This is particularly helpful during the first few months when the tree is most dependent on supplemental irrigation to survive. You should apply a layer of organic mulch within this basin, making sure it does not touch the trunk of the tree. The mulch serves to keep the roots cool, retain moisture, and prevent the growth of weeds that would compete for resources.
Staking the tree may be necessary if you are planting in a particularly windy location or if the sapling is quite tall and thin. Use soft ties and flexible stakes that allow the tree to move slightly in the wind, which actually helps strengthen the trunk over time. You should check the ties regularly to ensure they are not cutting into the bark as the tree grows in diameter. Most trees will only need this support for the first year or two until their root systems are strong enough to hold them upright.
Propagation from seeds
Growing cider gum from seeds is a rewarding challenge that allows you to produce many plants at a relatively low cost. The seeds are quite small and require a period of cold stratification to break their dormancy and improve germination rates. You can achieve this by placing the seeds in a damp paper towel inside a sealed bag in the refrigerator for several weeks. This process mimics the natural winter conditions that the seeds would experience in their native high-altitude environment.
More articles on this topic
Once the stratification period is complete, sow the seeds on the surface of a fine, well-draining seed-starting mix. Because the seeds need light to germinate, you should only cover them with a very thin layer of grit or vermiculite, or simply press them into the surface. Maintaining a consistent temperature and high humidity is essential during this phase, so using a propagation tray with a clear lid is often helpful. You must be careful to keep the medium moist but never waterlogged, as the tiny seedlings are prone to damping off.
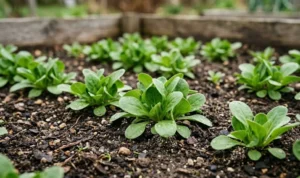
Germination can take anywhere from a few weeks to a couple of months, depending on the conditions and the freshness of the seeds. Once the seedlings appear, they will need plenty of bright, indirect light to grow strong and avoid becoming leggy. As they develop their first set of true leaves, you can begin to thin them out or carefully transplant them into individual pots. This transition requires a very gentle hand to avoid shocking the young plants during the move to larger containers.
As the young plants grow, gradually introduce them to more direct sunlight and outdoor conditions in a process known as hardening off. This prevents the leaves from being scorched by the sun or damaged by the wind when they are finally moved to their permanent locations. You should wait until the seedlings are at least six to ten inches tall and have a robust root system before planting them out in the garden. This patience ensures a much higher success rate and a more vigorous start for your new trees.
Propagation via cuttings
While growing from seed is common, taking cuttings is another method used to propagate cider gum, although it can be more temperamental. Semi-hardwood cuttings taken in late summer or early autumn generally offer the best chance of successful rooting. You should select healthy, vigorous shoots that are just starting to mature and become firm at the base. Using a sharp, sterilized knife or shears to take the cuttings is vital to prevent the spread of disease and ensure clean wounds.
The cuttings should be about four to six inches long, with the leaves removed from the bottom half to reduce moisture loss and expose the nodes. Dipping the base of each cutting into a rooting hormone can significantly increase the speed and reliability of root development. Insert the cuttings into a pot filled with a gritty, free-draining medium like a mix of peat and perlite or sand. It is important to provide a humid environment, perhaps by placing a plastic bag over the pot, to keep the foliage from wilting.
Bottom heat provided by a propagation mat can also be very beneficial for encouraging root growth in eucalyptus cuttings. You will need to be patient, as it can take several months for the cuttings to develop enough roots to be transplanted. During this time, keep the medium slightly moist and watch for any signs of mold or rot on the stems. If a cutting feels firm when gently tugged, it is a good sign that roots are beginning to form and take hold.
Once the cuttings have established a strong root system, they can be moved into individual pots with standard potting soil. Continue to grow them in a sheltered, bright spot until they are large enough to handle the conditions of the open garden. Propagating from cuttings has the advantage of producing a plant that is genetically identical to the parent, ensuring you keep the specific traits you admire. This method is particularly useful if you have a specimen with exceptionally beautiful foliage or a very desirable growth habit.