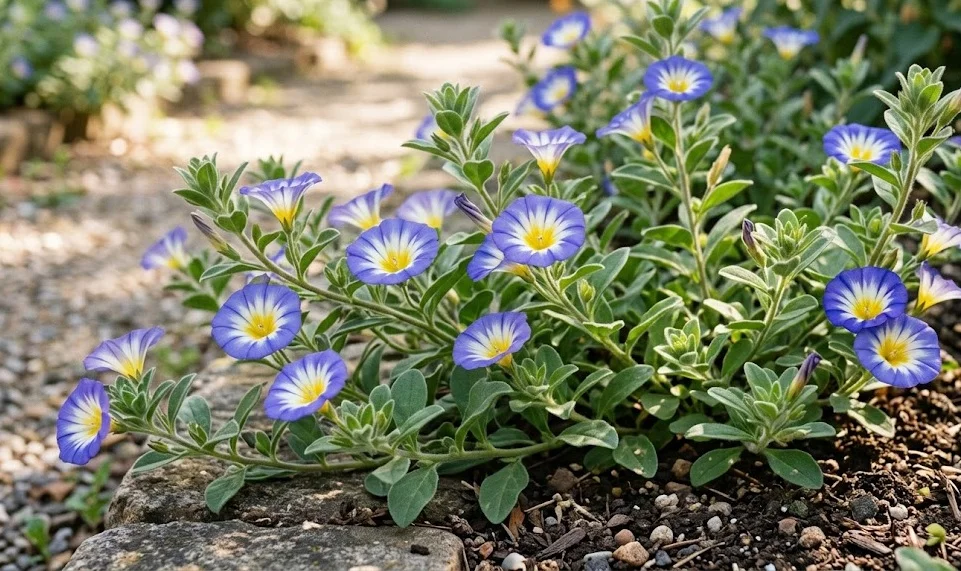
Establishing a beautiful colony of dwarf morning glory starts with understanding the best methods for planting and propagation. Whether you are a seasoned gardener or a beginner, the process of starting these plants from seed is both straightforward and deeply satisfying. These plants are known for their rapid growth and ability to cover ground quickly, provided they are given the right start in life. By focusing on proper timing, soil preparation, and gentle handling, you can ensure a high success rate and a spectacular floral display in your garden.
The journey begins with selecting high-quality seeds from a reputable source to ensure good germination rates. Dwarf morning glory seeds have a relatively hard outer shell, which can sometimes slow down the absorption of water. To help the seeds sprout faster, many experienced gardeners suggest soaking them in lukewarm water for about twenty-four hours before sowing. This simple step softens the seed coat and signals to the internal embryo that it is time to begin the growing process.
When it comes to the actual sowing process, timing is everything because these plants are quite sensitive to cold temperatures. In most climates, it is best to wait until all danger of frost has passed and the soil has begun to warm up in the spring. You can sow the seeds directly into the garden bed, burying them about half an inch deep in the prepared soil. Keeping the area consistently moist but not waterlogged will encourage the first green shoots to emerge within a week or two.
If you live in a region with a shorter growing season, you might prefer to start your seeds indoors a few weeks before the last frost. Use small pots or seed trays filled with a high-quality seed-starting mix that offers excellent drainage. Place the containers in a warm, bright location, such as a sunny windowsill or under grow lights, to support healthy growth. Once the seedlings have developed a few sets of true leaves and the outdoor weather is stable, they can be gradually acclimated to the outside world.
Preparing the planting site
Before you move your young plants into their permanent home, taking the time to prepare the site will pay dividends in growth and color. Start by choosing a location that receives full sun for the majority of the day, as this is essential for maximum flower production. Clear the area of any existing vegetation or large stones that might interfere with the delicate roots of the new arrivals. The goal is to create a clean and inviting space where the plants can spread out and thrive without competition.
More articles on this topic
The soil in your planting area should be loose and rich enough to support the rapid development of the dwarf morning glory. If your garden soil is particularly sandy or heavy with clay, mixing in some organic compost will improve its texture and nutrient content. Use a garden fork or spade to turn the soil to a depth of about six to eight inches, breaking up any large clumps. This ensures that the roots can easily penetrate the earth and access the moisture and minerals they need.
Another important aspect of site preparation is considering the final spacing of the mature plants. While the seedlings might look small now, they will quickly grow into mounds that are about twelve to eighteen inches wide. Mark out your planting holes with this spacing in mind to ensure good air circulation and enough room for each plant to show off its flowers. Proper spacing also makes it easier for you to navigate the garden bed for maintenance tasks like watering and weeding.
Finalize the preparation by lightly watering the area a day before you plan to plant, as this ensures the soil is hydrated but not muddy. If you are planting in containers or hanging baskets, make sure they have adequate drainage holes and are filled with a fresh potting soil. Container-grown plants often require more frequent attention, so choose a pot size that can hold enough moisture for a full day of summer heat. With the site ready, the transition from seedling to garden plant will be much smoother and less stressful for the flowers.
Techniques for successful transplanting
Transplanting is a critical moment in the life of a plant, and doing it carefully can prevent “transplant shock” and stunted growth. Choose a cloudy day or work in the late afternoon to minimize the stress caused by the intense midday sun. Carefully remove the seedling from its pot, being very gentle with the root ball to avoid breaking any of the fine, white feeder roots. If the plant is in a biodegradable pot, you can plant the whole thing directly into the ground after removing the top rim.
More articles on this topic
Place the plant in the hole at the same depth it was growing in its container, as burying the stem too deep can lead to rot. Gently backfill the hole with the surrounding soil, pressing down lightly with your hands to remove any large air pockets. You want the roots to have direct contact with the soil, but you should avoid compacting it so much that it restricts water movement. Immediately after planting, give each seedling a generous drink of water to help settle the soil around the roots.
If the weather is particularly warm or windy during the first few days after transplanting, providing some temporary shade can be very helpful. You can use a small piece of cardboard or even an upside-down laundry basket to shield the young plants from the harshest elements. This allows the root system to begin establishing itself without having to simultaneously cope with high evaporation rates from the leaves. Once you see new green growth appearing at the tips, you know the plant has successfully settled into its new home.
Keep a close eye on the moisture levels during the first two weeks, as the young plants do not yet have an extensive root system to find water. The soil should stay consistently damp but never soggy, as this balance is crucial for healthy root development. As the plants grow stronger and more resilient, you can gradually reduce the frequency of watering and allow the surface of the soil to dry out between applications. This careful transition period sets the stage for a long and productive blooming season.
Propagation and future planning
While starting from seed is the most common method, understanding the natural propagation habits of the plant can help you plan for the future. Dwarf morning glories are prolific seed producers, and in many gardens, they will naturally self-seed if the conditions are right. This means that you might see new “volunteer” seedlings popping up in the same spot next spring without any extra effort on your part. If you enjoy this effortless style of gardening, simply leave a few spent flowers on the plant at the end of the season.
If you prefer a more controlled approach, you can easily harvest the seeds yourself once the pods have turned brown and crispy. Carefully crack open the pods over a container to collect the small, dark seeds, making sure they are completely dry before storage. Label your seeds with the date and the specific variety so you can keep track of your garden’s history over the years. Storing them in a cool, dark, and dry place will ensure they remain viable until you are ready to plant them again next spring.
Some gardeners also experiment with taking stem cuttings, although this is less common for an annual like the dwarf morning glory. If you have a particularly beautiful specimen and want to try this method, take a four-inch cutting from a healthy, non-flowering stem. Remove the lower leaves and place the cutting in a glass of water or a moist rooting medium until new roots begin to form. While this requires more attention than growing from seed, it can be a fun way to multiply your favorite plants mid-season.
Finally, think about how you can improve your planting strategy for the following year based on your current observations. Perhaps you noticed that a certain area of the garden stayed too wet, or maybe the plants would look better grouped in larger clusters. Taking notes or photos during the peak of the season is a great way to remember these details when winter arrives. Each year of planting and propagation is an opportunity to refine your skills and create an even more beautiful outdoor space.