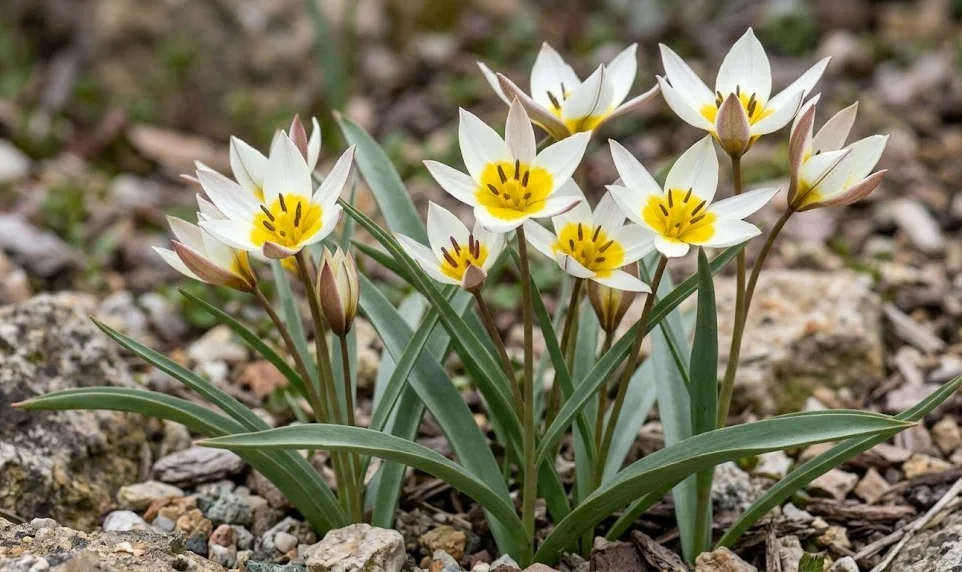
Planting the Turkestan tulip successfully begins with understanding that it is a species tulip, not a short-lived bedding tulip designed only for one spring display. Its bulbs are relatively small, but they are capable of settling into suitable soil and returning for many seasons. The best results come from planting at the right depth, in the right season, and in a site where drainage is naturally sharp. Once established, the plant can be propagated through offsets and, more slowly, by seed.
Selecting and preparing bulbs
Healthy bulbs are firm, clean, and free from soft spots. Small surface marks are usually not a problem, but mold, sour smell, or mushy tissue indicate poor storage or disease. Because species tulip bulbs are not large, size alone should not be judged in the same way as with hybrid tulips. Firmness and vitality matter more than impressive bulk.
Buy bulbs as early as possible in the planting season, then store them correctly until planting. They should be kept in a cool, dry, airy place away from direct sun. Plastic bags that trap condensation are unsuitable unless they are ventilated. Good storage prevents premature sprouting and fungal problems.
Before planting, sort the bulbs carefully. Discard any that are damaged, diseased, or unusually light in weight. If several bulbs are being planted together, group them by size so smaller bulbs are not overshadowed by stronger plants. This gives the planting a more even appearance in spring.
It is useful to prepare the planting area before opening bulb packages. The soil should be loosened, weeds removed, and drainage improved if necessary. Once bulbs are exposed, they should not be left lying around in sun or wind. Planting promptly helps preserve their moisture and energy reserves.
More articles on this topic
Planting time, depth, and spacing
Autumn is the ideal planting season. The soil should be cool but not frozen, allowing roots to form before winter. Planting too early in warm soil can encourage premature growth. Planting too late may reduce root development before spring.
A general rule is to plant bulbs at about three times their own height. For the Turkestan tulip, this usually means a moderate depth rather than the very deep planting used for some larger bulbs. In light sandy soil, slightly deeper planting can protect bulbs from temperature fluctuations. In heavy soil, excessive depth may increase the risk of wet conditions.
Spacing should allow each bulb room to grow and multiply. A natural effect is achieved by planting in small groups rather than straight rows. Groups of five, seven, or more bulbs look more convincing in rock gardens and borders. Avoid placing bulbs so close that they compete immediately after the first season.
Place each bulb with the pointed end upward and the basal plate downward. If a bulb is irregular and orientation is unclear, plant it on its side rather than forcing it into position. The shoot will usually find its way upward. Cover with soil gently, firm lightly, and water once if the soil is dry.
More articles on this topic
Propagating by offsets
Offsets are small bulbs that form beside the main bulb. This is the easiest and most reliable way to propagate the Turkestan tulip. Over time, a settled clump may produce several offsets, gradually increasing the planting. This natural multiplication is one reason species tulips are valuable in long-term gardens.
The best time to divide offsets is after the foliage has yellowed and died back. At that point, the bulb has completed its seasonal feeding cycle. Lifting too early interrupts energy storage and weakens both parent bulbs and offsets. Waiting until dormancy also makes handling safer.
Lift the clump carefully with a fork rather than pulling on old stems. Shake away loose soil and separate offsets by hand if they detach easily. Do not tear small bulbs away aggressively, because damaged basal plates may rot. Keep only firm, healthy offsets for replanting.
Large offsets can be replanted at flowering depth immediately. Smaller offsets may be planted in a nursery bed or container where they can grow on for a season or two. They should receive the same free-draining conditions as mature bulbs. Patience is important, because young offsets need time to reach flowering size.
Growing from seed
Seed propagation is slower but valuable for naturalistic planting and genetic diversity. When flowers are pollinated, seed capsules may form after the petals fall. These capsules should be allowed to ripen on the plant until they begin to dry. Harvesting too early can result in immature seed with poor germination.
Fresh seed can be sown in a gritty compost and left outdoors in a protected position. Exposure to seasonal temperature changes helps trigger germination. The seed should be covered lightly and kept from drying completely during the germination period. At the same time, the compost must never become waterlogged.
Seedlings are delicate and grass-like when they first appear. They should not be disturbed during their first growing season. After the tiny leaves die back, the young bulbs remain in the compost and continue their slow development. It may take several years before seed-grown plants flower.
Growing from seed requires more time than division, but it can produce strong plants adapted to the garden’s conditions. It also allows a planting to develop a more natural character. In suitable sites, a few self-sown plants may appear around established clumps. These should be protected from weeding until they are large enough to recognize confidently.