Establishing a new specimen of this aromatic shrub starts with a careful consideration of the site and the method of introduction. Whether you are starting from a nursery-bought container plant or attempting to grow your own from scratch, the early stages are vital. The success of the planting process dictates how quickly the shrub will adapt to its new environment and begin its productive life. By following professional standards, you ensure that the transition from the pot to the ground is as seamless as possible for the roots.
Selecting the right location is the first step toward a healthy and long-lived plant in your garden landscape. You should look for a spot that offers a balance of bright sunlight and protection from the harshest afternoon winds. The soil should be tested for drainage capacity, as standing water is the primary enemy of young root systems during the establishment phase. A site with a slight slope or naturally loose soil structure will provide the best foundation for future growth.
When preparing the planting hole, aim for a width that is at least twice the size of the root ball to encourage outward expansion. Digging a deep hole is less important than ensuring the sides are loose enough for new roots to penetrate easily. You can mix a small amount of well-rotted compost into the backfill soil to provide a gentle nutrient boost without burning the sensitive roots. Ensure that the plant sits at the same depth it was in its original container to prevent stem rot.
Once the shrub is in place, firm the soil gently with your hands rather than your feet to avoid over-compacting the earth. Water the area thoroughly immediately after planting to settle the soil and eliminate any air pockets around the roots. You might consider adding a temporary stake if the sapling is particularly tall or if the site is prone to frequent gusts. This initial care sets the stage for the plant to anchor itself firmly and begin its journey toward maturity.
Propagation from seeds and stratification
Growing this species from seed is a rewarding challenge that requires a bit of patience and an understanding of natural cycles. The seeds possess a hard outer coating and an internal dormancy mechanism that must be broken before germination can occur. In nature, this happens during the cold winter months, so you must mimic this process through a technique called stratification. This involves storing the seeds in a moist, cold environment for several months to signal that winter has passed.
More articles on this topic
To start the process, clean the black seeds thoroughly to remove any oily residue from the fruit husks that might inhibit water uptake. Place the seeds in a bag of damp sand or vermiculite and keep them in the refrigerator for approximately ninety days. Check the seeds periodically to ensure they remain moist but are not sitting in standing water, which could cause them to rot. Once the stratification period is complete, the seeds are ready to be sown into a high-quality seed starting mix.
Sow the seeds at a shallow depth and keep the trays in a warm, bright location, ideally with bottom heat to stimulate growth. Germination can be erratic, with some seeds sprouting within weeks while others take much longer to show signs of life. You should maintain consistent moisture in the soil, using a fine mist to avoid washing the seeds away or compacting the surface. Once the seedlings have developed their first true leaves, they can be carefully moved into individual pots for further growth.
Young seedlings are quite delicate and should be protected from direct, scorching sunlight and heavy rain during their first few months. Gradually acclimate them to outdoor conditions through a process of hardening off before they are permanently planted in the ground. This slow introduction helps the young plants build strength in their stems and adaptability in their leaves. While starting from seed takes more time than buying a plant, it offers the satisfaction of seeing the entire life cycle.
Vegetative propagation through cuttings
If you want to create an exact genetic clone of a particularly productive or beautiful shrub, vegetative propagation is the way to go. Taking cuttings allows you to bypass the long stratification and germination process associated with seeds. The best time to take softwood cuttings is in the late spring or early summer when the new growth is still flexible but starting to firm up. You should select healthy, vigorous shoots that show no signs of pests or disease to ensure the best chance of success.
More articles on this topic
Prepare a cutting of about four to six inches in length, making a clean diagonal cut just below a leaf node. Remove the leaves from the bottom half of the cutting to reduce moisture loss and expose the area where roots will form. You can dip the base of the stem into a rooting hormone powder or gel to stimulate faster and more uniform root development. Insert the cuttings into a well-draining medium, such as a mix of perlite and peat moss, and firm them in place.
Keeping the humidity high around the cuttings is essential since they have no roots to draw up water yet. You can cover the pots with a plastic dome or place them in a specialized propagation chamber to maintain a moist atmosphere. Place the cuttings in a bright location with indirect light, as direct sun will quickly overheat and dehydrate the tender stems. Within a few weeks, you can gently tug on the cuttings to see if they have anchored themselves with new roots.
Once the roots are well-established, the new plants can be transitioned into a regular potting soil and grown on for a season. This method is particularly useful for creating a uniform hedge or expanding your spice harvest without the variability of seeds. It requires a bit of technical skill and attention to detail, but the results are highly predictable and efficient. Many professional growers prefer this method for maintaining the quality and consistency of their stock.
Site selection and environmental factors
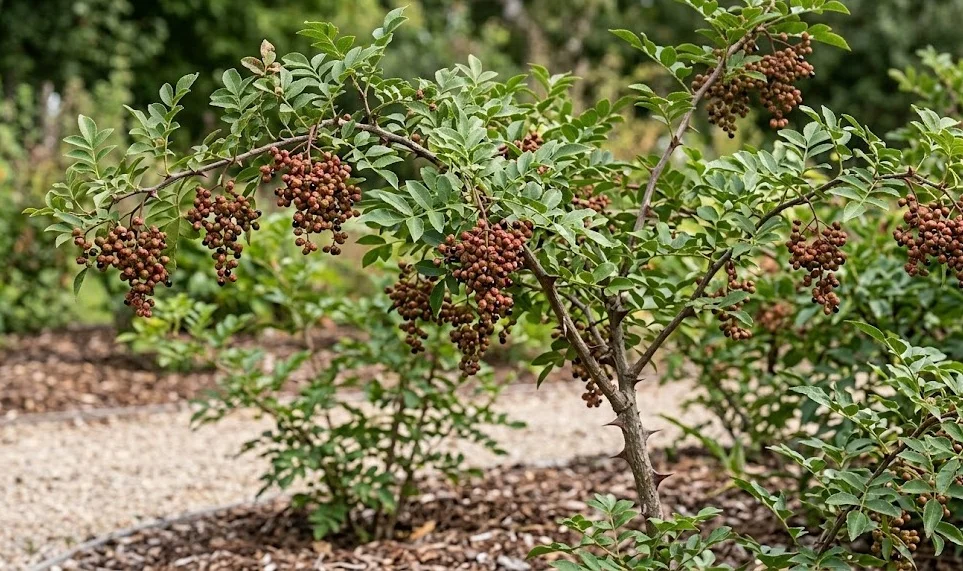
The long-term success of your planting depends heavily on how well the chosen site meets the biological requirements of the species. You should observe the sun patterns in your garden throughout the day to ensure the plant gets at least six hours of light. While it can survive in partial shade, the growth will be slower and the berry production will likely be disappointing. Sunlight is the engine that drives the production of the essential oils that give the peppercorns their unique flavor.
Consider the ultimate size of the shrub, which can reach several meters in both height and width if left unpruned. You must give it enough space to breathe and expand without crowding out its neighbors or being crowded itself. Good air circulation is vital for preventing fungal issues, especially in humid climates where the foliage might stay wet for long periods. Planning for the future saves you from the difficult task of moving a large, thorny shrub later on.
Soil drainage is perhaps the most critical environmental factor to get right during the planting phase. If the soil is heavy and holds water like a sponge, you should consider planting on a raised mound or installing drainage tiles. You can test the drainage by digging a hole, filling it with water, and seeing how long it takes to empty completely. If the water remains after several hours, you need to amend the site or choose a different location altogether.
Lastly, think about the proximity of the plant to other garden features like fences, walls, or underground utilities. The root system is not typically invasive, but it is always better to leave a buffer zone to avoid any future conflicts. Protecting the site from strong, drying winds will also help the plant maintain its moisture balance during the hot summer months. By selecting the perfect spot from the beginning, you set the stage for a thriving and productive prickly ash.