Successful establishment of this species begins with the selection of high-quality bulbs and the careful preparation of the planting site during the appropriate season. You must approach the planting process with precision, ensuring that each bulb is placed at the correct depth and orientation to facilitate healthy root and shoot development. The propagation of these lilies offers a fascinating opportunity to expand your garden collection through various biological methods, including seed sowing and bulb division. By mastering these techniques, you can ensure a continuous and thriving population of these striking orange flowers in your landscape.
Bulb selection and site preparation
The quality of the starting material is the single most important factor in determining the future success of your planting project. You should look for bulbs that are firm to the touch, heavy for their size, and free from any obvious signs of mold or physical damage. Avoid bulbs that feel light or hollow, as these are often dehydrated or have been stored improperly for an extended period. If you cannot plant your bulbs immediately upon arrival, store them in a cool, dark place in a medium like peat moss to keep them viable.
Choosing the right location involves more than just finding a sunny spot; you must also consider the hidden characteristics of the soil and drainage patterns. You should perform a simple drainage test by digging a small hole and filling it with water to see how quickly it disappears into the ground. If the water remains for more than an hour, the site is likely too wet for lilies and will require significant amendment or the construction of a raised bed. These plants prefer a location where they can keep their “feet” in the shade and their “heads” in the sun.
Preparing the soil should involve deep cultivation to break up any compacted layers that might hinder the downward growth of the roots. You should incorporate a generous amount of organic matter into the planting area, focusing on materials that will improve the soil’s structure without drastically changing its chemical balance. This preparation should ideally be done several weeks before planting to allow the soil to settle and the organic amendments to begin integrating with the native earth. A well-prepared bed provides a stable environment for the bulbs to anchor themselves and begin their growth cycle.
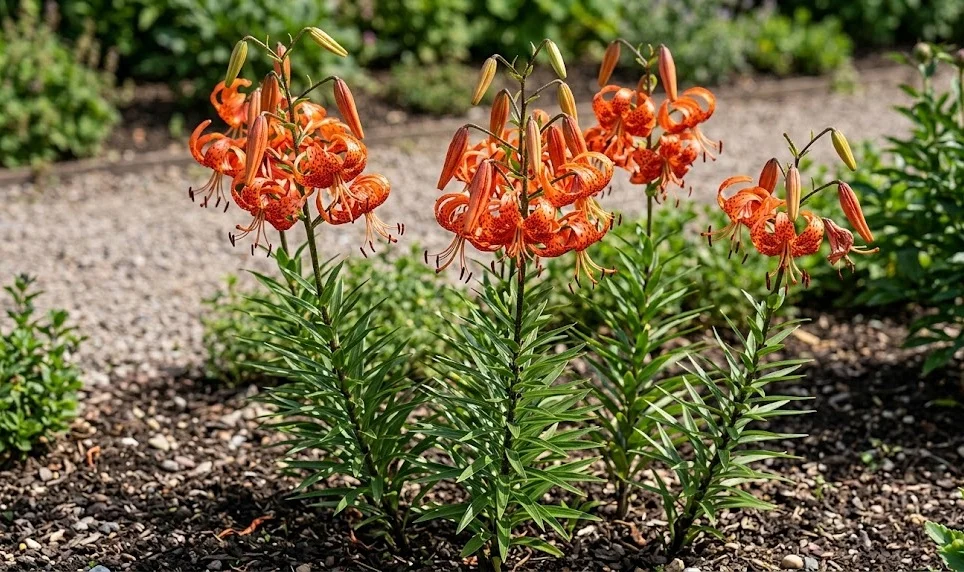
Finally, consider the aesthetic placement of the lilies within the context of your overall garden design and existing plant community. You should plant the bulbs in small groups or drifts rather than in isolated single units to create a more natural and impactful visual display. This grouping also makes it easier to manage the plants, as you can provide consistent care to a concentrated area of the garden. Thinking about the height and color of neighboring plants will help you create a harmonious landscape where the lilies can truly shine.
More articles on this topic
Planting techniques and depth
When you are ready to place the bulbs in the ground, the depth at which they are set is a critical calculation for their long-term survival. You should generally plant the bulbs at a depth that is roughly three times the height of the bulb itself, measured from the base to the soil surface. This deep planting protects the bulbs from extreme temperature swings and provides the necessary stability for the tall stems that will emerge later. If the bulbs are planted too shallowly, the plant may struggle with moisture stress and the stems may be prone to falling over.
The orientation of the bulb within the planting hole is equally important for the successful emergence of the first spring shoots. You should place the bulb with the pointed end facing upward and the flat, basal plate where the roots emerge facing downward toward the bottom of the hole. If you are unsure which end is which, you can plant the bulb on its side, and the plant will naturally adjust its growth direction as it develops. Firm the soil gently around the bulb to eliminate large air pockets, but avoid packing it so tightly that the roots cannot penetrate the surrounding earth.
Spacing between individual bulbs is a professional consideration that ensures each plant has enough room to expand and receive adequate sunlight and air. You should aim for a distance of at least 15 to 20 centimeters between bulbs to prevent overcrowding and reduce the competition for soil nutrients. This space also allows for better air circulation around the base of the mature plants, which is a key factor in preventing the spread of fungal diseases. Proper spacing reflects a forward-thinking approach that accounts for the future growth of the lily colony over several years.
Immediately after planting, you should water the area thoroughly to settle the soil and provide the bulbs with the moisture they need to initiate root growth. You might also consider applying a light layer of mulch to protect the site from erosion and to keep the soil temperature consistent during the initial establishment phase. Labeling the area with durable markers is a practical step that prevents you from accidentally disturbing the bulbs during future gardening tasks. These final touches complete the planting process and set the stage for a successful growing season.
More articles on this topic
Propagation through division and scales
As your lily collection matures, you will find that the original bulbs often produce smaller offsets or “bulblets” around their base or along the underground portion of the stem. You should take advantage of this natural process by carefully lifting the clumps during the dormant season and separating the offsets from the parent bulb. These smaller bulbs can then be replanted in a nursery bed or a new location in the garden where they can continue to grow to flowering size. This method is the simplest way to increase your stock while maintaining the exact genetic characteristics of the original plant.
Another professional propagation technique involves the use of individual bulb scales to create entirely new plants through a process called scaling. You should gently remove a few of the outermost scales from a healthy, dormant bulb, making sure to include a small piece of the basal plate at the bottom of each scale. These scales are then placed in a plastic bag with damp vermiculite or peat moss and kept in a warm, dark place for several weeks. During this time, tiny new bulblets will begin to form at the base of the scales, which can then be potted up individually.
The timing of these propagation efforts is essential for ensuring that the young plants have enough time to establish themselves before the onset of extreme weather. You should ideally perform division and scaling during the late autumn or very early spring when the plant is in its most dormant state. This minimizes the stress on the bulbs and allows the new roots to begin growing as soon as the soil temperatures are favorable. Patience is required, as plants grown from scales or small offsets may take two to three years to reach their full flowering potential.
Handling the bulbs during propagation requires a clean environment and sharp tools to prevent the introduction of pathogens. You should always sterilize your knives or shears before making any cuts and handle the delicate bulb tissues with great care to avoid bruising. Applying a light dusting of fungicidal powder to the cut surfaces can provide an extra layer of protection against rot and infection. By treating the propagation process as a professional surgical procedure, you significantly increase the success rate of your efforts to expand your lily garden.
Growing lilies from seed
For those looking for a more challenging and rewarding experience, growing these lilies from seed offers a way to observe the entire life cycle of the plant. You should collect the seed pods in the late summer or autumn once they have turned brown and begun to split open naturally. The seeds of this particular species are relatively easy to germinate, but they require a specific period of cold stratification to break their dormancy. This mimics the natural winter cycle they would experience in their native mountain environment, signaling to the embryo that it is time to grow.
The sowing process should be done in a well-drained seed-starting mix that is kept consistently moist but never waterlogged. You should place the seeds on the surface of the soil and cover them with a very thin layer of fine grit or vermiculite to help maintain humidity. Keeping the seed trays in a cool, bright location will encourage sturdy growth and prevent the young seedlings from becoming leggy or weak. As the first true leaves appear, you can begin a very light fertilization routine to support the development of the tiny underground bulb.
Transitioning seedlings from the protected environment of a greenhouse or seed tray to the open garden requires a gradual hardening-off process. You should move the young plants outdoors for increasing periods each day, protecting them from direct sun and strong winds until they are sufficiently acclimated. Once they are strong enough, transplant them into a dedicated nursery bed where they can grow undisturbed for the first year or two. This intermediate step allows you to monitor their progress closely and provide the specialized care that young lilies need during their formative years.
Finally, you must understand that growing lilies from seed is a long-term commitment that requires both time and dedication. It can take anywhere from three to five years for a seedling to produce its first flower, and the resulting blooms may show slight variations from the parent plant. This genetic diversity is one of the most exciting aspects of seed propagation, as you may discover a unique individual with exceptional color or form. For the dedicated horticulturalist, the sight of a first bloom from a plant they started as a tiny seed is the ultimate reward.