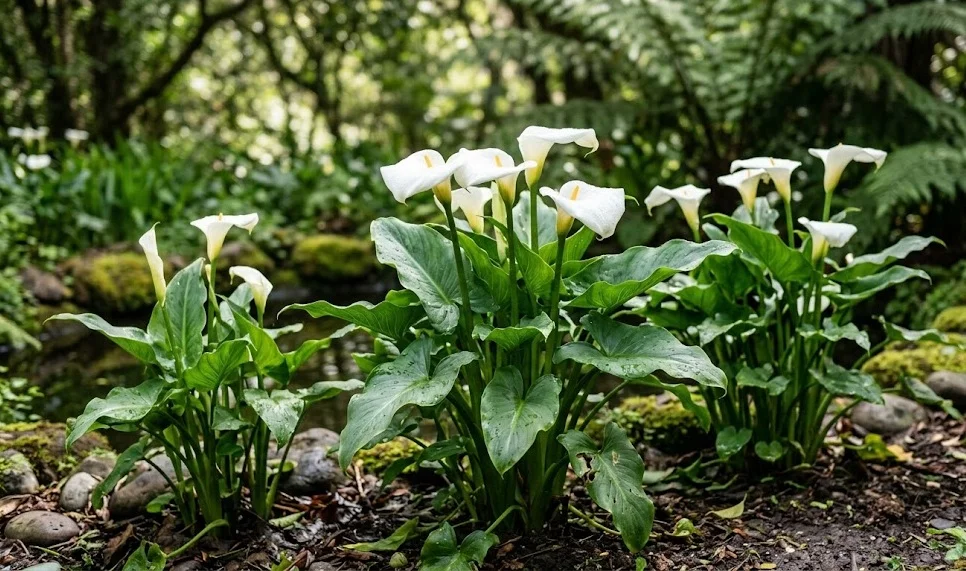
Pruning and cutting back the white calla are essential tasks that contribute to both the aesthetic appeal and the long-term health of the plant. While callas do not require the same type of structural pruning as woody shrubs, they do benefit from the systematic removal of old or damaged tissue. This practice ensures that the plant’s energy is directed toward productive growth and helps to prevent the buildup of pests and diseases. By understanding the timing and techniques for cutting back, you can maintain a tidy garden and promote a more vigorous flowering cycle for years to come.
The most common reason for pruning a white calla is to remove spent flowers, a process known as deadheading. When a flower begins to fade, it not only becomes less attractive but also starts to consume the plant’s resources as it attempts to produce seeds. By cutting these flowers back to the base, you signal to the plant that it should instead focus on its foliage and rhizome development. This simple intervention is one of the most effective ways to keep your callas looking fresh and to ensure they remain strong throughout the growing season.
Foliage maintenance is another important aspect of calla pruning, involving the removal of yellowing, withered, or diseased leaves. Because callas have large, fleshy leaves, any damage is highly visible and can detract from the overall elegance of the plant. Removing these leaves not only improves the appearance of the plant but also increases air circulation around the remaining foliage, which is a key factor in preventing fungal infections. A well-maintained calla should always look clean and vibrant, with no lingering dead material to spoil the view.
At the end of the growing season, a more dramatic cutting back is required as the plant prepares for its winter dormancy. This final pruning is a transition point in the plant’s life, marking the end of its active phase and the beginning of its rest period. Doing this correctly is vital for the protection of the rhizome and for ensuring a clean start in the following spring. Whether you are a casual gardener or a professional, mastering the art of the cut is a fundamental skill for anyone growing the white calla.
Techniques for seasonal maintenance
Deadheading white callas should be done as soon as the white spathe begins to lose its color and turn green or brown. You should not just cut the flower head off; instead, follow the stem all the way down to the base of the plant and make a clean cut. This prevents having unsightly, leafless stalks standing in the middle of your foliage. Using a pair of sharp, sterilized pruning shears ensures that the cut is clean and that you don’t accidentally introduce any pathogens into the plant’s vascular system.
More articles on this topic
When it comes to the leaves, you should only prune them once they are truly yellow or brown and have lost their functional value to the plant. Green leaves, even if they are a bit tattered, are still performing photosynthesis and providing energy to the underground rhizome. If you must remove a damaged green leaf for aesthetic reasons, do so sparingly and always cut it at the base. Regular “cleaning” of the plant every few weeks will keep it looking its best and will allow you to spot any potential pest problems early on.
If your white callas are being grown for cut flowers, the pruning technique is slightly different, as you want to preserve the longest possible stem. The best time to cut callas for an arrangement is in the early morning when the plant is fully hydrated and the flowers are just beginning to open. You should use a sharp knife or shears and cut the stem at an angle to increase the surface area for water uptake. Immediately placing the cut stems in a bucket of lukewarm water will help them last for up to two weeks in a vase.
Hygiene is paramount whenever you are pruning your callas, as their succulent tissues are easily infected by bacteria and fungi. You should always wipe your tools with rubbing alcohol or a mild bleach solution between plants, especially if you suspect any of them might be diseased. This professional habit prevents the accidental spread of issues like bacterial soft rot throughout your entire collection. Taking these small, extra steps is what separates a successful gardener from one who constantly struggles with plant health.
Cutting back for dormancy
As the autumn temperatures drop and the white calla begins its natural decline, your pruning strategy should shift toward preparing the plant for its winter rest. You will notice the leaves starting to turn yellow and droop, which is your cue to begin reducing your maintenance and allowing the plant to “shut down.” It is important not to rush this process; let the foliage wither naturally so that as much energy as possible is returned to the rhizome. This energy reserve is what will power the plant’s emergence in the spring.
More articles on this topic
Once the foliage has completely died back or has been killed by the first light frost, you can perform the final “cut back” of the season. Use your shears to remove all of the dead stems and leaves, cutting them as close to the ground as possible without damaging the top of the rhizome. This clears the area and makes it much easier to apply mulch or to lift the rhizomes for storage. Removing this bulk of dead organic matter also eliminates a common overwintering site for pests like slugs and snails.
If you are lifting the rhizomes to store them indoors, the cutting back process is also the time when you can inspect the health of the “crown” of the plant. Look for any signs of rot or soft tissue at the point where the stems were attached to the rhizome. If you find any, you can often cut away the affected part with a sterile knife before the problem spreads. This proactive pruning during the dormant transition is a vital part of maintaining a healthy and long-lived calla collection.
In regions where callas can stay in the ground, the cut-back foliage can sometimes be left as a very light, natural mulch, but it is usually better to remove it and replace it with clean straw or bark. This is because the old calla leaves can become slimy as they decompose, which may encourage rot in the crown of the plant. A clean, well-pruned site covered with fresh mulch is the professional way to ensure your callas survive the winter in the best possible condition. The goal is always to create a tidy, safe environment for the plant to rest.
Promoting future growth and vigor
While it might seem counterintuitive, regular pruning and cutting back actually promote more vigorous growth in the long run. By removing the old, less efficient parts of the plant, you allow more light and air to reach the new, emerging shoots. This stimulates the rhizome to produce more leaves and, eventually, more flowers. A plant that is never pruned can become a tangled mess of old and new growth, which is not only less attractive but also more prone to stagnation and disease.
The act of pruning also gives you a chance to closely observe the growth patterns of your callas and to understand their specific needs. You might notice, for example, that one side of the plant is producing more flowers, which could indicate a better light source or better soil quality in that area. This type of detailed observation, made during your regular pruning sessions, allows you to become a more responsive and effective gardener. Pruning is as much about learning as it is about maintenance.
Over time, you may find that the center of your calla clump becomes “choked” with old rhizome material and needs a more radical type of pruning or division. This involves lifting the entire plant and cutting the rhizomes into smaller pieces, effectively pruning the root system as well as the foliage. This rejuvenation pruning is usually done every three to four years and can result in a dramatic increase in the plant’s health and flowering potential. It is a powerful tool for maintaining the youth and vitality of your garden.
Ultimately, the goal of all pruning and cutting back is to support the natural lifecycle of the white calla while guiding it toward the aesthetic results you desire. By being consistent and using the correct techniques, you ensure that your callas remain a stunning focal point in your garden. Whether it’s a quick deadheading in mid-summer or the final clearing of the beds in late autumn, every cut you make should be a thoughtful contribution to the plant’s overall well-being. Professionalism in pruning is the key to lasting horticultural success.