Establishing a vibrant population of wild pansies begins with a focused approach to planting and propagation techniques. Whether you are starting from purchased seeds or using existing plants, the timing is a critical factor for success. These plants are remarkably hardy, yet they require specific conditions to germinate and root effectively in a new environment. A professional gardener knows that the secret to a long blooming season lies in the quality of the initial setup.
The first step in the planting process is determining the ideal calendar window for your local climate zone. For a spring display, many experts recommend starting the seeds indoors during the late winter months. This gives the seedlings enough time to develop a strong root system before the ground thaws. Alternatively, autumn planting is popular in milder regions where the plants can establish themselves before the winter cold.
Soil temperature is a hidden but vital variable that dictates how quickly your pansies will take hold. If the soil is too cold, germination will be sluggish, and the risk of the seeds rotting increases significantly. Using a soil thermometer can help you hit that sweet spot between fifteen and twenty degrees Celsius. Once the soil warms up, you will see a much more uniform emergence across your planting beds.
Choosing the right planting site involves looking at both the macro and micro levels of your garden landscape. The area should be cleared of all weeds and debris to prevent competition for young, developing roots. Adding a light layer of finely screened compost to the surface can provide an immediate nutrient source. A clean, well-prepped site is the best insurance policy against the early failure of your pansy crop.
Seed preparation and sowing
Starting wild pansies from seed requires patience and a bit of technical knowledge to ensure a high germination rate. Selecting high-quality seeds from a reputable supplier is the first step toward a vibrant garden display. You should look for seeds that have been stored in cool, dry conditions to maintain their viability. Understanding the specific dormancy requirements of the species will help you time your planting perfectly.
More articles on this topic
Pre-treating the seeds can often improve the speed and uniformity of germination in your trays. Some gardeners find that a brief period of cold stratification mimics the natural winter cycle and breaks dormancy. Placing the seeds in a damp paper towel inside a sealed bag in the refrigerator for a week is a common method. This simple trick can lead to much higher success rates when the seeds are finally moved to the soil.
When sowing the seeds, depth is a factor that must be managed with extreme precision. The seeds are quite small and should only be covered with a very thin layer of fine soil or vermiculite. They actually require a small amount of darkness to trigger the germination process effectively. Pressing the soil down gently ensures good contact between the seed and the growing medium without compacting it too much.
Moisture management during the germination phase is a delicate balancing act that requires daily attention. The soil should be kept consistently damp but never saturated, as this can lead to fungal issues like damping-off. Using a fine mist sprayer is much better than a heavy watering can, which might wash the tiny seeds away. Covering the trays with a clear plastic dome can help maintain the necessary humidity levels until the first green shoots appear.
Indoor starting and transplanting
Starting your plants indoors gives you complete control over the environment during the most vulnerable stage of life. High-quality seed-starting mix is essential because it is sterile and designed for optimal drainage. Ensure that your growing area has adequate light, either from a bright south-facing window or from specialized grow lights. Without enough light, the seedlings will become leggy and weak, making them poor candidates for the garden.
More articles on this topic
Once the seedlings have developed their second set of true leaves, they are usually ready for their first thinning. It might feel difficult to remove healthy plants, but giving each individual enough space is vital for air circulation. This stage is also a good time to begin a very weak liquid fertilization routine to support steady growth. Always use a balanced formula that is specifically designed for young, tender plant tissues.
Hardening off is a mandatory transitional step before moving indoor plants into the harsh reality of the outdoor garden. This involves gradually exposing the young pansies to outdoor temperatures, wind, and direct sunlight over several days. Start with just an hour or two in a sheltered spot and slowly increase the duration each day. This process toughens the cell walls and prevents the plants from going into shock after transplanting.
The actual transplanting process should ideally take place on a cloudy day or in the late afternoon to minimize stress. Dig a hole that is slightly larger than the root ball and place the plant at the same depth it was in the tray. Firm the soil gently around the base and water it in immediately to settle the roots. Providing a little temporary shade for the first few days can help the new transplants adjust to their permanent home.
Direct sowing in the garden
Direct sowing is a popular method for those who prefer a more naturalized look or have a large area to cover. This technique works best in late summer or early autumn, allowing the plants to bloom the following spring. The soil must be raked until it has a fine, crumbly texture that is free of large clods or stones. Sowing the seeds in rows or broadcasting them evenly across the surface are both effective strategies depending on your design.
After scattering the seeds, it is helpful to walk over the area or use a light roller to ensure good soil contact. Since the seeds are on the surface, they are at risk of being eaten by birds or washed away by heavy rain. A very thin layer of straw or specialized mulch can provide protection without blocking the necessary darkness for germination. Keeping the entire area moist during the two to three weeks it takes for sprouts to appear is the biggest challenge.
Thinning the direct-sown seedlings is necessary to prevent a crowded, stunted carpet of plants that won’t bloom well. Aim for a spacing of about fifteen to twenty centimeters between the strongest individual plants. You can often transplant the extras to other parts of the garden if you move them carefully with a small trowel. This ensures that the remaining plants have the resources they need to develop into robust, flowering specimens.
The success of direct sowing often depends on the consistency of the environmental conditions during the early autumn. If a sudden heatwave occurs, the tiny seedlings can dry out and perish in just a few hours. Monitoring the weather forecast and providing supplemental water during dry spells is non-negotiable for success. Once the plants have established a few sets of leaves, they become much more resilient to the elements.
Vegetative propagation and self-seeding
While seeds are the most common way to propagate wild pansies, vegetative methods like division can also be used. This is particularly effective for older, established clumps that have become too large for their space in the bed. By carefully lifting the plant and separating the root mass, you can create several new plants that are genetically identical. This is a great way to preserve a specific flower color or pattern that you particularly enjoy.
Cuttings can also be taken from the non-flowering stems during the active growing season for quick results. Use a sharp, sterile tool to take a five-centimeter cutting and remove the lower leaves before planting. Placing the cuttings in a moist, sandy medium under high humidity will encourage root development within a few weeks. This method is often faster than growing from seed but requires more technical skill and equipment.
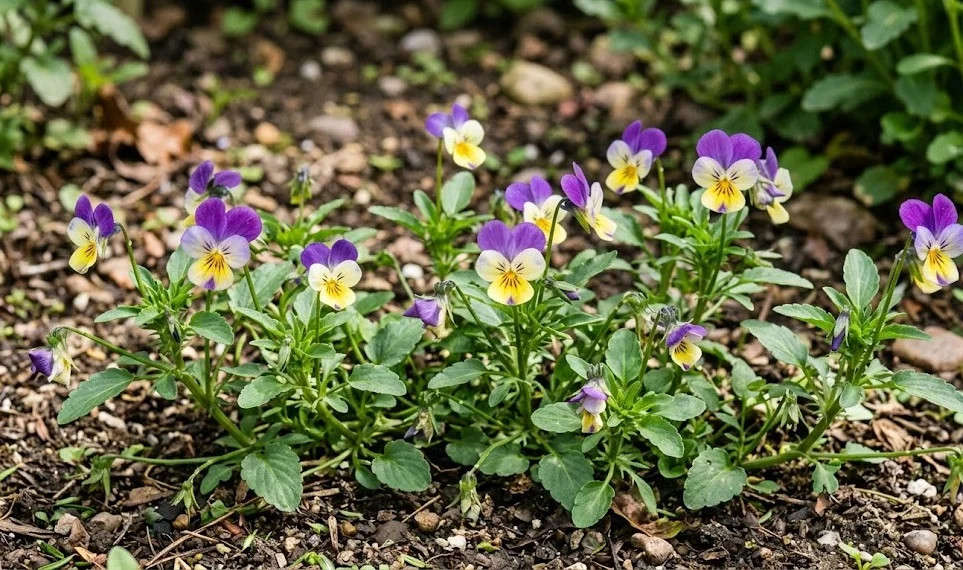
Allowing your wild pansies to self-seed is the easiest way to ensure a permanent presence in your garden landscape. If you leave the final flowers of the season to mature, they will naturally drop their seeds into the surrounding soil. These “volunteer” plants often pop up in unexpected places, adding a charming, informal feel to the garden beds. They are typically very hardy because they have germinated under natural conditions from the very start.
Managing a self-seeding population requires a balance between order and chaos in the flower garden. You might need to hoe out the seedlings that appear in paths or on top of other delicate plants. However, the ones that stay in the beds will often provide a free and effortless display of color year after year. Over time, the colors may revert to the original wild forms, which many gardeners find even more beautiful.