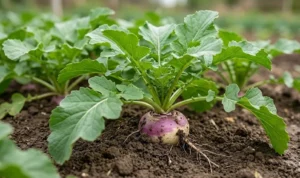
Establishing a new population of these stunning perennials begins with a clear understanding of the best techniques for planting and increasing your stock. Whether you are starting with nursery-bought plants or trying your hand at more advanced methods, the timing and execution are crucial for success. You should focus on creating the ideal conditions for root development so that the plants can quickly adapt to their new home in your garden. A careful approach during these initial stages will pay dividends in the form of robust growth and beautiful foliage.
The process of bringing new life into the garden is one of the most satisfying aspects of professional horticulture and landscape design. You will find that this particular species is quite cooperative when it comes to being moved or divided, provided you handle the roots with care. It is essential to prepare the site well in advance, ensuring that the soil is ready to receive the new additions without delay. By following a systematic approach, you can significantly increase the survival rate and vigor of your new plantings.
Propagation offers a cost-effective way to fill large areas of the garden or to share your favorite plants with other enthusiasts. You can choose between several methods, each with its own set of advantages and specific requirements for the time of year. Division is the most common and straightforward technique, while cuttings and seeds offer alternative paths for those looking to expand their skills. Regardless of the method you choose, patience and attention to detail are the hallmarks of a successful propagator.
Timing your planting and propagation activities with the natural cycles of the plant will yield the best results and minimize stress on the parent stock. Spring and autumn are the traditional windows for these tasks, as the cooler temperatures and increased moisture levels favor root growth over top-heavy foliage development. You should always monitor the weather forecast and avoid working during periods of extreme heat or drought. This strategic planning ensures that your efforts are supported by the environment, giving your plants the best possible start.
Preparation and planting techniques
Before you even dig a hole, you should spend time evaluating the chosen site to ensure it meets the ecological needs of the plant. Consider the path of the sun, the proximity of other plants, and the natural drainage patterns of the area. Preparing the soil by loosening it to a depth of several inches and incorporating organic matter will create a welcoming environment for the roots. This initial investment in site preparation is the most effective way to prevent future problems with establishment and growth.
More articles on this topic
When you are ready to plant, make sure the hole is twice as wide as the root ball but no deeper than the container the plant came in. You should gently loosen the roots if they have become pot-bound, as this encourages them to grow outwards into the surrounding soil. Place the plant in the hole and ensure that the crown sits slightly above the soil line to prevent water from pooling around the base. This careful positioning is critical for avoiding rot and ensuring the plant can breathe properly.
Filling the hole with a mixture of native soil and compost provides a nutrient-rich start for the new addition to your garden. You should firm the soil gently with your hands to remove any large air pockets, but avoid stepping on it, which can cause excessive compaction. Once the plant is in place, water it thoroughly to settle the soil and provide the immediate hydration needed after the stress of moving. A layer of mulch applied after planting will help hold that moisture and keep the roots cool as they begin to expand.
Newly planted specimens require consistent monitoring for several weeks as they establish their root systems in the ground. You should check the moisture levels daily, especially during dry spells, to ensure the soil remains evenly moist but not saturated. If the plant shows signs of wilting, it may need a bit of temporary shade until its roots are strong enough to support the foliage. Success in planting is about staying attentive to these early signals and providing the support the plant needs to become independent.
Dividing established clumps
Division is perhaps the most reliable method for propagating this species, and it also serves to rejuvenate older plants that have become less vigorous. You should look for large, healthy clumps that have been in the ground for at least three or four years before attempting to divide them. The best time for this procedure is early spring, just as the new growth begins to emerge from the crown. This allows the new sections an entire growing season to establish themselves before the challenges of winter arrive.
More articles on this topic
To start the process, carefully lift the entire plant from the ground using a spade or a garden fork, being sure to dig well outside the drip line. Once the plant is out of the soil, shake off the excess earth so you can clearly see the structure of the crown and the roots. You can often pull the plant apart by hand, but for older, tougher specimens, a sharp knife or two garden forks placed back-to-back may be necessary. Ensure that each new section has a healthy portion of roots and at least a couple of growing points.
Replanting the divisions should happen as quickly as possible to prevent the delicate roots from drying out in the air. You should follow the same planting techniques used for nursery stock, paying close attention to the depth of the crown in the soil. If you have more divisions than you need for your own garden, they make excellent gifts for fellow gardeners or can be used to start a new border. Proper division not only gives you more plants but also keeps the parent plant healthy and productive for many more years.
After-care for divisions is similar to that of new plants, with a focus on consistent moisture and protection from environmental extremes. You might notice a short period of transplant shock where the leaves look a bit tired, but the plant should recover quickly as the roots take hold. It is often helpful to trim back some of the larger leaves to reduce the demand on the newly separated root system. Watching these small pieces grow into full-sized, beautiful mounds is a testament to the resilience and vitality of the species.
Cuttings and advanced methods
While division is the standard approach, taking basal cuttings is another effective way to increase your collection of these perennials. This method involves taking small shoots from the base of the plant in early spring, ideally with a tiny piece of the crown attached. You should place these cuttings in a well-draining potting mix and keep them in a humid, protected environment until roots begin to form. This technique is particularly useful if you want to produce a large number of plants from a single parent without digging it up.
Maintaining the right balance of moisture and air around the cuttings is the most challenging part of this propagation method. You can use a clear plastic dome or a simple bag to create a mini-greenhouse effect that prevents the shoots from wilting before they can support themselves. It is important to provide bright but indirect light, as direct sun can quickly overheat the small environment and kill the delicate tissue. Once you see new growth, you can gradually acclimate the young plants to the outside air before moving them to their final locations.
Growing from seed is a more advanced method that requires patience, but it can be a fascinating way to see the natural variation within the species. You should sow the seeds on the surface of a fine seed-starting mix, as they require light to germinate effectively. Keep the trays in a cool, bright spot and ensure the soil remains consistently moist but never soggy. Germination can be erratic, so do not be discouraged if it takes several weeks for the first tiny leaves to appear.
Once the seedlings have developed a few sets of true leaves, they can be transplanted into individual pots to continue their development. You should provide them with a balanced liquid fertilizer at half-strength to support their growth during this juvenile stage. It will take a year or two for these plants to reach a size where they can be successfully integrated into the garden border. This slow but rewarding process gives you a deeper appreciation for the complex life cycle of the perennials you enjoy.
Establishing a long term nursery
For those with large gardens or a professional interest, setting up a dedicated area for young plants can be a very practical move. You should choose a spot that is sheltered from the wind and has access to a reliable water source for frequent tending. This “nursery” area allows you to monitor your new divisions and cuttings closely without them being lost among more established garden residents. It also provides a space where you can experiment with different propagation techniques and soil mixes to see what works best.
Organizing your nursery with clear labels and records will help you track the progress of different batches and varieties over time. You should note the date of propagation, the method used, and any specific observations about the health of the young plants. This professional approach to record-keeping allows you to refine your techniques and share your findings with the wider gardening community. A well-managed nursery is a sign of a gardener who is serious about the long-term success and sustainability of their landscape.
As your young plants mature, you can begin to transition them into their permanent roles in your garden design or use them for community projects. You should always ensure that the plants are well-hardened before moving them into more exposed or competitive garden environments. The transition from the nursery to the border should be done during a period of mild weather to minimize the stress of the move. Seeing your homegrown plants flourish in the landscape is one of the ultimate rewards of the propagation process.
By mastering the art of planting and propagation, you become more than just a consumer of garden products; you become a producer of life. You should feel empowered to take control of your garden’s future by maintaining a healthy and diverse population of plants. This species, with its ease of division and beautiful form, is the perfect subject for developing your skills in these fundamental horticultural practices. Your dedication to these tasks will ensure that your garden remains a vibrant and evolving space for many years to come.