Selecting the proper foundation is the first step toward a successful planting experience with your tree aeonium. You must prioritize drainage above all else, as these plants cannot survive in soil that holds moisture for too long. A mixture of two parts potting soil, one part coarse sand, and one part pumice or perlite works wonders. This combination allows the roots to breathe while providing enough weight to anchor the tall stems of a mature plant.
The container you choose should be appropriate for the current size of the plant’s root ball rather than its expected future size. Putting a small plant in a massive pot leads to “over-potting,” where the excess soil stays wet for too long because there are no roots to absorb the water. Choose a pot with at least one large drainage hole, and consider using a mesh screen over the hole to prevent soil loss. Terracotta is an excellent choice for beginners because it helps regulate moisture levels naturally through evaporation.
Before you begin the planting process, ensure that your work area and all tools are clean and free of pathogens. You should wash your pots with a mild soap solution if they have been used for other plants previously. Having everything organized beforehand prevents the roots from being exposed to the air for longer than necessary. A little preparation goes a long way in reducing the transplant shock that can occur during the planting phase.
Once the plant is situated in its new home, avoid the temptation to water it immediately after the soil is in place. Small tears in the roots are inevitable during the process, and these need a few days to heal in dry soil. Watering too soon can allow bacteria or fungi to enter these wounds, leading to root rot before the plant even gets established. Give the plant about a week of rest in a bright but shaded area before providing its first deep drink.
Propagation from cuttings
One of the most rewarding aspects of growing this succulent is how easily it can be propagated from stem cuttings. This method allows you to create identical clones of your favorite plant to expand your collection or share with friends. You should select a healthy, vigorous branch that has a well-formed rosette at the tip for the best results. Use a sharp, sterilized knife or pruning shears to make a clean cut several inches below the rosette.
More articles on this topic
After taking the cutting, it is absolutely essential to let the cut end dry out and form a callous. This process usually takes between three and seven days, depending on the thickness of the stem and the humidity of the air. Place the cuttings in a cool, dry place out of direct sunlight during this waiting period to prevent shriveling. The callous acts as a protective barrier that prevents pathogens from entering the stem once it is placed in the soil.
Once the callous has formed, you can insert the stem into a pot filled with a slightly moistened, sandy succulent mix. You do not need to use rooting hormones, as these plants are naturally inclined to produce roots from the nodes along the stem. Place the pot in a location with bright, indirect light but avoid harsh afternoon sun that could burn the young cutting. The goal is to keep the environment stable while the new root system begins to develop under the surface.
Patience is key during the rooting process, as it can take several weeks for the first roots to appear and take hold. You can check for progress by very gently tugging on the stem; if you feel resistance, it means roots are starting to grow. Avoid the common mistake of constantly pulling the cutting out of the soil to check, as this damages the fragile new root hairs. Once established, you can gradually transition the new plant to its permanent location and care routine.
Growing from seeds
While propagation from cuttings is faster, growing tree aeoniums from seeds offers a fascinating look at the plant’s entire life cycle. You should obtain high-quality seeds from a reputable supplier or harvest them from your own plants after a successful flowering period. The seeds are very fine, almost like dust, so handle them carefully to avoid losing them in a breeze. Use a shallow tray filled with a finely sifted seed-starting mix that has been pre-moistened for the best results.
More articles on this topic
Sow the seeds evenly across the surface of the soil and do not cover them, as they require light to trigger germination. You can use a spray bottle to gently mist the surface, ensuring the seeds make good contact with the substrate without being washed away. Covering the tray with a clear plastic lid or a plastic bag helps maintain the high humidity levels needed for the first stage. Place the tray in a warm spot with bright, indirect light but never in direct sunlight which would overheat the tray.
Germination typically occurs within two to four weeks, appearing as tiny green specks on the surface of the soil. Once you see the seedlings, you should gradually increase the ventilation by cracking open the plastic cover for longer periods each day. This helps the young plants harden off and prevents the growth of mold or algae on the soil surface. Keep the soil consistently moist but never soggy during this very early stage of their development.
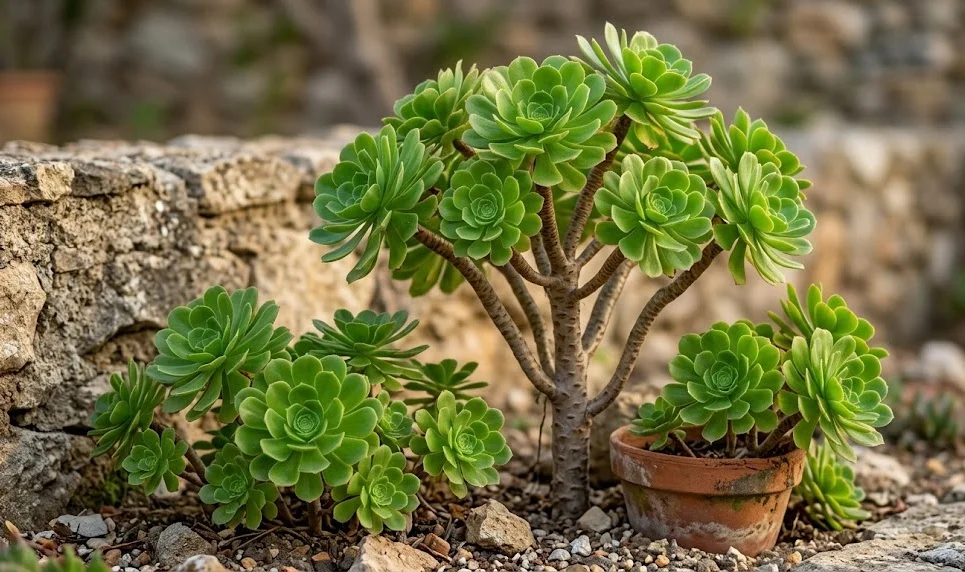
As the seedlings grow and develop their first true rosettes, they can be carefully transplanted into individual small pots. This is a delicate task that should only be done once the plants are large enough to handle without crushing their stems. Use a small spoon or a dedicated transplanting tool to lift the seedlings along with their surrounding soil to minimize root disturbance. With proper care, these tiny seedlings will eventually grow into the majestic tree-like structures that define the species.
Offset separation techniques
The tree aeonium naturally produces offsets, or “pups,” that grow from the base of the main stem or along the branches. These offsets are a great way to propagate the plant because they often already have their own small root systems started. You should wait until the offset is at least a few inches in size before attempting to separate it from the parent. Larger offsets have more stored energy and a higher success rate when transitioning to their own containers.
To remove an offset, you can sometimes gently twist it away from the main stem, but using a clean blade is more precise. Make the cut as close to the parent plant as possible to give the offset a long enough stem for planting. Just like with stem cuttings, these offsets need time to callous over for several days before they are introduced to new soil. This step is non-negotiable if you want to avoid losing your new plants to fungal infections or rot.
Prepare a small pot for each offset using the same high-quality succulent mix you use for mature specimens. Plant the offset so that the base of the rosette sits just above the soil line to ensure good air circulation. You might need to use a few small stones or a toothpick to help keep the small plant upright until its roots anchor it firmly. Place the new plants in a sheltered spot with filtered light and watch them closely for signs of new growth.
Separating offsets not only provides you with new plants but also helps the parent plant maintain a pleasing shape and direct its energy. If a parent plant becomes overcrowded with too many small rosettes, the air circulation can suffer and the overall growth may slow down. By thinning out the offsets periodically, you keep the entire collection healthier and more vibrant. It is a win-win situation for the gardener and the plants involved in the process.