Starting your journey with the mole plant begins with a clear understanding of its reproductive cycle and soil requirements. This species is primarily grown from seeds, which possess a remarkable ability to germinate under various conditions. Success depends on timing your planting to match the natural rhythm of the biennial lifecycle. By following professional standards for soil preparation and seed placement, you can ensure a high germination rate and healthy initial growth.
The best time to sow seeds is during the late summer or early autumn, mimicking the natural dispersal period of the plant. In the wild, the seeds fall to the ground as the parent plant dies, remaining dormant until the right moisture and temperature levels are met. If you are starting with purchased seeds, you can also sow them in early spring after the risk of hard frost has passed. Early sowing allows the young plants enough time to develop a strong root system before the summer heat arrives.
Direct sowing is generally preferred because the mole plant develops a deep taproot that does not take kindly to being disturbed. Choose a location with loose, friable soil that allows the root to penetrate deeply without meeting resistance. Clear the area of any aggressive weeds or large stones that might interfere with the young seedlings. A clean seedbed provides the perfect environment for the emerging plants to establish themselves without competition for light and space.
When placing the seeds, aim for a depth of about one to two centimeters, ensuring they have good contact with the surrounding soil. Space the seeds roughly thirty centimeters apart if you want a dense grouping, or further apart for individual specimen displays. Lightly water the area after sowing to settle the soil around the seeds and trigger the germination process. With consistent moisture and moderate temperatures, you should see the first green shoots appearing within two to three weeks.
Soil preparation and site selection
Before you put a single seed into the ground, take the time to evaluate and prepare your planting site thoroughly. The mole plant is not particularly fussy about soil fertility, but it absolutely requires excellent drainage to survive. If your garden has heavy, compacted soil, you should work in some coarse sand or fine gravel to improve the internal structure. This preparation prevents the roots from sitting in cold, stagnant water during the winter months, which is the most common cause of failure.
More articles on this topic
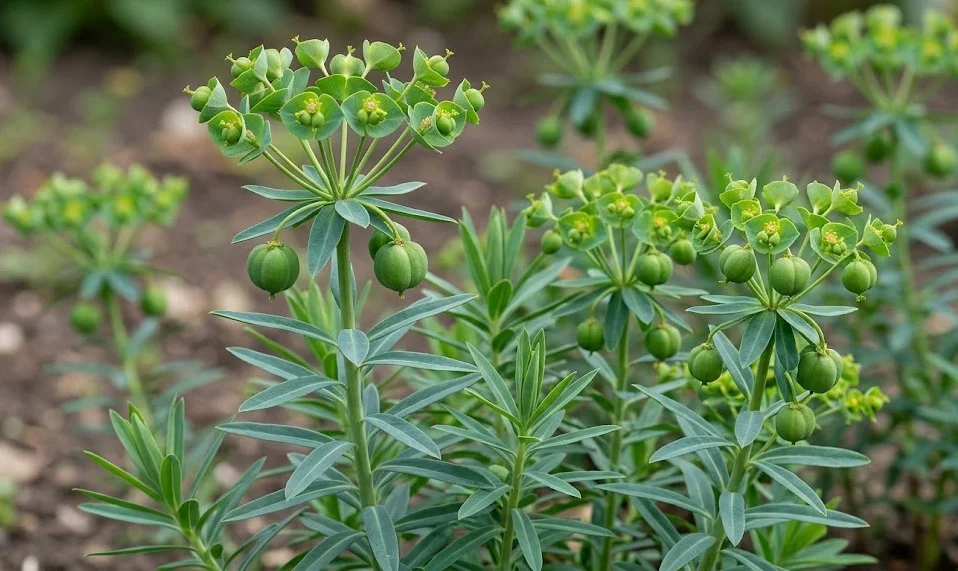
Choose a spot that receives plenty of sunlight, as this will encourage a sturdy and symmetrical growth habit. While the plant can tolerate partial shade, it often becomes leggy and may require support if it does not get enough direct light. A south-facing slope or an open area away from the shadow of large trees is usually the best choice for optimal health. Adequate light also ensures that the foliage maintains its attractive glaucous, blue-green coloration throughout the year.
The presence of other plants in the vicinity should also be considered when selecting your planting site. Because the mole plant can grow quite tall, it should be positioned where it won’t overshadow smaller, sun-loving perennials. It works exceptionally well when planted behind lower-growing herbs or drought-tolerant groundcovers. Consider the overall flow of your garden and how the architectural form of the mole plant will contribute to the visual landscape in both its first and second years.
If you are planting specifically to deter moles, place the seeds or young plants around the perimeter of the area you wish to protect. Traditional wisdom suggests that the roots release substances into the soil that rodents find unpleasant or irritating. While the effectiveness of this is a subject of debate among gardeners, the strategic placement adds a functional layer to your garden design. Regardless of its pest-repelling qualities, the plant remains a striking addition to any border or specialized garden bed.
Methods of vegetative propagation
While seeds are the most common way to propagate the mole plant, it is technically possible to use cuttings, though this is much more challenging. Cuttings should be taken from the young, non-flowering shoots of first-year plants during the active growing season. Use a sharp, sterilized knife to take a cutting of about ten to fifteen centimeters in length. Because of the toxic sap, it is essential to wear gloves and exercise extreme caution during this delicate process.
More articles on this topic
Once the cutting is removed, the cut end must be dipped in cold water or sealed with charcoal dust to stop the flow of the milky latex. Allow the cutting to callus over for twenty-four to forty-eight hours in a cool, shaded spot before attempting to plant it. This callusing period is vital as it prevents the open wound from rotting when it comes into contact with the rooting medium. Without a proper callus, the success rate for Euphorbia cuttings is extremely low due to their high moisture content.
The rooting medium should be very porous, consisting mainly of perlite, vermiculite, or coarse sand with only a small amount of peat. Insert the callused cutting into the medium and place it in a bright location out of direct sunlight. Keep the medium barely moist, as excess water will quickly cause the base of the cutting to turn black and decay. Patience is required, as it can take several weeks or even months for a functional root system to develop from a stem cutting.
Given the difficulties and the low success rate of cuttings, most professionals recommend sticking with seed propagation for this species. The plant produces such an abundance of seeds that there is rarely a need to struggle with vegetative methods. Furthermore, plants grown from seeds tend to be more vigorous and better adapted to the local environment. If you want to multiply a specific specimen, focusing on collecting its seeds is the most reliable way to ensure a new generation of healthy plants.
Managing seedlings and transplanting
Once your seeds have germinated and the seedlings have developed their first two pairs of true leaves, you can begin the thinning process. Remove the smaller, weaker-looking plants to give the more robust ones enough room to expand their foliage. This step is important because overcrowded plants will compete for nutrients and may become stunted. Aim for a final spacing that allows the mature plants to grow without touching their neighbors, promoting better air circulation.
If you find that you need to move a seedling to a different part of the garden, do so as early as possible. The mole plant develops a long taproot very quickly, and once this root is established, the plant becomes very difficult to transplant successfully. Use a trowel to dig deeply around the seedling, taking care to keep as much of the root ball intact as possible. The less the primary root is disturbed, the higher the chance that the plant will survive the relocation.
After transplanting, water the seedling thoroughly to help settle the soil and reduce transplant shock. You may want to provide a bit of temporary shade for a few days if the weather is particularly hot or sunny. Monitor the plant closely for signs of wilting, which would indicate that the roots are struggling to take up enough water. Most young plants will recover quickly if moved early enough in the spring or during a cool, overcast period in the autumn.
As the seedlings grow into their first-year rosettes, they will become much more resilient and require less frequent attention. You can then begin to treat them like established plants, focusing on keeping the surrounding area free of weeds. These young rosettes are quite attractive in their own right and provide a green presence in the garden even during the winter months. Proper care during these early stages sets the foundation for a spectacular floral display in the plant’s second and final year.