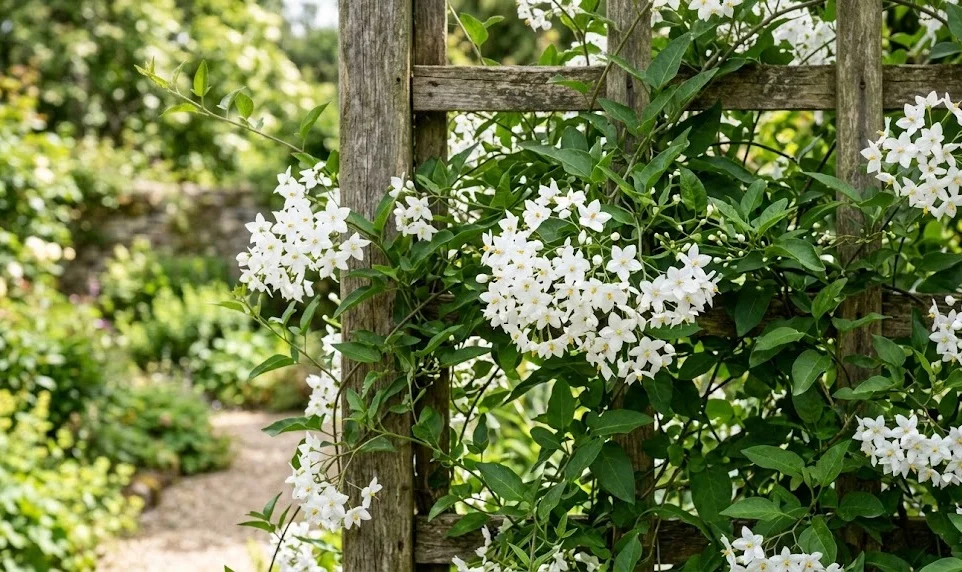
Successful cultivation of the jasmine nightshade begins with a deep understanding of the proper planting techniques and propagation methods. This vine is known for its adaptability, but giving it the best possible start is crucial for long-term vigor and flower production. Whether you are starting from a young nursery plant or attempting to create new plants from scratch, precision is your best friend. In this article, we will explore the professional ways to establish and multiply this beautiful climber in your garden.
Selecting the right time for planting is the first step toward a successful outcome in your horticultural journey. You should generally aim for the spring months when the soil has warmed up and the danger of frost has passed. Planting during this period allows the root system to establish itself before the intense heat of summer arrives. A well-timed start ensures that the vine can focus its energy on growth rather than just survival.
Preparation of the planting site is an area where many gardeners fail to put in enough effort. You must ensure the soil is loose, fertile, and free of competing weeds that might steal resources from the young plant. Integrating organic compost into the hole will provide a slow-release source of nutrients that supports early development. A professional touch in the beginning always leads to a more spectacular display as the seasons go by.
Propagation is a rewarding way to expand your collection or share this beautiful plant with friends and fellow enthusiasts. There are several methods you can use, ranging from simple cuttings to the more patient approach of growing from seeds. Each method has its own set of requirements and success rates, which we will detail in the following sections. Mastering these techniques will give you a sense of accomplishment and a deeper connection to the lifecycle of your garden.
Selecting and preparing the ideal site
Before you even pick up a shovel, you need to analyze your garden to find the spot that meets the vine’s specific needs. This climber requires a location that offers both structural support and the right balance of sunlight throughout the day. You should look for a place with well-draining soil to prevent the roots from sitting in stagnant water. Avoid low-lying areas of the garden where cold air might settle during the shoulder seasons.
More articles on this topic
Once the spot is chosen, the physical preparation of the soil is the next vital task for any serious gardener. You should dig a hole that is significantly wider than the current root ball of the plant to encourage lateral root spread. Breaking up the soil at the bottom of the hole will make it easier for the deep roots to penetrate the earth. This extra effort during site preparation pays off in the form of a more drought-resistant and stable plant.
The addition of organic matter during the planting process can transform average soil into a powerhouse of nutrition. Mixing in well-rotted manure or garden compost will improve the soil structure and its ability to hold moisture. You can also add a small amount of bone meal to encourage strong root development during the initial weeks. These amendments create a welcoming environment that reduces transplant shock and promotes immediate growth.
The final step in site preparation is ensuring that the support system is in place and ready for the new arrival. It is much easier to install a trellis or wire system before the plant is in the ground than after it has started to grow. Make sure the support is positioned close enough to the planting hole so that the young stems can reach it easily. A well-organized site is the hallmark of a professional approach to gardening and sets the stage for success.
Mastering the planting process
When it comes time to put the plant in the ground, handling the root ball with care is of the utmost importance. You should gently loosen any circling roots that have formed if the plant has been in a pot for a long time. This encourages the roots to grow outward into the new soil rather than continuing to circle the stem. Place the plant in the hole at the same depth it was in its original container to avoid stem rot.
More articles on this topic
Backfilling the hole should be done in stages, gently firming the soil as you go to remove any large air pockets. You want the soil to be snug around the roots but not so compacted that air and water cannot move through it. Using your hands rather than your feet to firm the soil allows for much better control and prevents damage to the delicate root system. This meticulous approach ensures that the plant feels secure and has immediate contact with its new environment.
Immediately after planting, a thorough watering is necessary to settle the soil and provide the plant with much-needed hydration. You should apply the water slowly so that it soaks deep into the ground rather than running off the surface. This initial watering is a critical step in reducing the stress of moving and helps the roots begin their journey into the surrounding soil. Think of this as the plant’s first real meal in its permanent home.
Applying a layer of mulch around the base of the plant will help regulate soil temperature and retain moisture in the coming weeks. You should keep the mulch a few inches away from the actual stem to prevent moisture from causing rot at the base. Organic mulches like wood chips or straw will eventually break down and further enrich the soil over time. This final touch completes the planting process and provides a professional finish to your new garden feature.
Propagating through softwood cuttings
Propagation from cuttings is one of the most effective ways to create identical copies of your favorite jasmine nightshade. You should take these cuttings in the late spring or early summer when the plant is in its most active growth phase. Look for healthy, non-flowering shoots that are flexible but start to feel a bit firm at the base. Using a sharp, sterilized knife or shears will ensure a clean cut that heals quickly and resists infection.
Each cutting should be about four to six inches long and contain at least two or three nodes where leaves are attached. Remove the lower leaves to expose the nodes, as this is where the new roots are most likely to emerge. You can dip the cut end into a rooting hormone powder to increase the speed and success rate of root formation. This professional technique gives the cutting the extra boost it needs to transition from a stem to an independent plant.
Place the prepared cuttings into a pot filled with a light, well-draining propagation mix, such as a blend of peat and perlite. You need to keep the environment humid, so covering the pot with a clear plastic bag or placing it in a propagator is a great idea. Keep the cuttings in a bright spot but out of direct sunlight to prevent them from drying out before they can grow roots. Patience is key during this phase, as it can take several weeks for the first signs of success to appear.
Once you see new growth and feel resistance when you gently tug on the cutting, you know that roots have successfully formed. You can then gradually acclimate the young plants to the outside air by removing the plastic cover for longer periods each day. After they have developed a strong root system, they can be moved into individual pots with regular potting soil. This process allows you to multiply your garden’s beauty with very little financial investment.
Growing from seeds and layering
While growing from seeds takes longer than cuttings, it can be a fascinating way to observe the entire lifecycle of the plant. You should collect the seeds from the mature berries in the autumn once they have turned dark and soft. Clean the seeds thoroughly to remove any fruit pulp, as this can contain inhibitors that prevent germination. Sowing them in a seed tray during late winter will give them a head start before the spring warmth arrives.
Keep the seed trays in a warm, bright location and maintain consistent moisture in the starting mix. Germination can be irregular, so do not be discouraged if some seeds take longer than others to sprout. Once the seedlings have developed their first set of true leaves, they are ready to be thinned or moved into small pots. This method requires more time and attention, but it is the most natural way to propagate any plant species.
Layering is another professional technique that is almost foolproof because the new plant remains attached to the parent during the process. You can take a flexible, low-growing stem and gently bend it down to the ground, burying a small section in the soil. Pinning the buried section down with a U-shaped wire will keep it in place and encourage roots to form at that point. After a few months, the buried section will have its own roots, and you can cut it away from the mother plant.
This method is particularly useful if you want to create a new plant nearby without the risk of a cutting failing. Because the “baby” plant is still receiving nutrients from the parent, it can survive even if environmental conditions are not perfect. Once the new root system is robust, you can transplant it to a different part of the garden or a new container. Professional gardeners often use a combination of these methods to ensure they always have healthy new plants ready to go.