Successful establishment of the harlequin glorybower begins with a strategic approach to both site selection and the timing of the planting process. This species is known for its adaptability, yet it responds exceptionally well to an environment tailored to its specific biological needs. Whether you are starting with a young nursery specimen or attempting to create new plants from scratch, precision is the key to success. Proper initial steps ensure that the shrub develops a robust root system capable of supporting years of vibrant growth.
The timing of planting is one of the most critical factors for ensuring the survival of a new specimen. Ideally, planting should take place in the early spring before the buds begin to break or in the mid-autumn when the soil is still warm. These periods allow the roots to establish themselves without the immediate pressure of extreme summer heat or winter freezes. Avoiding the height of summer minimizes the risk of transplant shock and excessive dehydration.
Site selection must account for the plant’s eventual size and its requirement for adequate light and air. It needs a spot that receives plenty of sunlight but remains sheltered from the most punishing winds. The soil at the chosen site should be well-draining and fertile, providing a rich base for the expansive root system. Taking the time to observe the movement of shadows across your garden will help you find the perfect location.
Preparation of the planting hole should not be rushed, as this is the only time you will have direct access to the deeper soil layers. The hole needs to be twice as wide as the root ball to allow for easy lateral expansion of the young roots. Mixing the excavated soil with high-quality organic compost improves the nutrient profile and physical structure of the medium. This enriched environment encourages the plant to move beyond the confines of its original pot quickly.
The planting process in detail
Once the hole is prepared, the actual placement of the shrub requires careful handling to avoid damaging the delicate root hairs. Gently remove the plant from its container and inspect the roots for any signs of being pot-bound. If the roots are circling tightly, use your fingers to lightly loosen them so they can grow outward. Position the plant in the center of the hole at the same depth it was growing in the nursery.
More articles on this topic
Backfilling the hole should be done in stages to eliminate any large air pockets that could cause the roots to dry out. Add the amended soil in layers, firming it down gently with your hands as you go. Be careful not to pack the soil too tightly, as this can impede water penetration and root growth. The goal is to create a stable environment that still allows for easy movement of air and water.
Watering immediately after planting is essential to settle the soil and provide the initial hydration the plant needs to recover. Apply water slowly at the base until the entire root zone is thoroughly saturated. This initial drenching also helps to establish good contact between the roots and the surrounding soil. After the water has soaked in, check the level of the soil and add a bit more if it has settled significantly.
Finishing the planting with a layer of mulch provides a protective barrier against the elements and competitors. Apply a three-inch layer of organic material around the base, being careful to keep it away from the actual trunk. This mulch will keep the soil moist, suppress weeds, and slowly add nutrients as it breaks down. It also gives the planting area a clean, professional appearance that enhances the garden’s overall look.
Propagation through softwood cuttings
Softwood cuttings are one of the most reliable ways to create identical clones of a particularly beautiful specimen. This process should be undertaken in early to mid-summer when the new growth is still flexible but has started to firm up. Select healthy stems that show no signs of pests or disease for the best chance of success. Using a sharp, sterilized knife or shears will ensure a clean cut that heals quickly.
More articles on this topic
Each cutting should be about four to six inches long and contain at least two or three leaf nodes. Remove the leaves from the bottom half of the cutting to reduce moisture loss and expose the nodes where roots will form. Dipping the cut end into a rooting hormone powder can significantly speed up the development of the new root system. This small step provides the chemical signal the plant needs to transition from stem growth to root production.
The cuttings should be placed into a well-draining rooting medium, such as a mix of perlite and peat moss. Insert them deep enough to stay upright and ensure that the bottom nodes are completely covered by the substrate. Keeping the environment humid is vital, so covering the pots with a clear plastic dome or bag is often necessary. Place the containers in a bright location but out of direct sunlight to prevent overheating.
Monitoring the cuttings involves checking for moisture levels and signs of new growth over several weeks. Gently tugging on the stem after a month can tell you if roots have begun to anchor the plant. Once a strong root system has developed, the young plants can be gradually acclimated to lower humidity levels. At this stage, they are ready to be potted individually into a standard potting mix to continue their development.
Growing from seeds and root cuttings
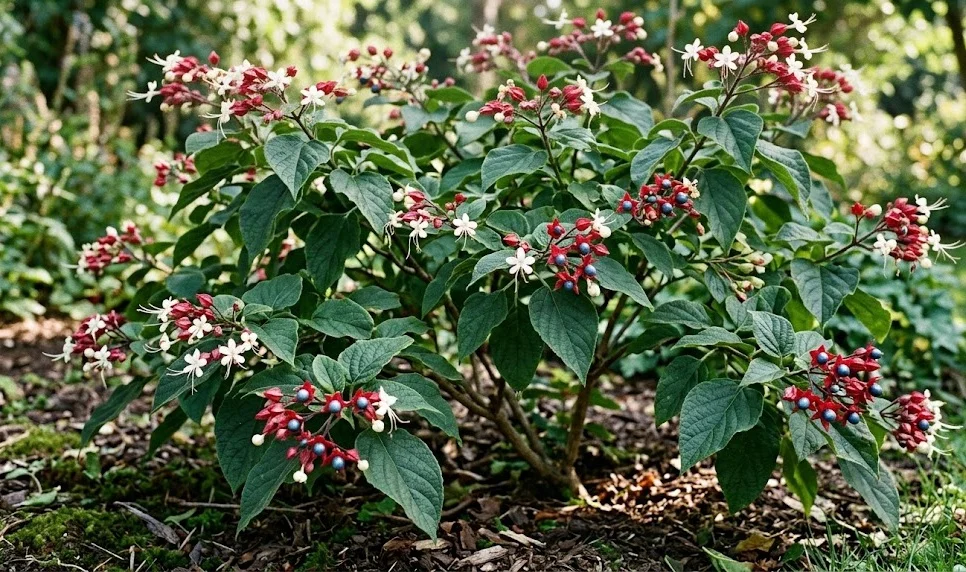
Propagating from seeds is a rewarding process, though it requires more patience than using cuttings. The metallic blue berries should be collected in late autumn once they are fully ripe and the calyxes have turned red. Clean the pulp from the seeds immediately to prevent rot and store them in a cool, dry place until spring. Some gardeners find that a period of cold stratification improves the germination rates significantly.
Sow the seeds in a light, sterile seed-starting mix and cover them with just a thin layer of soil. Keep the tray in a warm location with consistent moisture to encourage the first sprouts to emerge. Germination can be irregular, so do not give up if some seeds take longer than others to show life. Once the seedlings have several sets of true leaves, they can be moved to larger pots.
Root cuttings are an alternative method that takes advantage of the plant’s natural tendency to sucker. This is best done during the dormant winter months when the plant is not actively growing. Dig down carefully near the base of an established shrub to locate a healthy, vigorous root about the thickness of a pencil. Cut a three-inch section and bury it horizontally in a pot filled with sandy soil.
These root sections will eventually send up new shoots from the nodes along their length. This method often results in very hardy young plants because they start with a significant energy reserve from the parent root. Keep the pots in a sheltered, frost-free area until the new growth is well-established. By the following spring, these new plants will be ready to join the garden landscape.