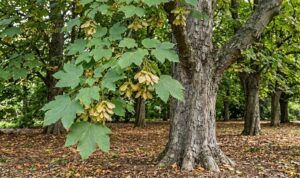
Establishing a new evergreen clematis in your landscape is a project that yields significant rewards when performed with technical precision and care. The initial stages of site selection and soil preparation are the most critical factors in determining whether the vine will reach its full potential. Unlike deciduous varieties, this evergreen climber requires a specific set of conditions to maintain its foliage through the colder months. A successful planting process ensures that the roots are well-positioned to support rapid growth and abundant flowering in the coming years.
Before you even dig a hole, it is essential to analyze the microclimate of your chosen location to ensure it meets the plant’s basic biological needs. The ideal spot provides full sun for the foliage while keeping the root zone sheltered from the drying effects of direct heat. You should also consider the prevailing wind patterns, as strong winter gusts can strip moisture from the evergreen leaves very quickly. Taking the time to observe these environmental factors over a few days will lead to a much more successful establishment.
Soil preparation is the next pillar of a successful planting project, as the evergreen clematis is a heavy feeder that thrives in fertile ground. You should enrich the planting area with high-quality compost or well-rotted manure to improve both the nutrient content and the soil structure. Adding a handful of bone meal to the bottom of the hole provides a slow-release source of phosphorus that is vital for early root development. These initial amendments create a reservoir of energy that the young plant can draw upon as it adjusts to its new home.
The technical act of placing the plant in the ground requires a gentle touch and attention to the depth of the root ball. Unlike some other clematis varieties, the evergreen species should be planted at the same depth it was growing in its original container. Burying the stems too deeply can lead to rot, while planting too shallowly may expose the sensitive upper roots to environmental stress. Firming the soil gently around the roots removes air pockets and ensures immediate contact between the plant and its new environment.
Selection of the ideal planting site
Finding the perfect home for an evergreen clematis requires a deep understanding of how light and shadow move across your garden throughout the day. The plant desperately needs at least six hours of bright sunlight to produce its signature white, almond-scented blossoms in early spring. However, the base of the plant must remain in deep shade to prevent the delicate root system from overheating during the summer. This “sun on top, shade on bottom” requirement is best met by planting near a low wall or behind a dense cluster of perennials.
More articles on this topic
The proximity to a sturdy support structure is another essential consideration when choosing a location for this vigorous climber. Since the vine can reach lengths of up to five or six meters, it needs a wall, fence, or pergola that can handle its significant weight and mass. You should ensure that the support is already in place before planting to avoid disturbing the roots later on with construction. A well-placed trellis not only supports the plant but also allows you to control the direction of its growth for maximum aesthetic impact.
Air circulation is often an overlooked factor in site selection, yet it is critical for preventing the development of fungal diseases. The site should be open enough to allow a gentle breeze to pass through the foliage, which helps keep the leaves dry after a rain. However, the location must also provide some protection from the harsh, drying winds that often occur during the winter months. Finding a spot that balances these two opposing needs is the hallmark of an experienced and thoughtful gardener.
Finally, you must consider the long-term spatial requirements of the plant as it expands to its mature size. Planting an evergreen clematis too close to other vigorous growers can lead to intense competition for water and soil nutrients. Give the vine plenty of room to breathe and ensure that it will not eventually overwhelm its neighbors or block important walkways. By planning for the future dimensions of the plant, you create a harmonious garden environment where every species has the space it needs to thrive.
The technical process of transplantation
When you are ready to move your clematis from its pot to the garden, the first step is to ensure the plant is well-hydrated. Watering the container thoroughly an hour before transplantation makes the root ball more cohesive and easier to handle without causing damage. Dig a hole that is twice as wide as the current root ball but no deeper than the height of the pot. This extra width allows you to backfill with enriched soil, giving the new roots an easy medium to grow into.
More articles on this topic
Carefully remove the plant from its container by turning it sideways and supporting the main stems with one hand. If the roots are tightly coiled around the edge, you should gently tease them outward with your fingers to encourage them to explore the new soil. Place the root ball in the center of the hole and check the height to ensure it sits flush with the surrounding garden bed. This is the moment to verify that the plant is straight and positioned correctly against its intended support structure.
Backfilling the hole should be done in stages, watering halfway through to settle the soil and remove any large air gaps. Use a mixture of the native garden soil and the organic amendments you prepared earlier to fill the remaining space. Press down firmly but avoid using your full body weight, as over-compacting the soil can restrict root respiration and water movement. This measured approach ensures that the plant is stable and has immediate access to the moisture and nutrients it needs.
The final step in the transplantation process is the application of a thick layer of mulch and a long, slow watering session. The mulch serves to protect the newly disturbed soil from erosion and helps maintain the cool root temperatures the plant requires. Direct the water at the base of the plant to encourage the roots to grow downward into the deeper layers of the earth. Monitoring the plant daily for the first two weeks will help you catch any signs of transplant shock and intervene with extra water if necessary.
Methods for successful propagation
Propagating the evergreen clematis is a fascinating way to expand your garden collection or share a beloved specimen with other enthusiasts. The most common and reliable method for home gardeners is taking semi-ripe cuttings during the mid-summer months. You should select healthy, non-flowering shoots that have begun to turn slightly woody at the base but are still flexible at the tip. Using a sterilized blade, cut a section that includes at least two sets of leaves to provide enough energy for root formation.
The preparation of the cutting involves removing the lower set of leaves and dipping the wounded end into a rooting hormone powder. Insert the cutting into a pot filled with a well-draining mix of perlite and peat moss, ensuring the remaining leaves do not touch the soil surface. Place the pot in a warm, humid environment with bright but indirect light to prevent the cutting from drying out before it can form roots. Many gardeners use a plastic dome or a simple clear bag to maintain the high humidity levels required for success.
Layering is an alternative propagation technique that is often more successful for those who find cuttings to be a challenge. This method involves bending a low-growing, flexible stem down to the ground and partially burying a section of it in the soil. You should make a small nick in the underside of the stem where it touches the ground to stimulate the growth of new roots. Secure the stem in place with a landscape pin or a heavy stone and keep the area consistently moist throughout the following season.
Once the layered stem has developed a strong independent root system, it can be severed from the parent plant and moved to its new location. This process typically takes a full year, but it produces a much larger and more robust new plant than the cutting method. Both techniques require patience and attention to detail, but the reward is a genetically identical copy of your favorite evergreen climber. Experimenting with both methods will broaden your horticultural skills and ensure the continued presence of this beautiful vine in your garden.