Establishing a colony of coltsfoot requires a strategic approach that respects the plant’s aggressive growth habits while providing it with the necessary start. Unlike many common garden flowers, this species is often introduced for its medicinal value or its ability to stabilize soil on slopes and embankments. The success of the planting process depends heavily on selecting the right site and timing the intervention to match the plant’s natural dormant periods. Proper planning at the outset prevents future management headaches and ensures a healthy, self-sustaining population.
Site selection and soil preparation
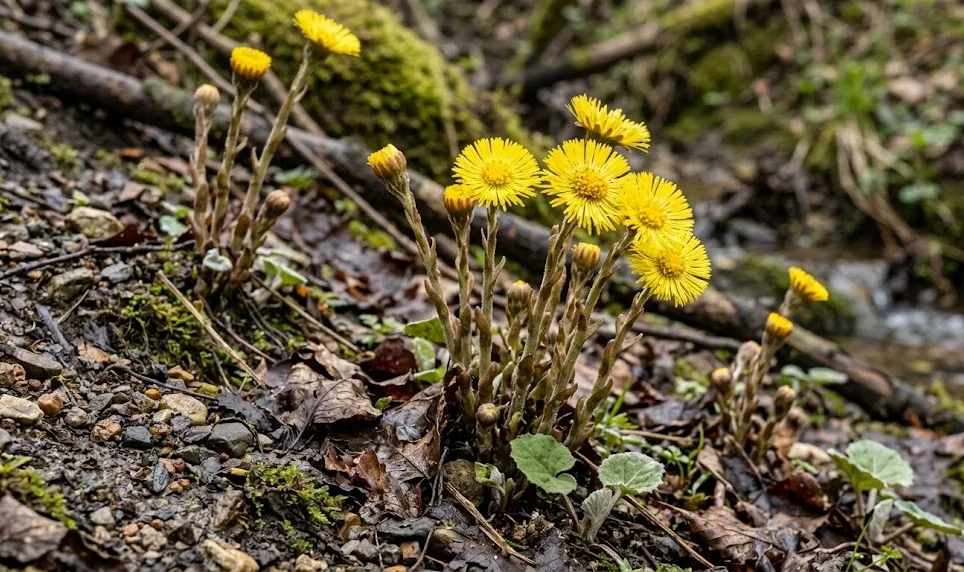
Choosing the correct location is the most important decision when planning to plant coltsfoot in a new area. This plant naturally thrives in areas with high moisture levels and heavy soil, such as the banks of streams, ditches, or damp meadows. It is also a pioneer species, meaning it excels in colonizing disturbed ground where other plants might struggle to find a foothold. Ensuring that the site has access to full sun or partial shade will provide the energy needed for the plant to establish its extensive root system.
Soil preparation for coltsfoot does not require the intensive fertilization that many vegetable crops demand, but it does benefit from some structural attention. If the chosen site has very light, sandy soil, incorporating organic matter like well-rotted compost or peat can help improve water retention. The plant prefers a neutral to slightly alkaline pH, so testing the soil beforehand is a wise professional step. If the soil is excessively acidic, a light application of agricultural lime can be worked into the top layer before planting.
Because coltsfoot spreads through an underground network of rhizomes, it is essential to consider the long-term boundaries of the planting site. If you do not want the plant to wander into adjacent flower beds or lawns, you should install a physical barrier at the time of planting. A plastic or metal edging buried at least thirty centimeters deep will usually be enough to contain the creeping roots. Planning for this containment during the site preparation phase is much easier than trying to retroactively control a spreading colony.
Clear the site of any aggressive perennial weeds that might compete with the young coltsfoot plants as they try to establish themselves. While mature coltsfoot is very competitive, the initial stages of growth can be hindered by dense mats of grass or other invasive species. Turning the soil over and removing large roots and stones creates a hospitable environment for the new rhizomes to expand. Once the site is cleared and amended, a light tilling will leave the soil loose and ready for the propagation material.
More articles on this topic
Propagation via rhizome division
The most reliable and common method for propagating coltsfoot is through the division of its underground rhizomes. This process is best performed during the plant’s dormant period in late autumn or very early spring before the flower stalks begin to emerge. By using a sharp spade, you can lift sections of the root system from an established patch, ensuring that each piece has at least one or two healthy-looking buds or “eyes.” These segments are the building blocks of your new colony and should be handled with care to prevent drying out.
Once the rhizome sections have been collected, they should be replanted as quickly as possible to maintain their vitality. If there is a delay, keeping them in a cool, damp environment wrapped in moist burlap or placed in a bucket of wet sand will preserve them for a short time. When planting, place the rhizome segments horizontally in the prepared soil at a depth of about five to ten centimeters. Firm the soil over the top to ensure good root-to-soil contact, which is crucial for early growth.
Spacing between the planted rhizomes will determine how quickly the area becomes fully covered by the coltsfoot colony. For a relatively fast fill, placing the segments about thirty to forty centimeters apart is a standard professional recommendation. This gives each plant enough room to expand its own root system without immediate competition from its neighbors. Within a single growing season, these individual points of growth will begin to merge into a continuous carpet of foliage.
After planting the rhizome divisions, a thorough watering is necessary to settle the soil and eliminate any air pockets around the roots. Even if the soil is naturally damp, this initial irrigation provides the moisture needed to trigger the dormant buds into active growth. If planting in the autumn, a light mulch can be applied to protect the new sections from extreme temperature fluctuations during the winter. By the time spring arrives, the rhizomes will be well-positioned to send up their first golden flowers.
More articles on this topic
Growing from seed
While rhizome division is faster, growing coltsfoot from seed is a viable option if you need to produce a large number of plants or are starting from scratch. The seeds of coltsfoot are equipped with a feathery pappus, similar to dandelions, which allows them to be easily carried by the wind. Because of this, the seeds have a relatively short viability period and should be sown as soon as they are ripe in the late spring or early summer. Collecting the seeds just as the “clock” begins to expand ensures that you have the freshest possible material.
To start the seeds, a shallow tray filled with a light, seed-starting mix is usually the most effective method for professional results. The seeds should be pressed lightly into the surface of the moist soil but not covered deeply, as they often require some light to stimulate germination. Keeping the tray in a warm, bright location and ensuring the soil remains consistently moist will lead to sprouts within a couple of weeks. Once the seedlings have developed their first true leaves and are large enough to handle, they can be transplanted into individual pots.
Hardening off the young coltsfoot plants is a critical step before they are moved into their permanent positions in the landscape. This involves gradually exposing them to outdoor conditions over a period of a week or two to prevent transplant shock. Start by placing them in a sheltered spot for a few hours a day and slowly increase their time in the sun and wind. This process builds the physical resilience needed for the plants to survive the transition from a controlled environment to the open field.
Transplanting the seedlings into the prepared garden site should ideally take place during a period of overcast weather or in the late afternoon. This reduces the immediate stress of the sun on the young plants while they are trying to establish their roots in the new soil. Space the seedlings at the same interval as you would for rhizome segments to allow for future expansion. With regular watering and a bit of attention during the first few weeks, these seedlings will quickly grow into a robust and healthy colony.
Maintenance during the establishment phase
The first year after planting is the most critical time for the long-term success of a coltsfoot colony. During this establishment phase, the plants are focusing most of their energy on developing the underground rhizome network rather than producing massive amounts of top growth. It is essential to keep the area well-watered, especially during dry spells, as the young root systems are not yet deep enough to access subsoil moisture. Consistent moisture levels prevent the plants from going into a stress-induced dormancy that could stunt their growth.
Monitoring for invasive weeds remains a top priority during the first few months after planting or sowing. Because the coltsfoot canopy has not yet fully closed, there is plenty of open soil where opportunistic weeds can take root. Regular hand-weeding prevents these competitors from stealing nutrients and water from the developing coltsfoot plants. A light layer of mulch can also help suppress weed growth while maintaining the soil moisture levels that coltsfoot prefers.
Observing the development of the foliage during the first summer provides clues about the health of the new planting. If the leaves are large, vibrant green, and free of significant pest damage, it indicates that the site and soil conditions are suitable. If the growth seems stunted or the leaves are yellowing, it may be necessary to provide a light application of organic fertilizer or to check the soil pH again. Making these small adjustments early on ensures that the colony enters its first winter in a strong and healthy state.
As the first growing season comes to a close, the coltsfoot will naturally begin to die back as it prepares for winter dormancy. This is a good time to inspect the area and see how far the rhizomes have already spread from their original planting points. If you notice any plants appearing outside of your intended boundaries, they can be easily removed or redirected while they are still young. This proactive management ensures that the coltsfoot remains a disciplined and valuable addition to your professional agricultural or horticultural project.