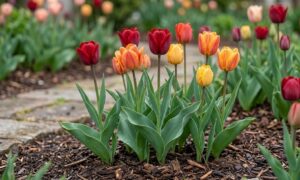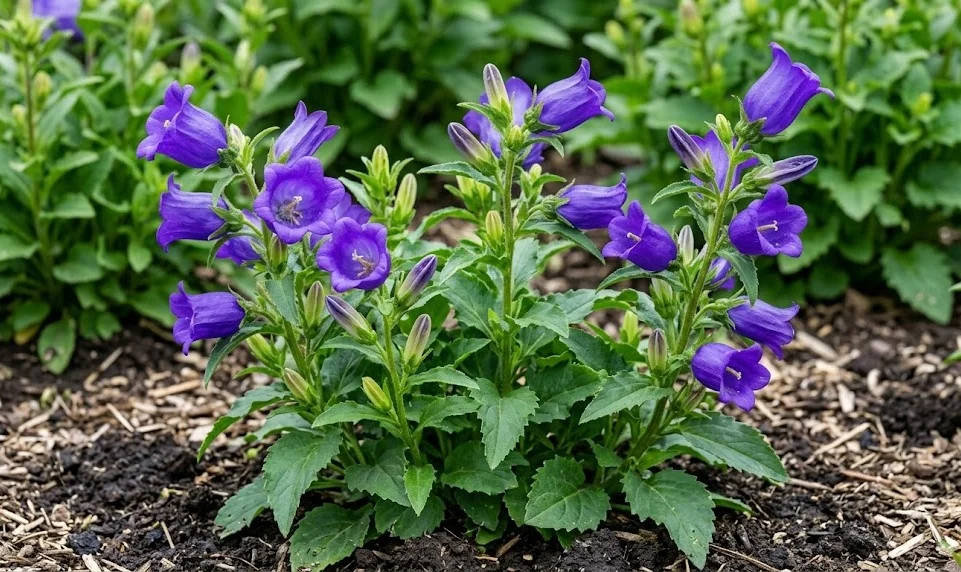
Starting a new gardening project begins with the careful selection of high-quality plant material and a solid plan for the future. The process of adding bellflowers to your landscape is an exciting endeavor that promises a beautiful return on your investment of time and effort. Whether you are planting nursery-grown specimens or starting from scratch with seeds, the fundamentals remain the same. Success in the garden is built on a foundation of proper timing, correct technique, and a genuine understanding of the plant’s natural life cycle.
Site preparation is the most critical step you can take before the actual planting begins in your backyard. You should clear the area of any perennial weeds that might compete with your new additions for water and space. Digging the soil to a depth of at least twelve inches allows the roots to penetrate easily and establish themselves quickly. Adding a few shovelfuls of well-aged compost will give the young plants the nutrient boost they need to get started.
The best time for planting is typically in the early spring or the early autumn when the weather is mild and the soil is moist. Avoid planting during the heat of midsummer, as the high temperatures can cause significant transplant shock and stress. If you must plant during a warm spell, be sure to provide extra shade and plenty of water for the first few weeks. Monitoring the weather forecast helps you choose a day that is overcast or followed by gentle rain.
Spacing is an essential consideration that depends heavily on the specific variety you have chosen for your garden. Low-growing groundcover types should be planted closer together to create a seamless carpet of foliage and flowers. Taller, upright varieties need more room to breathe and show off their impressive architectural form without being crowded. Always check the plant tag for the recommended spacing to ensure each specimen has the room it needs to reach its full potential.
Techniques for successful planting
When you are ready to put your plants in the ground, start by digging a hole that is twice as wide as the root ball. This loosened soil around the plant makes it much easier for the new roots to spread out into the surrounding environment. The depth of the hole should be just enough so that the top of the root ball is level with the soil surface. Planting too deeply can lead to crown rot, while planting too shallowly can cause the roots to dry out.
More articles on this topic
Gently remove the plant from its nursery container and inspect the roots for any signs of being pot-bound or circled. If the roots are tightly wound, you should carefully loosen them with your fingers to encourage outward growth after planting. Place the plant in the center of the hole and fill in the gaps with the original soil you removed. Firm the soil down gently with your hands to remove any large air pockets that could dry out the roots.
Immediately after planting, you must give each specimen a thorough watering to settle the soil and hydrate the root system. This initial drink is crucial for helping the plant recover from the stress of being moved and handled. If the soil settles significantly after watering, you can add a little more to bring it back up to the correct level. A layer of organic mulch around the base will help keep the moisture in the ground where it is needed most.
It is often helpful to provide some temporary protection if the weather turns unexpectedly harsh right after you finish planting. A simple cloche or even an inverted crate can shield tender young foliage from strong winds or a surprise late frost. Once you see new growth appearing, you can be confident that the plant has successfully established itself in its new home. Patience during this initial phase is a hallmark of a professional and experienced gardener.
Propagation from seeds
Growing these perennials from seeds is a rewarding way to produce a large number of plants at a very low cost. Many varieties require a period of cold stratification to break their dormancy and trigger the germination process. You can achieve this by sowing the seeds outdoors in the fall or by keeping them in the refrigerator for several weeks before planting. Following the specific requirements for each species is the key to achieving a high germination rate.
More articles on this topic
The seeds are often quite small and should be sown on the surface of a fine seed-starting mix rather than buried deeply. Light is frequently a requirement for germination, so a very thin dusting of vermiculite is usually all that is needed to cover them. Keep the soil consistently moist but never waterlogged by using a fine misting spray instead of a heavy watering can. A warm, bright location will encourage the tiny seedlings to emerge within a few weeks of sowing.
Once the seedlings have developed their first set of true leaves, they will need a bit more space to grow and develop. You can carefully transplant them into individual small pots to allow their root systems to expand without competition. Continuing to provide plenty of light and a gentle breeze will help them grow strong stems and healthy green foliage. Avoid the temptation to move them outdoors too early, as they are still quite delicate at this stage.
Hardening off is the process of gradually introducing your young plants to the outdoor environment before final planting. Start by placing them in a sheltered spot for a hour or two each day and slowly increase their exposure to sun and wind. This transition period prevents the foliage from being burned by the sun or damaged by the fluctuating outdoor temperatures. After a week or two of this routine, your home-grown plants will be ready to take their place in the garden.
Division and cuttings
Division is perhaps the easiest and most reliable way to propagate established clumps that have grown too large for their space. This task is best performed in the early spring just as the new shoots are beginning to poke through the soil. Lift the entire plant with a garden fork, being careful to keep as much of the root system intact as possible. Use a sharp knife or a spade to cut the crown into several smaller pieces, each with its own roots and shoots.
Replant the newly created divisions immediately into prepared soil at the same depth they were growing before. This method not only gives you new plants for free but also rejuvenates the original specimen, which might have been dying out in the center. Give the new transplants plenty of water to help them settle into their new locations and reduce the stress of the move. You will find that these divisions often grow with surprising vigor and may even bloom in their first year.
Taking basal cuttings is another professional technique that can be used to increase your collection of specific cultivars. In the spring, look for young, firm shoots that are emerging from the base of the plant near the ground. Cut these shoots cleanly at the base and remove the lower leaves before dipping the end in a rooting hormone powder. Place the cuttings in a pot filled with a gritty, well-draining compost and keep them in a humid, shaded environment.
With proper care, these cuttings will develop their own roots in just a few weeks and can then be moved into larger pots. This method allows you to create exact copies of your favorite plants, ensuring the color and form remain consistent. It is a great way to save money and gain a deeper understanding of how these perennials grow and reproduce. Successful propagation is one of the most satisfying aspects of being a skilled and dedicated gardener.