Successful parsnip cultivation begins with a precise understanding of the germination requirements and early-stage development of this slow-growing root vegetable. Unlike many other crops, parsnips require a significant amount of patience and attention to detail from the moment the seeds are placed in the ground. You must start with high-quality, fresh seeds, as their viability drops significantly after just one year of storage. Professional growers always recommend sourcing new seeds each season to ensure a high germination rate and a robust start for the agricultural magazin’s crop.
The timing of planting is critical because the soil must be warm enough to trigger biological activity but moist enough to support the long germination period. You should wait until the soil reaches a temperature of at least 10 degrees Celsius before considering the first sowing of the year. If the ground is too cold and wet, the seeds are likely to rot before they have a chance to sprout and establish their first roots. Many experienced agriculturists use soil thermometers to make informed decisions about the exact day to begin the planting process.
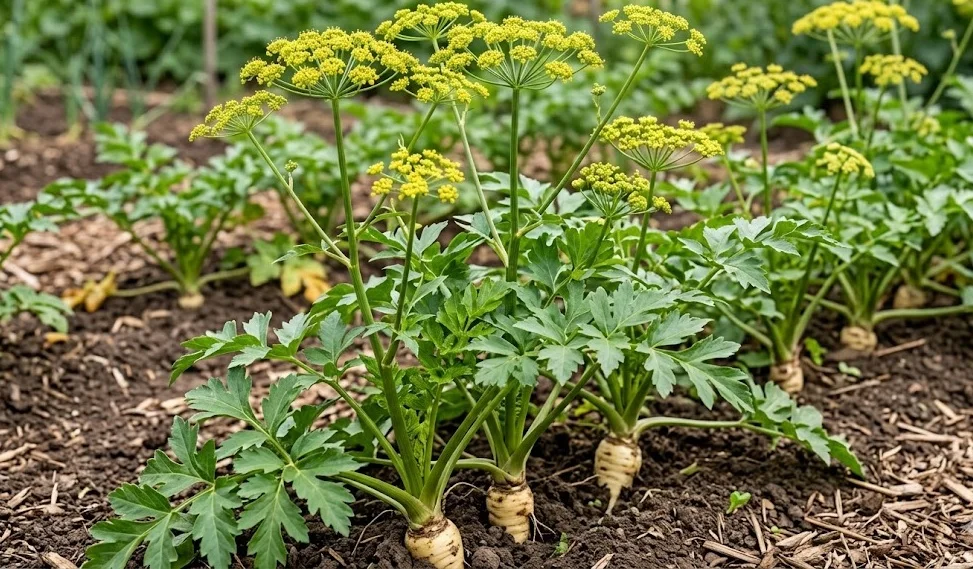
Preparing the site involves more than just digging a hole; it requires a deep, thorough loosening of the soil to accommodate the long taproot. You should remove any stones, clay clumps, or organic debris that could obstruct the downward growth of the vegetable. Any resistance encountered by the growing tip will cause the root to fork or bend, which decreases its commercial value and makes it harder to peel. A well-prepared bed provides the path of least resistance, allowing the parsnip to grow straight and deep into the nutrient-rich layers of the earth.
Once the physical environment is ready, the actual act of sowing must be done with great care to ensure even spacing and depth. You should sow the seeds approximately one to two centimeters deep, covering them lightly with fine soil or a specialized seed-starting mix. Because the seeds are small and thin, they can easily be washed away by heavy rain if not protected correctly. Maintaining consistent moisture throughout the three-week germination period is the most challenging but essential part of the planting phase for any professional grower.
Seed selection and quality
Choosing the right variety for your specific climatic conditions is the first step toward a successful parsnip harvest. You should look for cultivars that are known for their resistance to canker, a common disease that can ruin an otherwise healthy crop. Modern hybrids often offer improved vigor and more uniform root shapes compared to older heirloom varieties found in some catalogs. By selecting seeds that are well-suited to your local soil type, you increase the chances of a productive and trouble-free growing season.
More articles on this topic
Seed freshness is an absolute requirement for parsnips because they have one of the shortest shelf lives in the world of vegetable gardening. You should never use leftover seeds from previous years, as the germination rate typically falls below fifty percent after the first twelve months. Always check the packaging date on the seed packets to ensure you are working with the current season’s inventory. Professional growers often perform a quick germination test on a damp paper towel before planting to verify the quality of their seed lot.
Primed seeds are an excellent option for those who want to speed up the slow germination process and achieve more consistent results. These seeds have been pre-treated to start the internal biological processes, allowing them to sprout more quickly once they are sown in the field. You might find that primed seeds are more expensive, but the reduction in time spent monitoring empty beds often justifies the extra cost. For the professional magazin’s trials, using primed seeds can provide a more predictable timeline for research and photography purposes.
The genetic potential of the seed determines the final flavor profile and sugar content of the mature root vegetable. You should research the characteristics of different varieties, focusing on those that are described as having a sweet, nutty flavor and a smooth skin texture. Some varieties are specifically bred for late-season harvesting, while others are better suited for early lifting in the autumn months. Matching the variety to your intended harvest window is a professional strategy that ensures the highest culinary quality for the end consumer.
Sowing techniques and spacing
The method you choose for sowing can have a significant impact on the ease of maintenance and the ultimate yield of the parsnip bed. You should create shallow drills or furrows that are spaced approximately thirty to forty centimeters apart to allow for easy weeding and airflow. Within the rows, it is common practice to sow several seeds at each station every ten centimeters to ensure at least one plant survives. This “station sowing” technique is a professional way to manage the erratic germination rates often associated with this particular crop.
More articles on this topic
Using a marking system or a “navigator crop” like radish can help you identify where the parsnip rows are located during the long wait for sprouts. Since radishes germinate in just a few days, they act as row markers that allow you to cultivate the soil between the rows without hitting the hidden parsnip seeds. Once the parsnips finally appear, the radishes can be harvested or removed, leaving the space clear for the main crop to develop. This clever intercropping strategy is a hallmark of experienced growers who want to maximize their use of space and time.
The depth of sowing must be consistent across the entire bed to ensure that all seedlings emerge at roughly the same time. You can use a simple wooden stick or a specialized tool to create a uniform depth for every seed you place in the ground. If some seeds are buried too deep, they may run out of energy before reaching the surface, leading to a patchy and uneven stand of plants. A uniform emergence makes all subsequent tasks, such as thinning and fertilizing, much more efficient for the professional agriculturist.
After placing the seeds in the soil, you must firm the earth gently over them to ensure good seed-to-soil contact. You should use the back of a rake or your hands to press the soil down, but avoid compacting it so tightly that the delicate sprouts cannot push through. This firming action helps to wick moisture from the deeper layers of the soil up to the seeds, preventing them from drying out during the day. Proper contact between the seed and the damp earth is the primary physical trigger for the start of the germination process.
Managing the germination period
The three to four weeks following sowing are the most critical time in the entire life cycle of the parsnip plant. You must keep the soil surface constantly moist to prevent the formation of a hard crust that could trap the emerging seedlings underground. In dry weather, this might require light watering every morning and evening to ensure the seeds never experience moisture stress. Many professionals use specialized horticultural fleece or planks of wood to cover the rows and preserve soil moisture until the first green shoots appear.
Temperature fluctuations during the spring can delay germination and lead to uneven growth across the agricultural plot. You should be aware that while the seeds need warmth to start, excessive heat in the upper layer of the soil can also be detrimental. Using a light-colored mulch or row cover can help moderate the soil temperature and provide a more stable environment for the developing embryos. Consistency is the key to managing this phase, as parsnips are very sensitive to any environmental instability during their early life.
Once the first tiny, clover-like leaves appear, you must be extremely careful not to mistake them for common weeds. You should familiarize yourself with the exact appearance of a young parsnip seedling to avoid accidental removal during early-season maintenance. The first leaves are small and delicate, and they can be easily overwhelmed by faster-growing weeds if you are not vigilant. This is the period where the “navigator crop” strategy mentioned earlier pays off by clearly defining the area where you should be most cautious.
Bird and pest protection is often necessary during the germination phase to prevent the seeds or young sprouts from being disturbed. You might need to install fine netting over the beds to keep birds from scratching the soil and uncovering the shallow-sown seeds. Some soil-dwelling insects may also find the swelling seeds attractive, so using organic deterrents or barriers can be a helpful professional precaution. Protecting the crop from the very beginning ensures that you have a full and healthy population of plants to work with for the rest of the year.
Thinning and early establishment
Thinning is the process of removing excess seedlings to provide enough space for the remaining plants to reach their full potential size. You should wait until the seedlings are about five centimeters tall and have at least two sets of true leaves before performing this task. Using sharp scissors to snip off the unwanted plants at soil level is better than pulling them out, as pulling can disturb the roots of the neighboring parsnips. Proper thinning ensures that each root has the physical room and nutrient access it needs to grow large and straight.
The final spacing between the plants should be approximately ten to fifteen centimeters, depending on the size of the roots you wish to harvest. You should aim for a uniform distance between every plant in the row to prevent competition and ensure a consistent product for the magazine’s readers. If the plants are too close together, they will produce thin, spindly roots that are of much lower quality and value. Professional spacing is one of the easiest ways to improve the overall success rate of your root vegetable cultivation.
After thinning, the young plants enter a phase of rapid leaf development that sets the stage for the growth of the taproot. You should continue to provide regular water and monitor for any early signs of pest pressure or nutrient deficiencies in the new foliage. The goal during this period is to establish a strong, healthy canopy of green leaves that can fuel the expansion of the root throughout the summer. A strong start in the late spring and early summer is the best predictor of a heavy and high-quality winter harvest.
Finally, you should consider a light application of balanced organic fertilizer to support the establishment of the young parsnips. You must be careful not to use high-nitrogen products, as these can encourage excessive leaf growth at the expense of root development. A professional approach involves using slow-release nutrients that provide a steady supply of energy over many weeks. Once the plants are well-established and the canopy has started to close, they become much more resilient and require less frequent intervention from the grower.