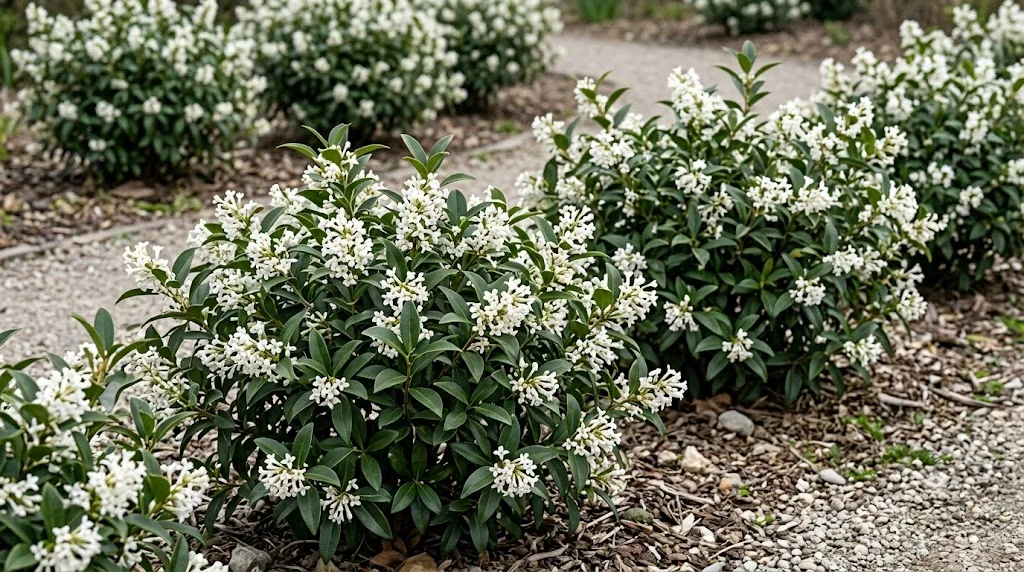

Planting Burkwood osmanthus carefully gives the shrub the strong foundation it needs for decades of healthy growth. Its evergreen foliage makes root establishment particularly important because the plant continues to lose moisture even outside the active growing season. A well-prepared site, correct planting depth, and reliable aftercare are far more valuable than adding excessive fertiliser to the planting hole. Propagation is slower than routine planting, but cuttings and layering allow gardeners to produce new shrubs that retain the characteristics of the parent plant.
The shrub can be planted as a solitary feature, an informal screen, a fragrant boundary, or part of an evergreen planting scheme. Its moderate growth rate means that spacing should be based on mature dimensions rather than the size of the young nursery plant. Crowded specimens may eventually compete for light, water, and air circulation. Generous spacing helps each plant develop a balanced crown and reduces the need for corrective pruning later.
Autumn and spring are generally the most favourable planting periods because the soil is usually moist and temperatures are moderate. In colder districts, spring planting may be safer because the roots have an entire growing season to establish before winter. In mild climates, early autumn planting allows root growth to continue while the soil remains warm. Planting during very hot, dry, frozen, or waterlogged conditions should be avoided.
Propagation requires patience because evergreen shrubs often root more slowly than soft-stemmed perennials. Semi-ripe cuttings taken during summer are usually the most practical method. Layering is slower but dependable because the new plant remains attached to the parent while roots develop. Seed propagation is rarely preferred because hybrid seedlings may vary and can take many years to reach flowering size.
Selecting the plant and preparing the site
Choose a nursery plant with evenly coloured foliage, a balanced framework, and no obvious signs of pests, dieback, or root congestion. A few roots at the edge of the pot are normal, but a thick, circling mass indicates that the plant has remained confined for too long. Severely pot-bound specimens may establish slowly unless the outer roots are loosened. The compost should smell fresh rather than sour or stagnant.
More articles on this topic
Before planting, place the potted shrub in water until the root ball is thoroughly moist. This is especially important when peat-based compost has dried and begun to repel water. A dry root ball may remain dry after planting even when the surrounding soil is watered. Allowing it to absorb moisture beforehand gives the roots a much safer start.
Clear perennial weeds from a broad area because established weeds compete strongly for water and nutrients. Dig the soil deeply enough to relieve compaction, but avoid bringing infertile subsoil to the surface unnecessarily. Organic matter can be incorporated across the planting zone where soil is poor. The finished ground should be workable, crumbly, and free-draining.
Spacing depends on whether the plant will grow as an individual shrub or as part of a hedge. Specimens should be given enough room to reach their expected spread without pressing against walls or neighbouring plants. Hedge plants can be positioned more closely, but they should not be crowded in the hope of creating an instant barrier. Correct spacing produces a healthier, denser screen over time.
Planting at the correct depth
The planting hole should be wider than the root ball but no deeper than necessary. A broad hole encourages roots to move into loosened surrounding soil, while an excessively deep hole may allow the shrub to settle below ground level. The upper surface of the root ball should finish level with, or slightly above, the surrounding soil. Deep planting can restrict oxygen around the crown and increase the risk of stem decay.
More articles on this topic
Remove the container carefully and inspect the roots before placing the shrub in the hole. Tight circling roots should be teased outward gently so that they do not continue growing around the root ball. If the roots are extremely dense, several shallow vertical cuts may help stimulate outward development. Avoid breaking away all the original compost, as this can damage fine feeder roots.
Backfill using the excavated soil, improved with a modest amount of mature organic matter when needed. Large quantities of rich compost or fertiliser should not be concentrated directly around the roots. A sharp difference between the planting hole and surrounding ground can discourage roots from expanding outward. Firm the soil gently in stages to remove large air pockets without compacting it heavily.
Water thoroughly after planting, even when the ground already appears moist. This settles the soil around the roots and reveals whether further backfilling is necessary. A mulch can then be spread across the root zone while keeping the stems clear. In exposed locations, a temporary stake may be useful until roots anchor the shrub securely.
Establishment after planting
The first growing season is critical because the plant has not yet developed an extensive root system. Check moisture frequently during dry or windy weather, especially when the shrub carries a dense canopy of evergreen leaves. Water slowly and deeply whenever the root zone begins to dry. Avoid giving small amounts that moisten only the soil surface.
A newly planted shrub may show mild leaf drop or temporary loss of lustre as it adjusts to its new environment. This does not always indicate serious failure, particularly after transplanting in warm or windy conditions. Continued wilting, widespread browning, or blackened shoots should prompt an examination of soil moisture and planting depth. Correcting the cause early can prevent permanent damage.
Weeds should be removed by hand or shallow cultivation to avoid disturbing developing roots. Grass growing close to the stem is especially competitive and can significantly reduce establishment. Maintaining a weed-free circle beneath the canopy directs available water toward the shrub. Mulch simplifies this task while also protecting soil structure.
Feeding should remain light during establishment because strong fertiliser does not compensate for poor root function. If the soil was prepared properly, nutrients are rarely the main limiting factor in the first few months. A modest balanced feed in the following spring is usually sufficient. The priority should be stable moisture, good drainage, and protection from severe exposure.
Propagating by cuttings and layering
Semi-ripe cuttings are taken from current-season shoots that have begun to firm but are not fully woody. Healthy, non-flowering side shoots are usually the best material. Cuttings approximately eight to twelve centimetres long can be prepared by trimming just below a leaf joint. The lower leaves should be removed to expose a clean section of stem for insertion.
A free-draining propagation medium is essential because cuttings need moisture without stagnation. A mixture of fine propagation compost and grit, perlite, or similar material helps maintain air around the developing roots. The cuttings should be inserted firmly so that the lower nodes are in contact with the medium. A humid environment reduces water loss while the stems lack functional roots.
Bright, indirect light and gentle warmth encourage rooting without overheating the foliage. Direct sun beneath a plastic cover can raise temperatures quickly and scorch the cuttings. Ventilation should be introduced regularly to reduce fungal growth and gradually acclimatise the young plants. Rooting may take several weeks or longer, so the medium must remain evenly moist throughout the process.
Layering provides an alternative when suitable low branches are available. A flexible shoot is bent to the ground, lightly wounded on the underside, and secured beneath a shallow layer of soil. The shoot tip remains exposed and continues growing while roots develop at the buried section. Once a strong root system has formed, the new plant can be separated from the parent and transplanted carefully.