Establishing a successful colony of these winter treasures requires a thoughtful approach to both the initial planting and the methods used for expansion. Because these plants are known for their longevity and their dislike of being moved, the preparation you do today will echo through your garden for many years. Whether you are starting with a single nursery-bought specimen or looking to multiply your existing stock, understanding the biological needs of the root system is essential. This guide will walk you through the professional techniques needed to ensure your plants thrive and spread effectively.
Selecting the perfect site is perhaps the most critical decision you will make in the entire process. These plants prefer a spot that offers dappled shade, particularly during the hot summer months when direct sunlight can be too intense. A location under deciduous trees is often ideal, as it provides shade in the summer but allows light to reach the plants in the winter when the trees have lost their leaves. Ensure the area is sheltered from harsh, drying winds that can damage the evergreen foliage during the coldest months.
Professional techniques for initial planting
The actual act of putting the plant in the ground should be done with care and precision to avoid any unnecessary stress. Start by digging a hole that is twice as wide as the current pot and just as deep, ensuring the sides are not “glazed” or smoothed over by the shovel. This allows the new roots to easily penetrate the surrounding soil and establish themselves quickly. Adding a handful of bone meal or a slow-release organic fertilizer to the bottom of the hole can provide a helpful boost for the first growing season.
When you remove the plant from its container, take a moment to inspect the root system for any signs of being pot-bound. If the roots are circling the bottom, gently tease them outward so they can grow away from the center once planted. Place the plant in the hole so that the crown is exactly level with the surrounding soil surface. Filling the hole with a mixture of native soil and high-quality compost will provide the best possible start for your new addition.
Once the plant is in place, firm the soil down gently with your hands to remove any large air pockets that could dry out the roots. It is important not to pack the soil too tightly, as this can impede water drainage and air circulation. Give the plant a thorough watering immediately after planting to help settle the soil and ensure the roots have good contact with the earth. A light layer of organic mulch around the base will help keep the moisture in and the weeds out during the critical establishment phase.
More articles on this topic
Spacing is another professional consideration that will affect the health of your garden in the long run. Since these plants eventually grow into large clumps, you should space individual specimens about 15 to 18 inches apart. This allows for adequate air flow between the plants, which is vital for preventing the spread of fungal spores. While the garden might look a little sparse at first, you will be rewarded with a lush, healthy carpet of green and white within a few seasons.
Effective methods for clump division
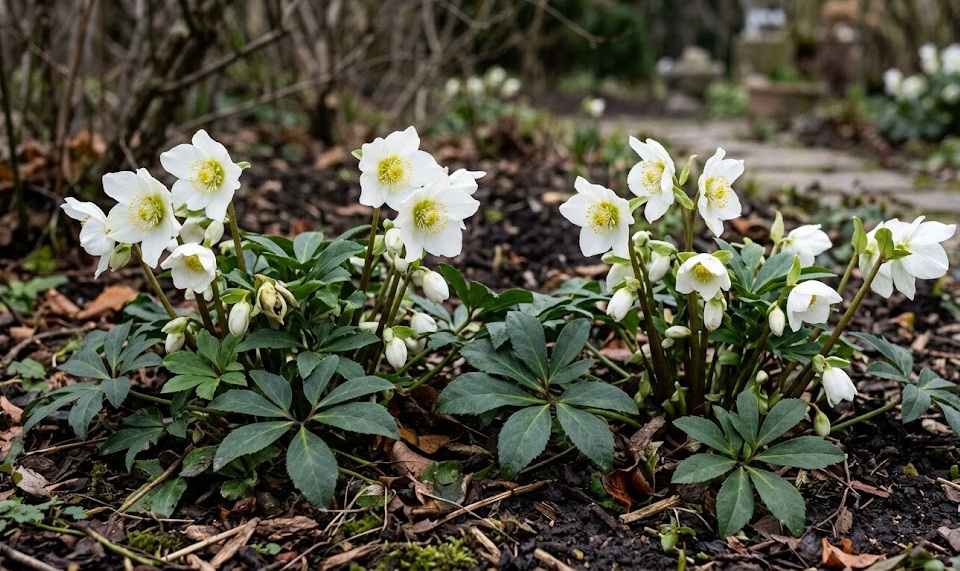
Division is the most common and reliable way to propagate your black hellebore while ensuring the new plants are identical to the parent. The best time to perform this task is in the early autumn or late winter, just after the flowering period has finished and before new growth begins in earnest. Using a sharp spade or a garden fork, carefully lift the entire clump out of the ground, taking as much of the root ball as possible. You should see distinct growth points or “noses” where the new stems will emerge.
Once the clump is lifted, you can usually see natural places where the plant wants to separate. You may need to use a sharp knife to cut through the tough, woody rhizome, ensuring that each new section has at least two or three healthy buds and a good portion of roots. Work quickly to prevent the exposed roots from drying out in the air. If the clump is particularly large and old, it may take some physical effort to divide it, but the plant is surprisingly tough.
Replant the newly created divisions immediately into prepared soil, following the same planting guidelines as you would for a new plant. It is often a good idea to water the parent plant thoroughly a few days before you plan to divide it, as this ensures the tissues are well-hydrated. Divisions may not bloom in their first year after the move, but they will quickly catch up once they have settled into their new locations. This method allows you to expand your collection significantly without any additional cost.
More articles on this topic
Maintaining the health of your divided plants requires a bit of extra attention during their first year. They will be more susceptible to drought and extreme temperatures until their root systems are fully re-established. Keep the soil consistently moist and avoid applying heavy fertilizers until you see strong new growth emerging. Division not only gives you more plants but also rejuvenates older clumps that may have become less productive in the center over time.
Growing new plants from collected seeds
For those who enjoy a bit of a challenge and aren’t in a hurry, growing from seed can be a very rewarding experience. Black hellebores often self-seed in the garden, and you can simply look for the tiny seedlings that appear around the base of mature plants. However, if you want to be more controlled, you can harvest the seeds once the pods have turned brown and are just beginning to split open. It is vital to sow the seeds as soon as they are ripe, as they lose their viability very quickly if stored.
Sow the seeds in a tray filled with a gritty, well-draining seed compost and cover them with a thin layer of fine horticultural grit. The seeds require a period of warmth followed by a period of cold to break their dormancy, a process known as stratification. Leaving the seed trays outdoors in a sheltered spot over the winter is usually the easiest way to achieve this. Germination can be slow and erratic, so do not give up if you don’t see green shoots right away.
Once the seedlings have produced their first true leaves, they can be carefully pricked out and moved into individual small pots. They will need to be grown on in these pots for a year or two until they are large and strong enough to be planted out in the garden. Seed-grown plants can take three to four years to produce their first flowers, so this is definitely a project for the patient gardener. One exciting aspect of seed propagation is that you might end up with a unique variation that differs slightly from the parent plant.
When working with seeds and young seedlings, it is important to keep them protected from slugs and snails, which find the tender new growth particularly delicious. Use a cold frame or a sheltered corner of the patio to give them the best chance of survival. Consistent moisture is even more critical for seedlings than it is for mature plants, as their tiny root systems can dry out in a matter of hours. With a little bit of care and time, you can raise an entire generation of winter roses from just a few seed pods.
Long-term success and establishment
The first two years after planting or propagating are the most important for the long-term health of your black hellebore. During this time, the plant is focusing most of its energy on building a deep and resilient root system. You might not see a huge amount of top growth or a massive display of flowers right away, but this is perfectly normal. Resist the urge to over-water or over-fertilize in an attempt to speed up the process; nature has its own timeline.
Regularly checking the soil around your new plants will help you understand how they are adapting to their environment. If you notice the soil pulling away from the root ball, it might be a sign that it was not firmed in properly or that it is drying out too much. Gently filling in these gaps and adding a bit more mulch can solve the problem quickly. Keeping the area free of aggressive weeds will also ensure the young plants don’t have to compete for resources.
As the plants become more established, they will become increasingly self-sufficient and require less intervention from you. You will start to see the clumps getting wider and the number of flower stalks increasing every winter. This is the stage where the plant really starts to pay back the effort you put into the planting and propagation phases. A well-established patch of Christmas roses is a sight to behold and will continue to improve for decades.
Finally, remember that gardening is a continuous learning process, and every plant has its own personality. Some might take off immediately, while others might linger for a season before finding their stride. By observing your plants closely and responding to their needs with a gentle touch, you will become a more skilled and successful gardener. The black hellebore is a generous plant that, once settled, will bring a lifetime of winter joy to your outdoor space.