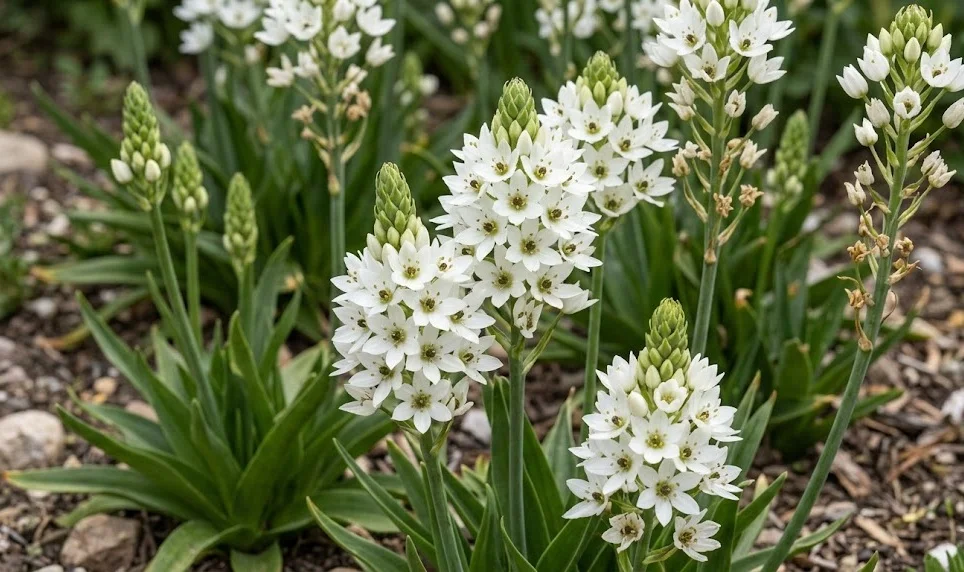
Managing the chincherinchee through the cold winter months is the most critical phase for ensuring its long-term survival in temperate climates. Being native to South Africa, these plants have a limited tolerance for freezing temperatures and prolonged periods of wet soil. The strategy for overwintering depends entirely on your local hardiness zone and the specific conditions of your garden. A successful winter plan protects the dormant bulb from rot and extreme cold, allowing it to re-emerge with vigor in the spring.
In regions with mild winters, the bulbs may be able to stay in the ground if the soil remains exceptionally well-drained. However, a thick layer of protective mulch is usually required to insulate the soil from occasional frost. For most gardeners, the safest approach involves lifting the bulbs and storing them in a controlled indoor environment. This process requires careful timing to ensure the bulb has finished its growth cycle but is not yet damaged by the first hard freeze.
The storage environment must be cool enough to maintain dormancy but warm enough to prevent freezing of the delicate bulb tissues. Humidity is another factor to consider, as too much moisture will cause rot, while too little can lead to the bulb shriveling up and dying. Finding the perfect balance in a cellar, garage, or utility room is an art that comes with experience. Checking the bulbs periodically throughout the winter allows you to catch any problems before they become catastrophic.
Preparing the bulbs for storage involves a period of curing, where the outer skins are allowed to dry and harden. This natural protective layer helps to prevent moisture loss and acts as a barrier against surface molds. Cleaning the bulbs and removing any remaining roots or soil is a necessary step to maintain hygiene during the long storage period. With a little bit of effort in the late autumn, you can guarantee a beautiful floral display for the following summer season.
Determining the best strategy
Knowing your local climate zone is the first step in deciding whether to leave your bulbs in the ground or lift them. If your area frequently experiences temperatures below freezing for extended periods, lifting is the only reliable option. While some claim the chincherinchee can survive light frosts, the combination of cold and wet soil is almost always fatal. A professional gardener never takes unnecessary risks with their most prized plant specimens.
More articles on this topic
For those in warmer regions, staying in the ground is an option provided you can guarantee the soil won’t become waterlogged. High-rainfall winters can be just as dangerous as cold ones, as the dormant bulbs are highly susceptible to fungal rot. If you choose to leave them, consider improving the drainage in the planting area or creating a raised bed. A temporary rain cover or a simple plastic sheet can also help keep the soil dry during the wettest months.
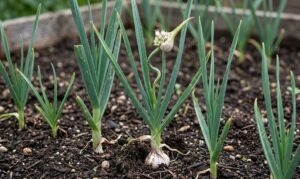
The timing for lifting the bulbs is usually late autumn, shortly after the foliage has turned completely brown and withered away. You should aim to do this on a dry day when the soil is easy to work with and not sticking to the bulbs. Waiting too long after the leaves have disappeared can make it difficult to locate the bulbs without accidentally damaging them. Keep a close eye on the weather forecast and plan to have the bulbs safely indoors before the first serious frost.
If you are growing your chincherinchee in containers, the overwintering process is significantly simplified. You can simply move the entire pot into a frost-free area like a basement or a cool spare room. Stop all watering completely once the foliage has died back, and allow the soil in the pot to dry out thoroughly. This method keeps the bulbs in their natural medium, which provides an extra layer of protection and insulation throughout the winter.
Lifting and cleaning the bulbs
Carefully dig around the perimeter of the plant clump with a garden fork to loosen the soil without cutting into the bulbs. Lift the entire mass of bulbs and soil gently and shake off the excess earth by hand. It is important to handle the bulbs with care, as any bruises or cuts can become entry points for rot during the storage period. If the soil is very wet, you may need to rinse the bulbs briefly and then dry them immediately.
More articles on this topic
Once lifted, the bulbs should be placed in a single layer in a shaded, well-ventilated area to dry out. This curing process usually takes between three and seven days depending on the ambient temperature and humidity. During this time, the outer tunic of the bulb will become papery and dry, which is a good sign of health. Avoid drying the bulbs in direct sunlight, as this can cause them to overheat and suffer from internal tissue damage.
After the drying phase is complete, you can gently remove any remaining soil and the withered remnants of the leaves and roots. Do not strip off the protective papery skin, as this helps the bulb retain its internal moisture during the long winter months. Inspect each bulb closely for any signs of disease, soft spots, or unusual discoloration. Only the healthiest and firmest bulbs should be kept for storage, as one rotten bulb can quickly infect the entire batch.
Labeling your bulbs before storage is a highly recommended habit, especially if you have different varieties or colors. You can write directly on the bulb with a soft pencil or place them in labeled paper bags. Including the date of lifting and any notes about the plant’s performance during the past year can be very helpful for future planning. Organized storage is the mark of a professional who takes their gardening hobby or profession seriously.
Ideal storage conditions
The storage area should maintain a consistent temperature between five and ten degrees Celsius throughout the entire winter. A dark location is preferable, as light can sometimes trigger premature sprouting if the temperatures fluctuate slightly. Avoid areas that are prone to dampness or have poor air circulation, such as unventilated basements. A cool garage or a protected crawl space is often an ideal spot for keeping bulbs in their dormant state.
To prevent the bulbs from drying out completely, you can store them in a box filled with dry peat moss, vermiculite, or sawdust. These materials provide a bit of cushioning and help to maintain a very low but stable level of humidity around the bulb. Do not pack the bulbs too tightly; ensure there is some space between them to allow for minimal air movement. If the storage material feels bone-dry halfway through the winter, you can give it a very light misting of water.
Air circulation within the storage container is just as important as the surrounding environment to prevent the buildup of stagnant air. Use cardboard boxes with small holes or wooden crates that allow the bulbs to breathe during their dormancy. Plastic containers should be avoided unless they have significant ventilation, as they can trap moisture and lead to rapid rot. Check the bulbs at least once a month to ensure they are still firm and show no signs of mold or decay.
Rodent protection is another factor that is often forgotten but can lead to the loss of your entire collection. Mice and other small animals may find the dormant bulbs to be an attractive food source during the cold winter months. Storing your boxes in a place that is inaccessible to pests or using fine wire mesh covers can help keep your bulbs safe. A little bit of foresight can prevent a lot of disappointment when you go to replant your bulbs in the spring.
Preparing for spring re-emergence
As the days begin to lengthen and the outdoor temperatures start to rise, you can begin to prepare the bulbs for replanting. About two to three weeks before the last expected frost, move the storage containers to a slightly warmer location to signal the end of dormancy. You might even see the first tiny tips of new green growth starting to emerge from the top of the bulbs. This is a perfectly normal and healthy sign that the bulbs are ready for another productive year.
Inspect the bulbs one last time before they go back into the ground to ensure they have survived the winter in good condition. Any bulbs that have become soft, mushy, or exceptionally light during storage should be discarded. You can give the healthy bulbs a quick soak in room-temperature water for an hour or two to rehydrate them just before planting. This small step can help the roots establish themselves more quickly once they are back in the soil.
The timing of replanting is just as important as the initial lifting, as the young shoots are very sensitive to late spring frosts. Wait until the soil has warmed up and the risk of a hard freeze has completely passed in your local area. If you are eager to get started, you can plant the bulbs in pots and keep them in a protected spot until the weather is reliable. This gives the plants a head start and can result in an earlier and more robust blooming period.
Once replanted, provide a light watering to settle the soil around the bulbs and kickstart the growth process. You don’t need to fertilize immediately, as the bulb already contains enough energy to produce its first set of leaves. As the green shoots break the surface, you can return to your regular maintenance routine of watering and light fertilization. Seeing those first green tips is always a rewarding moment that marks the successful conclusion of the overwintering process.