Preparing your tulip bulbs for the cold season is a straightforward process, as they are naturally adapted to surviving freezing temperatures. These hardy plants actually require a period of cold dormancy to trigger the biological processes that lead to spring flowering. You must ensure that while the bulbs stay cold, they remain protected from excessive moisture and physical disturbance. A professional overwintering strategy focuses on creating a stable underground environment during the most volatile months.
The timing of the final autumn preparations should coincide with the first hard frosts in your region. You should ensure that the soil surface is clean and free of any diseased plant material that could harbor pathogens over the winter. If the autumn has been exceptionally dry, a final light watering before the ground freezes can be beneficial. However, the primary goal is to maintain a relatively dry environment to prevent the bulbs from sitting in ice-cold slush.
Mulching can be used as a protective layer, but it must be applied with care and precision. You should wait until the ground has actually started to freeze before applying a thick layer of organic material. This prevents the soil from fluctuating in temperature during early winter thaws, which can confuse the bulbs. A professional gardener knows that the goal of winter mulch is to keep the ground frozen, not to keep it warm.
For those growing tulips in containers, overwintering requires a slightly more hands-on approach to prevent the soil from freezing solid and thawing repeatedly. You should consider moving pots to a sheltered location or insulating them with burlap or bubble wrap. The smaller volume of soil in a container is much more vulnerable to the elements than the open ground. Proper winter care ensures that your potted displays are just as vigorous as those in the garden beds.
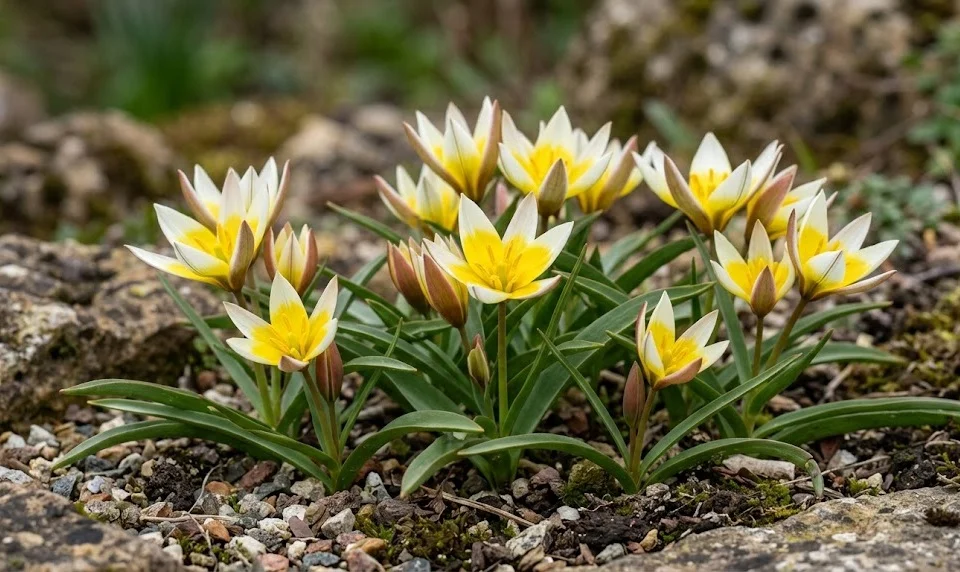
Cold hardiness and natural cycle
These tulips are exceptionally cold-hardy, often surviving temperatures well below freezing without any permanent damage. You should understand that this chilling period, known as vernalization, is a biological necessity for the genus. During the winter, the bulb undergoes internal changes that prepare the embryonic flower for emergence. Without enough cold hours, the plants may produce weak stems or fail to bloom altogether in the spring.
More articles on this topic
The natural cycle of the bulb is perfectly synchronized with the changing seasons of its native mountain habitats. You should trust the plant’s ability to handle the cold while providing the basic structural support it needs. Avoiding any nitrogen-rich fertilizers in late autumn is crucial, as you don’t want to encourage soft growth that would be killed by the frost. The goal is to let the plant enter a deep, undisturbed state of dormancy.
Snow cover can actually act as an excellent natural insulator for your tulip beds. You should welcome a steady layer of snow, as it protects the ground from the most extreme air temperatures and wind desiccation. If you live in an area with little snow but extreme cold, you might need to provide a more substantial artificial mulch. Understanding your local winter patterns allows you to tailor your protection strategy to the specific risks of your region.
In the late winter, as the sun begins to gain strength, you might see the first signs of activity beneath the surface. You should resist the urge to uncover the bulbs too early, as late-season cold snaps can still be dangerous. The bulbs are resilient, but the tender new shoots are more sensitive to rapid temperature swings. A professional approach is to wait until the threat of severe, deep-freezing weather has passed before clearing the winter protection.
Mulching for protection
Choosing the right mulching material depends on your soil type and the typical winter weather in your area. You should opt for light, airy materials like pine needles, straw, or evergreen boughs that don’t compact easily. These materials allow for some air circulation while providing the necessary thermal buffer for the soil. Avoid using heavy, wet leaves that can mat down and create an anaerobic environment over the bulbs.
More articles on this topic
The thickness of the mulch layer should be adjusted based on the severity of your local winter. You should aim for a layer of about five to ten centimeters to provide significant insulation without smothering the site. If your garden is in a particularly windy location, you might need to secure the mulch with a light netting or branches. This professional touch ensures that your protective layer stays in place until it is no longer needed.
One of the secondary benefits of mulching is the prevention of “frost heaving,” where the soil expands and contracts. You will find that this movement can sometimes push bulbs toward the surface, exposing them to the air and predators. A stable mulch layer minimizes this physical stress and keeps the bulbs securely at their intended depth. Protecting the physical integrity of the planting site is just as important as managing the temperature.
As spring approaches and you see the first green tips appearing, you should gradually thin out the mulch layer. You should not remove it all at once, as the young shoots benefit from a bit of protection during the first few weeks of growth. Eventually, the remaining mulch can be moved aside to allow the sun to warm the soil directly. This phased transition is a professional technique for ensuring a smooth and healthy start to the growing season.
Managing container-grown bulbs
Overwintering tulips in pots presents a unique set of challenges because the roots are much more exposed to the air. You should choose containers made of frost-resistant materials like heavy plastic, wood, or treated terra cotta. In very cold climates, you might need to move the pots into an unheated garage, shed, or “cold cellar.” The temperature in these locations should stay between zero and five degrees Celsius for the best results.
If you must leave your pots outdoors, you should cluster them together in a sheltered spot, such as against a south-facing wall. You can wrap the individual pots in insulating materials or place them inside a larger box filled with straw or leaves. This added mass helps to slow down the rate of temperature change within the soil. A professional knows that it’s the rapid freezing and thawing that causes the most damage to containerized bulbs.
Monitoring the moisture levels in your winter containers is a task that should not be forgotten. While the plants are dormant, the soil should not be allowed to become bone-dry, as this can desiccate the bulbs. You should check the pots during any mid-winter thaws and provide a tiny amount of water if the soil feels like dust. However, you must be extremely careful not to over-water, as wet soil in a frozen pot is a recipe for disaster.
As the weather begins to warm in late winter, you can move the pots back to their display positions. You should do this gradually to avoid shocking the emerging shoots with sudden exposure to full sun and wind. If a late frost is predicted, be prepared to move the pots back into shelter or cover them temporarily. Container gardening allows for a high degree of control, but it requires consistent attention from the gardener.
Spring emergence preparations
The transition from winter dormancy to spring growth is a fast and exciting time for any gardener. You should start by removing any heavy debris or remaining mulch as soon as the ground is no longer frozen. This allows the sun’s rays to reach the soil and signal to the bulbs that it is time to wake up. Cleaning the site also helps to prevent the growth of molds that can occur in the damp interface between mulch and soil.
If you see any bulbs that have been pushed to the surface by frost heaving, you should carefully replant them. You should be gentle with any emerging roots, as they are very brittle at this early stage. Firming the soil back down around the shoots ensures they have the support they need to grow straight and tall. This early-season intervention is a professional way to fix winter damage before it affects the bloom.
This is also the ideal time to check for any signs of animal damage that might have occurred under the snow. You should look for tunnels or chewed bulbs and take steps to prevent further issues as the plants grow. If necessary, you can apply a light repellent or set up temporary barriers to protect the most vulnerable shoots. Being proactive in the first weeks of spring sets the tone for a successful flowering season.
Finally, you should enjoy the anticipation as the first green leaves begin to unfurl in the spring sun. Your professional overwintering efforts have provided the bulbs with the perfect conditions to thrive. You will soon be rewarded with the bright, cheerful colors that make all the winter preparation worthwhile. Successful overwintering is the bridge between the seasons that ensures the continuity of your garden’s beauty.