Establishing a vibrant collection of these perennials begins with a precise understanding of their planting requirements and timing. You should approach the process with a focus on long-term sustainability rather than immediate visual impact. Successful propagation not only increases your plant stock but also revitalizes the parent plants by preventing overcrowding and competition. This guide outlines the professional techniques necessary to ensure your new additions take root and flourish in their new environment.
Site preparation and drainage
Selecting the perfect location is the most important decision you will make before you even touch a shovel. You should look for a spot that receives ample sunlight and offers protection from the most severe environmental elements. The soil must be well-draining, as these plants will not tolerate heavy, waterlogged conditions for any length of time. If your chosen site has heavy soil, you must take steps to improve the texture before you begin the planting process.
Amending the soil with organic matter like well-rotted compost or fine bark can significantly improve the aeration of the substrate. You should aim for a soil structure that is crumbly and easy to work with your hands. This allows the roots to penetrate deeply while ensuring the rhizome remains stable on the surface. Avoiding heavy fertilizers during the initial site preparation prevents the risk of burning the young, sensitive root tissues.
The slope and elevation of the planting site also play a critical role in managing water runoff and drainage. You should consider planting on a slight incline or creating a raised mound if you live in a particularly rainy climate. This natural gravity helps move excess water away from the base of the plant, protecting the rhizomes from rot. Even a small change in elevation can make a significant difference in the survival rate of your perennials.
Before you begin the physical act of planting, you should clear the area of all competing weeds and grass. These unwanted plants will fight with your new iris for water, nutrients, and sunlight during the critical establishment phase. You should dig down deep enough to remove the roots of perennial weeds to prevent them from returning later. Starting with a clean, well-prepared site gives your new plants the best possible chance to thrive.
More articles on this topic
Rhizome spacing and depth
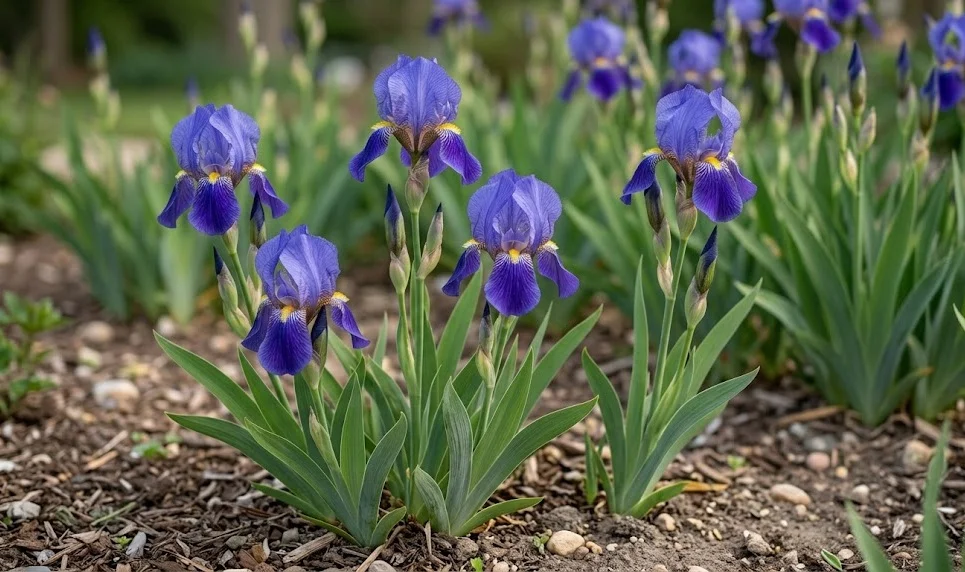
Understanding the unique structure of the iris rhizome is essential for placing it correctly in the ground. You should imagine the rhizome as a storage tank that needs to sit partially exposed to the sun and air. Planting it too deep is one of the most common mistakes that leads to poor flowering or complete plant failure. Ideally, the top of the rhizome should be level with the soil surface or only slightly covered in very hot climates.
The orientation of the rhizome also matters when you are trying to create a balanced and aesthetically pleasing display. You should point the leaf fan in the direction you want the plant to grow, as the new growth will emerge from that end. Spacing the plants about twelve to eighteen inches apart allows for adequate airflow and room for future expansion. This distance prevents the plants from becoming overcrowded too quickly, which maintains their health and vigor.
When you are ready to set the plant, you should dig two shallow trenches with a small ridge of soil between them. You can then place the rhizome on the ridge and spread the roots out into the trenches on either side. This method provides immediate stability and ensures the roots are in direct contact with the soil where they can find moisture. Once the roots are positioned, firm the soil around them gently to remove any large air pockets.
After the initial planting, you should water the area thoroughly to settle the soil and hydrate the roots. You should check the depth again after the first watering, as the soil may settle and leave the rhizome too exposed or too deep. Making small adjustments now is much easier than trying to fix the planting depth once the roots have begun to grow. Consistent monitoring during the first few weeks ensures the plant is off to a strong and healthy start.
More articles on this topic
Division of established clumps
Dividing your plants is a necessary task that should be performed every few years to maintain the quality of the blooms. You should plan this activity for the late summer or early autumn, several weeks after the flowering period has finished. This timing allows the new divisions to establish their root systems before the onset of the cold winter months. Signs that a clump needs division include a “bald” center or a noticeable decrease in the size and number of flowers.
To begin the process, you should carefully lift the entire clump out of the ground using a sturdy garden fork. You should shake off the excess soil so you can clearly see the structure of the interconnected rhizomes. Healthy rhizomes will be firm and light-colored, while older sections may look shriveled or dark. Using a sharp, sterilized knife, you can cut the rhizomes into smaller sections, ensuring each piece has at least one healthy leaf fan.
Inspecting each division for pests or signs of disease is a critical step in the propagation process. You should discard any sections that feel soft, look hollow, or show signs of infestation by boring insects. This is an excellent opportunity to clean up the plant stock and ensure you are only replanting the healthiest material. Trimming the leaves back to about six inches in a fan shape reduces water loss and helps the plant focus on root growth.
Once you have prepared your new divisions, you should treat the cut surfaces with a fungicidal powder to prevent infection. You can then replant them following the same spacing and depth guidelines used for new plants. Dividing not only gives you more plants for your garden but also rejuvenates the original stock, leading to more impressive displays. It is a rewarding cycle that keeps your garden looking fresh and vibrant year after year.
Transplanting techniques for success
Moving an established plant to a new location requires care to minimize the stress of the transition. You should prepare the new hole before you dig up the plant to ensure the roots spend as little time as possible in the air. Keeping the roots moist during the move is essential for preventing desiccation and ensuring a quick recovery. If you must transport the plants over a distance, wrap the roots in damp burlap or newspaper to protect them.
The best time for transplanting is during a cool, overcast day when the sun will not put extra stress on the foliage. You should avoid moving plants during the peak of summer heat or when they are in the middle of their blooming cycle. If you must move them during a less-than-ideal time, be prepared to provide extra shade and water. Proper timing significantly increases the success rate and reduces the amount of time the plant takes to recover.
When placing the plant in its new home, you should ensure the soil is firmed down well enough to support the weight of the leaves. You can use your hands to press the earth around the roots, making sure there is good soil-to-root contact. Avoid using your feet to stomp the soil, as this can easily crush the delicate rhizomes or compact the earth too much. A gentle but firm touch is all that is needed to secure the plant in place.
Post-transplant care involves consistent watering and a watchful eye for any signs of wilting or distress. You should not be surprised if the plant looks a bit tired for the first week as it adjusts to its new environment. Providing a light layer of mulch around the base—but not over the rhizome—can help maintain soil moisture and temperature. With the right technique and attention, your transplanted irises will soon be thriving in their new garden home.