Successful cultivation of this ornamental shrub begins with a thorough understanding of the proper techniques for both planting and creating new specimens. Choosing the right moment and the correct method can make the difference between a struggling plant and a flourishing garden highlight. You must pay close attention to the timing of your actions, as the plant responds best when its natural growth cycles are respected. Whether you are starting with a nursery-bought plant or trying to grow your own from scratch, the following professional advice will guide you through the process.
The initial planting phase is the most critical period for the long-term health and stability of the shrub in your landscape. You should select a site that offers the right balance of light and soil conditions before you even bring the plant home. Preparing the planting hole properly ensures that the roots have plenty of room to expand and access the resources they need. Taking the time to do it right the first time saves you from having to move the plant later, which can cause significant stress.
Propagation offers a rewarding way to expand your garden collection or share this beautiful species with friends and neighbors. There are several methods available, ranging from simple stem cuttings to more complex seed germination or root division. Each technique requires a different level of patience and equipment, so you should choose the one that best fits your experience level. Understanding the biological principles behind each method will increase your success rate and lead to healthier young plants.
Healthy young plants are the future of your garden, and their early care dictates their eventual success as mature shrubs. During the first few weeks after planting or propagation, the specimens are particularly vulnerable to environmental fluctuations and physical damage. You must provide a stable environment with consistent moisture and protection from extreme temperatures to help them establish their roots. With the right start, these young plants will quickly grow into the robust and colorful specimens that are so highly prized in the gardening world.
Professional planting techniques
When you are ready to put your shrub into the ground, the first step is to dig a hole that is at least twice as wide as the root ball but no deeper. This extra width allows you to backfill with loose, amended soil that encourages the roots to spread outward rather than circling the hole. You should avoid digging too deep, as planting the shrub below its original soil line can lead to stem rot and other health issues. Setting the plant at the correct depth ensures that the crown remains at the soil surface where it can breathe.
More articles on this topic
Amending the soil during the planting process can give your shrub a significant boost in its new home. You should mix in high-quality compost or well-rotted manure to improve the nutrient content and moisture retention of the existing garden soil. This creates a transition zone that helps the roots move from the rich nursery potting mix into the native soil of your garden. Avoid using high-strength chemical fertilizers in the planting hole, as these can burn the sensitive new roots of a young plant.
Once the shrub is placed in the hole, you must backfill carefully to remove any large air pockets that could dry out the roots. Use your hands or the handle of a tool to gently firm the soil as you go, but do not pack it so tightly that you prevent water and air movement. Watering the plant halfway through the backfilling process can help settle the soil naturally and ensure that moisture reaches the deep roots. A final thorough watering after the hole is completely filled will finish the job and give the plant the hydration it needs to start growing.
Applying a layer of mulch immediately after planting is a professional secret for ensuring the survival of new shrubs. A three-inch layer of organic mulch, such as wood chips or shredded bark, helps to suppress weeds and maintain a consistent soil temperature. You should keep the mulch a few inches away from the base of the stems to prevent moisture buildup against the bark, which can invite fungal diseases. This protective layer also breaks down over time, providing a slow-release source of organic matter for the growing root system.
Choosing the ideal location
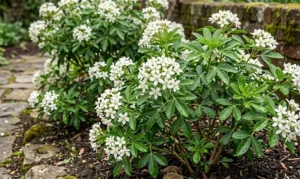
The location you choose for your shrub will dictate its growth habit, foliage color, and overall health for many years. You should look for a spot that receives at least some direct sunlight, although the plant is remarkably tolerant of various light conditions. Areas that are protected from harsh, drying winds will help prevent the foliage from becoming tattered or scorched during the winter. Consider how the plant will look throughout the year and place it where its changing colors can be best appreciated from your windows or patio.
More articles on this topic
Soil drainage is a non-negotiable factor when selecting a site, as the shrub will not survive in areas where water collects and stands. If your garden has a high water table or heavy clay, you might consider planting on a slight mound or in a raised bed. Observing the site after a heavy rain will tell you exactly where the low spots are and where the water naturally drains away. Avoiding these soggy areas is the best way to prevent the dreaded root rot that can quickly kill even the most established plants.
Space requirements must be considered to ensure the shrub has enough room to reach its mature size without becoming crowded. You should research the specific variety you are planting, as some can reach heights of eight feet while others stay quite small and compact. Planting too close to buildings or other large shrubs can restrict airflow and lead to increased problems with pests and diseases. Giving each plant its own defined space allows it to develop its natural, elegant form without the need for constant heavy pruning.
Aesthetic integration with other plants in your garden will enhance the overall beauty of your landscape design. The fine texture of the foliage pairs well with broader-leaved plants, creating a pleasing contrast in the garden beds. You can use the shrub as a background for smaller perennials or as a standout specimen in a more minimalist garden style. Thinking about how the colors of the heavenly bamboo will interact with neighboring flowers will help you create a truly professional-looking outdoor space.
Stem cutting propagation
Propagating from stem cuttings is one of the most popular and effective ways to create new plants that are identical to the parent. You should take your cuttings in the late summer or early autumn when the wood is semi-ripe, meaning it is firm but still somewhat flexible. Use a sharp, sterilized pair of shears to cut a six-inch section from a healthy, vigorous branch that is free from any signs of disease. Removing the lower leaves and dipping the cut end into a rooting hormone can significantly increase your chances of success.
The rooting medium for your cuttings should be a sterile, well-draining mix of peat moss and perlite or coarse sand. Place the prepared cuttings into small pots and firm the medium around them to ensure good contact with the stem. You must keep the medium consistently moist but never waterlogged, as too much water will cause the cuttings to rot before they can form roots. Covering the pots with a clear plastic bag or placing them in a propagation dome helps to maintain the high humidity that the cuttings need.
Temperature and light management are critical during the rooting phase, which can take several weeks or even months. You should keep the cuttings in a warm spot with bright, indirect light, but avoid direct sunlight which can cause the small containers to overheat. If you see new growth starting to appear at the top of the cutting, it is usually a sign that roots have begun to form. You can gently tug on the stem to feel for resistance, which confirms that a healthy root system is developing beneath the surface.
Once the cuttings have established a strong set of roots, you can begin the process of hardening them off for outdoor life. Gradually expose the young plants to outdoor conditions by placing them in a sheltered spot for a few hours each day. After a week or two of this acclimation, they will be ready to be moved into larger pots or their permanent spots in the garden. This transition period is vital for preventing the tender young plants from being overwhelmed by the sudden change in environment.
Root division and seed methods
Root division is an excellent method for propagating older, established shrubs that have become large enough to be split. You should perform this task in the early spring before new growth starts, as this gives the divisions the most time to recover. Carefully dig up the entire root ball and use a sharp spade or garden saw to cut it into two or more sections. Each new piece must have a healthy portion of both roots and stems to ensure it can survive as an independent plant.
Replanting the divisions immediately is essential to prevent the exposed roots from drying out and dying. You should treat each division as a new plant, following the same professional planting techniques you would use for a nursery-bought specimen. Watering the new plants thoroughly and keeping them well-shaded for the first few weeks will help them settle into their new locations. This method is a fast way to get large, mature-looking plants without waiting for cuttings or seeds to grow.
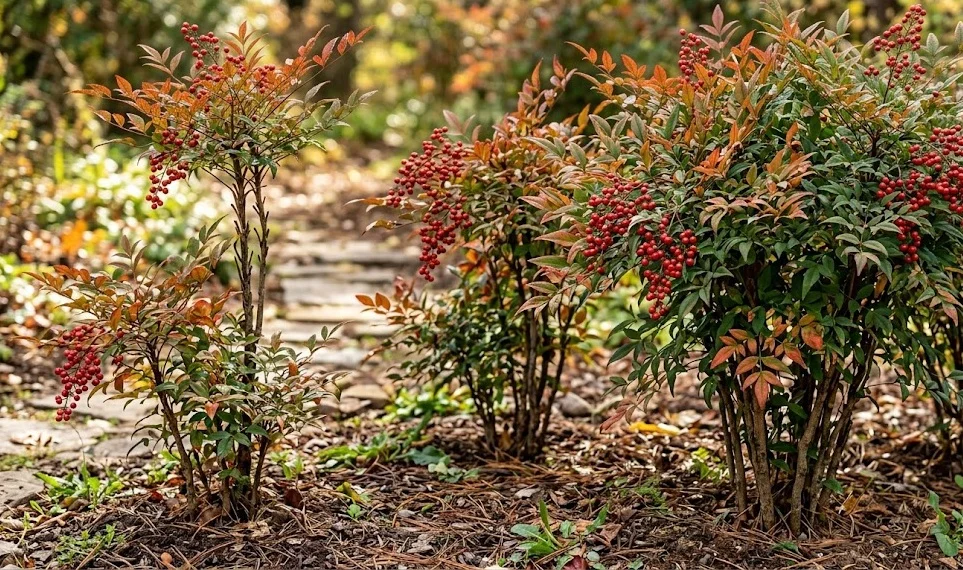
Growing from seed is a more time-consuming process but can be a fascinating way to see the natural variation within the species. You can collect the bright red berries in the late autumn and remove the fleshy outer layer to reveal the small seeds inside. Sowing the seeds in a tray of moist potting soil and keeping them in a cool, protected area over the winter will mimic their natural life cycle. Patience is required, as germination can be slow and irregular, sometimes taking several months to show signs of life.
Young seedlings require very careful attention to moisture and light as they begin to develop their first true leaves. You should thin them out if they are growing too close together to ensure that each plant has enough space and resources. Once they have reached a height of several inches, you can move them into individual pots to continue their growth. While it takes longer for a seed-grown plant to reach a significant size, the satisfaction of growing your own from scratch is a unique reward for any dedicated gardener.