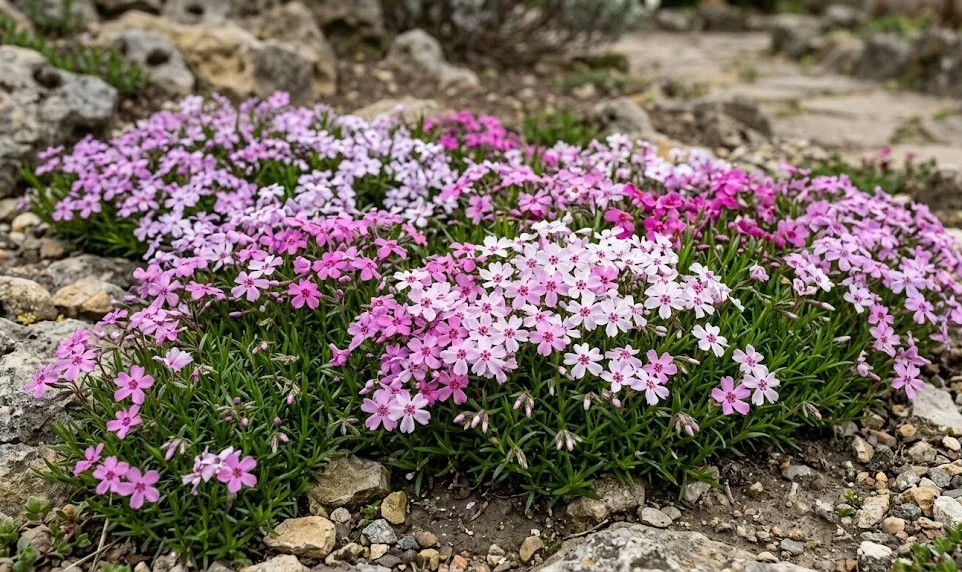
Planting moss phlox is a rewarding endeavor that transforms bare ground into a lush, flowering carpet within just a few seasons. This process begins with choosing the right location where the plant can enjoy the conditions it needs to flourish. Whether you are starting with nursery-bought containers or using pieces from an existing patch, the steps are straightforward and easy to follow. Proper technique during the initial stages ensures that the roots establish quickly and the plant begins to spread across the soil surface.
Choosing the ideal location and preparation
The first step in planting is finding a spot that receives full sun for the majority of the day. Moss phlox is a sun-loving species that requires at least six hours of direct light to produce its famous dense blooms. If the area is too shady, the plant will become thin and lose its characteristic carpet-like appearance. You should also look for a site with natural drainage to prevent water from sitting around the roots.
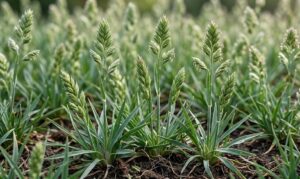
Before you put any plants in the ground, you must prepare the soil by removing all existing vegetation. Grass and weeds are the biggest enemies of a new phlox planting because they compete for space and nutrients. You should dig down several inches to ensure that you have removed the roots of any invasive species. Creating a clean slate is the best way to give your new groundcover a head start in the garden.
The texture of the soil should be loose and friable to allow the fine roots of the phlox to penetrate easily. If your garden has heavy soil, you can mix in some coarse sand or fine gravel to improve the internal drainage. This is especially important if you are planting in a flat area where water might collect after a heavy downpour. A well-prepared bed provides the structural support needed for the plant to thrive for many years.
Spacing is another critical consideration when you are planning your new garden layout. You should place the individual plants about twelve to eighteen inches apart to allow room for them to spread. While it might look a bit sparse initially, the plants will quickly grow toward each other to form a solid mat. Giving them enough space from the beginning prevents overcrowding and promotes better air circulation between the stems.
More articles on this topic
Step-by-step planting technique for success
When you are ready to plant, start by digging a hole that is slightly larger than the root ball of the container. You should avoid digging too deep, as the crown of the plant needs to sit level with the soil surface. Placing the plant too deep in the ground can lead to moisture being trapped against the stems, which causes rot. Consistency in planting depth is one of the most important factors for a healthy start.
Gently remove the plant from its pot and tease out the roots if they have become circular or compacted. Healthy roots should be spread out in all directions within the planting hole to encourage outward growth. You can then fill in the space around the root ball with the native soil you removed earlier. Press the soil down firmly with your hands to eliminate any large air pockets that could dry out the roots.
Immediately after planting, you should water the area thoroughly to help settle the soil around the plant. This initial watering ensures that the roots have direct contact with the moist earth and can begin absorbing water right away. You may need to water more frequently during the first few weeks as the plant adapts to its new environment. Once the phlox shows signs of new growth, you can begin to reduce the frequency of supplemental irrigation.
Applying a very thin layer of fine mulch can help retain moisture during the critical establishment phase. However, you must be extremely careful not to cover the green foliage or the center of the plant with mulching material. The goal is to keep the surrounding soil cool and moist without hindering the plant’s ability to breathe. Monitoring the moisture levels daily during the first month will help you determine the needs of your new installation.
More articles on this topic
Propagation through the method of division
Division is the simplest and most effective way to create new moss phlox plants from an established patch. This process is best performed in the early spring before the plant begins its main growth spurt or in the early autumn. You should look for a healthy, vigorous section of the plant that has a well-developed root system beneath the foliage. Using a sharp spade or a garden knife, you can cut out a square or circular section from the edge.
Once you have removed a section, you can further divide it into smaller pieces, ensuring each one has both roots and green stems. These smaller units are then ready to be moved to a new location in your garden or shared with friends. You should treat these divisions just like new nursery plants by preparing the soil and planting them at the correct depth. Division not only gives you more plants but also helps rejuvenate the original mother plant by reducing overcrowding.
The success rate for division is very high because you are starting with a plant that already has a functional root system. You will notice that the new divisions often start growing almost immediately if the weather conditions are favorable. It is important to keep the newly moved pieces well-watered until you see clear signs that they have anchored themselves. This method is a cost-effective way to expand your garden’s groundcover over several seasons.
If the center of your old moss phlox has become thin or woody, division can be used as a restorative technique. You can dig up the entire clump and discard the old, unproductive center while keeping the healthy outer edges. Replanting the vigorous outer sections into refreshed soil will result in a much healthier and more attractive display. This cycle of renewal keeps your garden looking young and vibrant regardless of the actual age of the plants.
Propagating with stem cuttings and layering
Starting new plants from stem cuttings is an alternative method that works well during the summer months. You should select healthy, non-flowering stems that are about three to four inches long for the best results. Remove the leaves from the bottom half of the cutting and insert it into a pot filled with a light, well-draining starting mix. Keeping the cuttings in a shaded area with high humidity will encourage them to develop their own roots.
Layering is another natural propagation technique that requires very little effort from the gardener. You can simply take a long stem that is still attached to the main plant and pin it down onto the soil surface. By covering a small portion of the stem with a little bit of earth, you trigger the growth of new roots at the nodes. After a few months, once the roots are strong, you can snip the connection to the parent plant and move the new individual.
Cuttings usually take several weeks to form a root system that is strong enough to support the plant in the garden. You can check for progress by very gently tugging on the stem to see if there is any resistance from new roots. Once the cuttings have established themselves in their small pots, they can be hardened off and moved to their permanent spots. This method allows you to produce a large number of new plants from a single source without much expense.
Regardless of the propagation method you choose, the key to success is maintaining consistent moisture without overwatering. Young plants and cuttings are more sensitive to drying out than established mats of moss phlox. Providing a stable environment during the first few months of life is the best way to ensure long-term survival. With a little bit of practice, you will find that propagating this plant is one of the most satisfying parts of gardening.