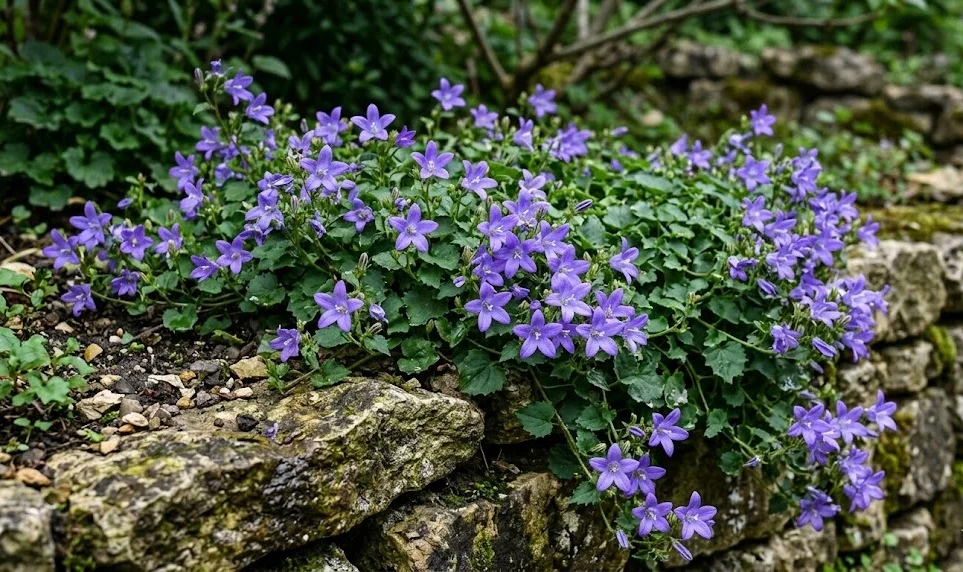
Ensuring this perennial survives the cold months is a critical part of its long-term success in the landscape. While it is naturally hardy in many climates, the combination of freezing temperatures and wet winter soil can pose a significant threat to its root system. A professional approach to overwintering involves both physical protection and careful management of the plant’s environment during its dormant phase. By taking a few preventative steps in the autumn, you can guarantee a vibrant return of those purple flowers when the spring sun begins to warm the earth.
Preparation for the first frost
The process of overwintering begins long before the first snow falls, starting with a gradual reduction in maintenance tasks. You should stop fertilizing the plant in late summer to discourage any new, tender growth that would be easily damaged by the cold. This allows the existing stems and leaves to “harden off” and prepare their internal chemistry for the upcoming drop in temperature. A professional knows that a plant in a state of rest is much more resilient to the challenges of a harsh winter season.
As the days grow shorter, you should perform a thorough cleanup of the area surrounding your bellflowers to remove any debris. You must clear away fallen leaves from nearby trees that might smother the low-growing foliage and trap excessive moisture. Wet leaves sitting on top of the crown can lead to rot and provide a breeding ground for various fungal pathogens during the damp autumn months. Keeping the site clean is a simple but highly effective way to protect the health of the plant as it enters dormancy.
Watering should also be adjusted as the weather cools, though the plant still needs some moisture to sustain its roots through the winter. You should ensure the soil is well-hydrated before the ground freezes, as the plant cannot absorb water from frozen earth. However, you must be careful not to create a waterlogged environment, which is the primary cause of winter mortality for this species. Finding the right balance of hydration is a hallmark of an expert gardener who understands the local climate and soil conditions.
Inspect the plant one last time for any signs of lingering pests or diseases that could overwinter in the foliage or the soil. You should prune away any damaged or diseased stems to ensure the plant is in peak condition as it goes into its rest period. Removing these potential problems now prevents them from flaring up again as soon as the weather warms in the spring. This proactive maintenance ensures a clean start for the next growing season and reduces the need for interventions later on.
More articles on this topic
Mulching and root protection
Applying a layer of mulch is the most effective way to insulate the root system against extreme temperature fluctuations and “frost heaving.” You should wait until the ground has chilled but not yet frozen solid before applying about two inches of organic mulch. Good choices for mulch include shredded bark, straw, or even evergreen boughs that allow for some air circulation while providing warmth. A professional understands that the goal of mulching is to keep the soil temperature consistent rather than just keeping it warm.
Be careful not to pile the mulch directly against the crown of the plant, as this can trap moisture and cause the base to rot. You should leave a small gap of a few centimeters around the center of the plant to allow for some gas exchange between the soil and the air. This “donut” method of mulching provides protection to the wider root zone while keeping the most vulnerable part of the plant safe. This technical detail is what separates a professional installation from a more casual approach to winter protection.
In areas with very little natural snow cover, mulch is even more important as a barrier against the drying effects of winter winds. You might notice that the exposed foliage can become “windburned” and turn brown if it is not shielded by some form of mulch or snow. Snow is actually a fantastic natural insulator, so if you have it, you should leave it in place over your garden beds. If you lack snow, adding a bit of extra straw or loosely packed leaves can provide the necessary protection for the delicate trailing stems.
As the winter progresses, you should periodically check the mulch to ensure it hasn’t been washed away or displaced by animals. You may need to refresh the layer after a particularly heavy storm or if you notice the bare soil is becoming exposed. Maintaining a consistent protective barrier is a key part of an expert overwintering strategy that yields the best results in the spring. This ongoing attention to detail reflects a high level of professional care and a commitment to the long-term health of the garden.
More articles on this topic
Winter care for container plants
Bellflowers grown in pots are much more vulnerable to the cold because their roots are more exposed to the ambient air temperature. You should consider moving your containers to a more sheltered spot, such as against a south-facing wall or into an unheated garage or shed. If you leave them outdoors, you must wrap the pots in bubble wrap or burlap to provide an extra layer of insulation for the root ball. A professional knows that container plants can experience much more dramatic temperature swings than those planted in the ground.
Watering is still necessary for container-grown plants during the winter, though the frequency will be much lower than in the summer. You should check the soil moisture every few weeks and provide a small amount of water if the earth feels completely dry. It is best to do this on a day when the temperature is above freezing to ensure the water can actually reach the roots. Monitoring moisture levels is critical because container soil can dry out surprisingly fast, even in the middle of a cold winter.
Drainage is especially important for pots in the winter, as standing water that freezes can expand and crack the container or kill the roots. You should ensure the pots are raised slightly off the ground on “pot feet” or bricks to allow water to flow freely out of the drainage holes. This prevents the pot from becoming stuck to the ground and ensures the roots are never sitting in an ice block. Professional container management is about anticipating these physical challenges and taking steps to mitigate them early on.
If you have particularly valuable or sensitive specimens, you might even consider “sinking” the pots into a temporary trench in the garden for the winter. You should bury the pot up to its rim in the soil and then cover the top with a layer of mulch or straw. This technique uses the natural insulation of the earth to protect the container-grown roots just like those of ground-planted specimens. This is an advanced professional tip that can save your favorite container plants during an exceptionally harsh winter season.
Reawakening the plant in spring
As the days begin to lengthen and the temperature rises, you should start the process of gradually uncovering your bellflowers. You should remove the winter mulch in stages rather than all at once to avoid shocking the plant with sudden exposure. Start by thinning the layer of straw or bark and then wait a week or two before removing the rest as the threat of deep frost passes. This careful transition allows the plant to acclimate to the changing conditions and prevents damage to early emerging shoots.
Early spring is the best time to perform a “rejuvenation cleanup” by cutting away any foliage that didn’t survive the winter. You should look for brown, brittle stems and remove them to make way for the fresh, green growth that will soon appear. Do not be discouraged if the plant looks a bit sparse at first, as this species is known for its ability to bounce back quickly. A professional cleanup sets the stage for a tidy and vigorous growing season, ensuring the plant looks its best from the very beginning.
Once you see the first signs of new growth, you can provide the plant with its first deep watering of the season. You should also consider a light application of balanced fertilizer to give the plant the energy it needs to rebuild its canopy. This is also a great time to check the soil for any compaction that might have occurred during the winter months. Gently loosening the earth around the plant provides the roots with the oxygen they need to support a healthy and vibrant floral display.
Finally, keep a close eye on the weather forecast during the early spring, as a late frost can still damage the tender new growth. You should be prepared to toss a piece of frost cloth or an old blanket over your plants if a sudden cold snap is predicted. Protecting the first flush of growth ensures that the plant stays on track for its usual blooming schedule in late spring. This final phase of the overwintering process completes the cycle and marks the beginning of another successful year for your Serbian bellflowers.