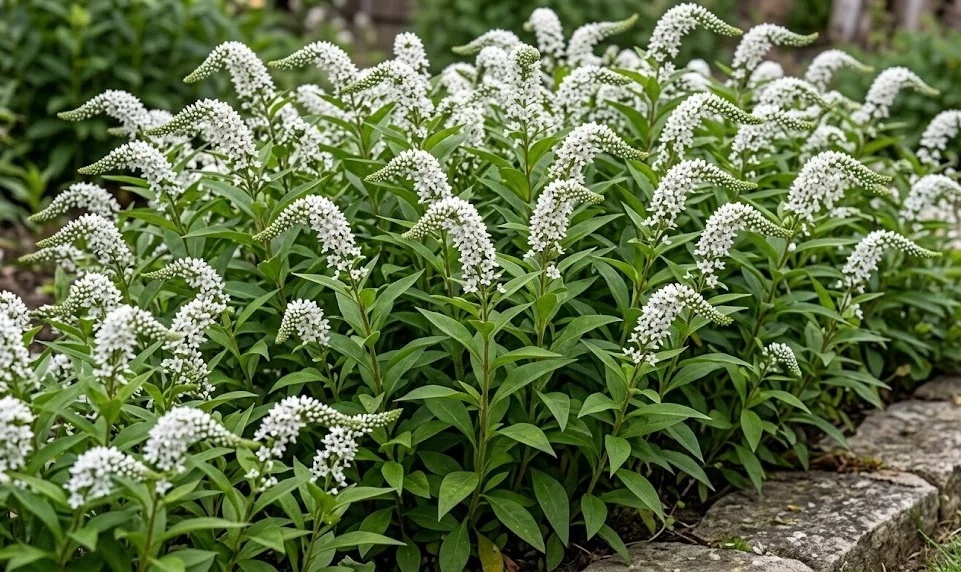
Pruning and cutting back gooseneck loosestrife is a simple but vital part of maintaining a tidy and healthy garden display throughout the year. This perennial is quite vigorous and responds very well to regular maintenance, which helps keep its growth in check and its appearance pristine. While it doesn’t require complex horticultural techniques, knowing when and how to use your shears will make a noticeable difference in your results. A professional approach to pruning ensures that the plant remains an asset rather than a messy distraction in your landscape.
There are two main times of the year when you will likely need to reach for your pruning tools for this species. The first is in the middle of the summer, after the main flush of white flower spikes has finished its spectacular show. This task, often called deadheading, is primarily for aesthetic reasons but can also benefit the plant’s overall energy balance. The second major pruning event occurs at the end of the season or in the early spring when the old growth is removed to make way for the new.
Regular cutting back not only improves the look of the plant but also serves as an important part of your garden’s sanitation routine. By removing old or diseased stems, you reduce the chances of pests and fungi finding a place to hide and multiply. It also allows you to control the height and spread of the colony, ensuring it stays within its designated boundaries. A well-managed patch of loosestrife is a testament to the care and attention of its owner.
In this guide, we will walk you through the best practices for pruning your gooseneck loosestrife from summer through to the spring awakening. We will discuss the right tools to use and the best techniques for making clean, healthy cuts that won’t harm the plant. By following these expert tips, you can keep your garden looking sharp and professional all year long. Let’s dive into the details of effective pruning for this unique and beautiful perennial.
Deadheading for aesthetics and seed control
Deadheading is the process of removing the spent flower spikes once they have finished blooming and the white petals have started to turn brown. For gooseneck loosestrife, this is a very rewarding task because it immediately cleans up the appearance of the entire plant. Simply follow the flower stem down to where it meets the first set of healthy leaves and make a clean cut there. This prevents the plant from looking messy as the old flowers dry up and hang onto the stems.
More articles on this topic
Beyond just looking better, deadheading also prevents the plant from putting its valuable energy into the production of seeds. When a plant thinks its job of reproduction is done, it will redirect its resources toward root development and strengthening its foliage. This can lead to a healthier and more robust colony that is better prepared for the following year. In some cases, a light deadheading can even encourage a few smaller, secondary flower spikes to appear later in the season.
Another important reason to deadhead gooseneck loosestrife is to prevent it from self-seeding in unwanted areas of your garden. While its primary method of spreading is through underground rhizomes, it can also produce a fair amount of viable seed if left to its own devices. By removing the flowers before they can mature into seed heads, you are taking an extra step to keep the plant’s expansion under your control. This proactive measure is a key part of professional landscape management.
You should perform this task throughout the mid to late summer as the individual flower spikes finish their bloom cycle. It only takes a few minutes every week to keep the patch looking fresh and vibrant for the remainder of the season. Use a sharp pair of hand pruners or even floral snips, as the stems are generally quite soft and easy to cut. This regular attention is one of the easiest ways to maintain a high-quality garden display.
Fall cutting back and garden sanitation
As the autumn progresses and the foliage begins to die back after the first hard frost, it is time for the major seasonal pruning. Many gardeners choose to cut the entire plant down to the ground, leaving only an inch or two of stems visible above the soil line. This creates a clean and tidy look for the winter months and removes any potential sites for overwintering pests or diseases. It is a satisfying task that signals the end of the active gardening season and the beginning of a period of rest.
More articles on this topic
Using a sharp pair of bypass pruners or garden shears is the best way to handle this large-scale cutting back. Work your way through the colony, gathering the stems in one hand and cutting them off cleanly at the base with the other. Be careful not to pull or tug on the stems, as you want to avoid damaging the crown of the plant or pulling up the shallow rhizomes. A clean cut heals quickly and prevents any unnecessary stress on the dormant plant system.
Removing the cut stems from the garden bed is just as important as the act of cutting them down in the first place. Old foliage left on the ground can trap moisture against the soil, which can lead to fungal issues in the early spring. It can also provide a cozy hiding spot for rodents or insects that might want to snack on your plants during the winter. Composting the healthy stems is a great way to recycle the organic matter, but always discard any diseased material in the trash.
Some professional gardeners prefer to leave the dried stalks standing until the following spring to provide winter interest and a habitat for beneficial insects. The architectural structure of the dried gooseneck stems can be quite beautiful when covered in a light layer of frost or snow. If you choose this route, just be sure to complete the cutting back in very early spring before the new green shoots begin to emerge. This flexibility allows you to tailor your garden maintenance to your own aesthetic preferences.
Tools and techniques for clean healthy cuts
The quality of your pruning tools directly affects the health of your gooseneck loosestrife and the ease with which you can complete your tasks. Always use tools that are sharp and well-maintained to ensure that every cut you make is clean and precise. Ragged or crushed stems can become entry points for bacteria and fungi, which can lead to health problems for the plant later on. A professional gardener knows that a sharp blade is the most important item in their maintenance kit.
Bypass pruners are the ideal choice for most pruning tasks involving this perennial, as they work like a pair of scissors to make smooth cuts. For larger colonies, a pair of lightweight hedge shears can also be used to cut back the entire patch quickly and efficiently in the autumn. Whichever tool you choose, make sure it is appropriately sized for your hand and for the thickness of the stems you are cutting. This ensures your comfort and prevents hand fatigue during a long afternoon of garden work.
It is a very good practice to clean and disinfect your pruning tools between different plants or at the end of each gardening session. A simple wipe with a cloth soaked in rubbing alcohol or a mild bleach solution is enough to kill any lingering pathogens. This simple step prevents you from accidentally spreading diseases from one part of your garden to another as you move from plant to plant. Maintaining tool hygiene is a fundamental rule of professional horticulture that should never be ignored.
When making your cuts, always try to angle the blade slightly so that any moisture will run off the cut surface rather than pooling on top of it. While this is less critical for the soft stems of the loosestrife than for woody shrubs, it is still a good habit to develop for all your pruning. Aim to cut just above a node or a set of leaves to encourage healthy regrowth in the future. With these professional techniques and the right tools, your pruning will become a quick and easy part of your garden routine.