The process of establishing a new false shamrock begins with the careful handling of its unique underground structures. Unlike many common houseplants that grow from seeds or soft stem cuttings, this species relies on its corms for reproduction. Success in planting requires a gentle touch and an understanding of how these rhizomes interact with their environment. When you master these techniques, you can easily expand your collection or share this beautiful plant with others.
Selecting and preparing the planting material
Before you begin the planting process, you must ensure that your starting material is healthy and viable. The corms should feel heavy for their size and have a firm, slightly textured exterior without any signs of mushiness. If you are buying them online or from a nursery, they often look like small, elongated brown pinecones or dried cloves. Avoid any that have visible mold or appear to be completely dried out and hollow.
If you are harvesting your own rhizomes from an existing plant, wait until the plant has entered its dormant phase. This is when the energy is most concentrated in the underground structures and the plant is least likely to suffer from shock. Gently tip the pot over and tease the soil away to reveal the clusters of rhizomes hidden beneath the surface. You can usually snap the clusters apart by hand, ensuring each piece has at least one growing point.
Once you have your pieces, it is a good idea to let any broken “wounds” callouse over for a few hours. This prevents soil-borne pathogens from entering the plant tissue immediately after you put it in the ground. You don’t need any special rooting hormones for this species because the corms are naturally designed for rapid growth. Keeping the planting material in a cool, dry place during this short preparation period is sufficient.
Preparation also involves deciding how many corms to place in a single container for the best visual impact. If you plant them too sparsely, the pot will look thin and underwhelming for the first few months of growth. Conversely, crowding them too tightly can lead to competition for nutrients and poor air circulation between the stems. Aim for about three to five healthy rhizomes in a standard six-inch pot to create a full, lush appearance quickly.
More articles on this topic
The technical steps of successful planting
The depth at which you plant the rhizomes is a major factor in how quickly they will emerge and how stable the stems will be. Generally, you should place them about two to three centimeters below the surface of the soil. If you plant them too deep, the young shoots might struggle to reach the light and could rot before they break the surface. If they are too shallow, the heavy leaves may cause the plant to fall over once it reaches full size.
Positioning the corms horizontally in the soil is the standard practice, although they are remarkably resilient and will usually find their own way up. Make sure the soil underneath the corm is loose so the new roots can easily penetrate the medium. You can create small trenches or individual holes depending on the shape of your container and your aesthetic goals. Cover them gently with the potting mix and press down very lightly to ensure good contact.
The first watering after planting is a critical moment that sets the tone for the entire growth cycle. You want to moisten the soil thoroughly so that it settles around the corm, but you must avoid creating a swampy environment. Use room-temperature water and pour it slowly until a small amount begins to trickle out of the drainage holes. This initial hydration wakes up the dormant tissue and signals that it is time to start producing roots.
After the initial watering, place the container in a warm spot with bright but indirect light to stimulate development. Do not water again until the top centimeter of soil feels dry to the touch, as the corm has no leaves to process water yet. It can take anywhere from one to three weeks to see the first purple tips emerging from the soil. Patience during this phase is essential, as the most important work is happening out of sight underground.
More articles on this topic
Methods for effective propagation
Division is the most common and reliable way to propagate this plant because it essentially clones the parent plant. This method ensures that the new plant will have the same vibrant color and growth habits as the original. Because the plant naturally produces more corms as it grows, you will eventually have more than you know what to do with. Simply separating these natural offsets every few years keeps the parent plant healthy and gives you plenty of new material.
Another interesting way to propagate is by using leaf cuttings, although this method is significantly more difficult and has a lower success rate. To try this, you would need to take a healthy leaf with a full stem and place it in a glass of clean water. Over several weeks, a tiny new corm may form at the very base of the stem where it meets the water. While fascinating to watch, this is more of a fun experiment than a practical way to grow many new plants.
The timing of propagation should ideally coincide with the plant’s natural emergence from its winter rest. Spring is the season of renewal, and the increasing light levels provide the energy needed for new rhizomes to establish themselves. If you try to propagate in the middle of a hot summer or the dead of winter, the success rate drops significantly. By working with the plant’s internal clock, you ensure the highest chance of a vigorous and healthy new generation.
For those looking to mass-produce these plants, maintaining a “mother pot” specifically for corm production is a smart strategy. In this scenario, you would provide optimal conditions and plenty of space for the rhizomes to spread without worrying about the foliage’s appearance. Every year or two, you can “mine” this pot for new starts while leaving enough behind to replenish the stock. This sustainable approach allows for a continuous supply of beautiful purple plants for your home or garden.
Ensuring the health of young starts
Once the new shoots have emerged, they are particularly sensitive to environmental extremes and need a bit of extra protection. The stems are very soft at this stage and can be easily damaged by strong winds or heavy-handed watering. It is best to keep young starts in a protected indoor area where the light is consistent and the temperature is stable. Avoid using any fertilizer for the first month, as the young roots are easily burned by concentrated salts.
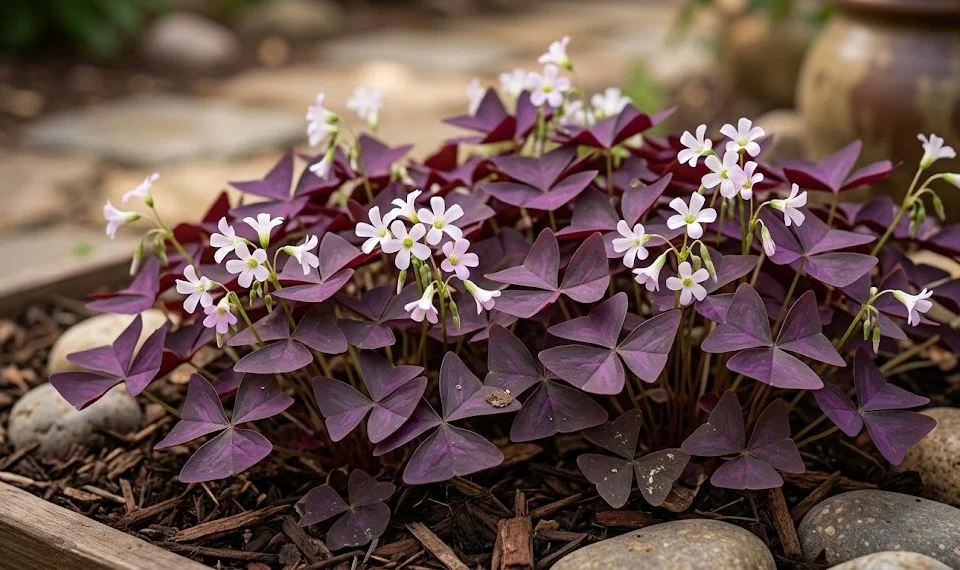
The first few leaves may not have the deep purple color or the full size that you expect from a mature plant. This is perfectly normal, as the plant is prioritizing root and rhizome development over foliage display in its early days. As the root system expands and becomes more efficient, the leaves will become larger and the colors more intense. Just keep providing steady care, and the plant will eventually reach its full aesthetic potential.
Monitoring for pests is especially important during the early stages of growth because a small infestation can quickly overwhelm a young plant. Look for any signs of webbing or tiny spots on the undersides of the developing leaves. If you catch problems early, you can usually handle them with a gentle spray of water or a mild insecticidal soap. A healthy start leads to a much more resilient adult plant that can withstand future challenges.
Consistency in your care routine is the best way to ensure that your new plantings thrive in the long run. Try to check the soil moisture on the same day every week so you can develop a feel for the plant’s water consumption. As the canopy densifies, the water needs will increase, so be prepared to adjust your schedule accordingly. Before you know it, your small planting project will have transformed into a stunning, full-grown false shamrock.