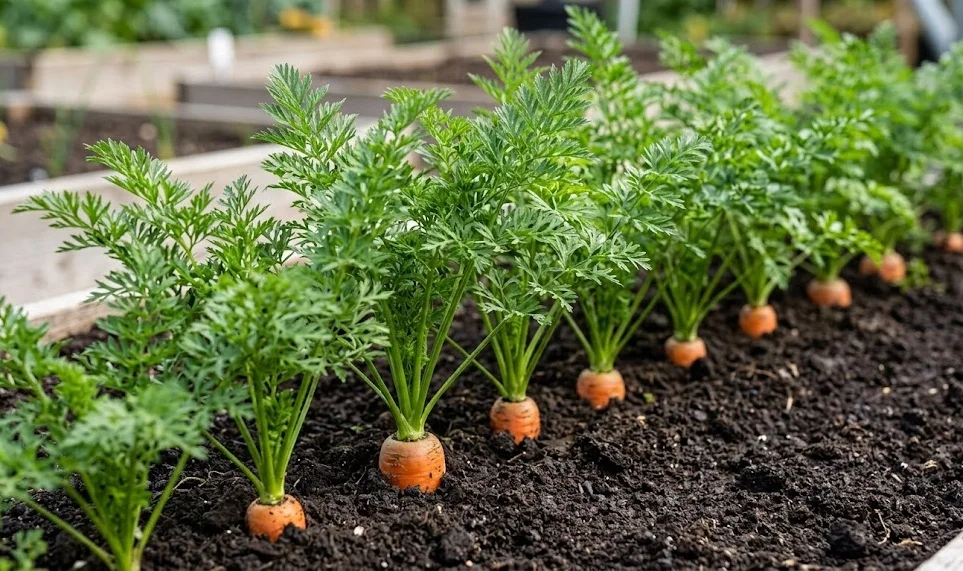

The journey of a carrot from a tiny, dust-like seed to a robust and flavorful root begins with a meticulous planting process. Successful propagation requires a deep understanding of the vegetable’s biological needs, particularly its sensitivity to soil conditions and temperature. Because carrots are rarely transplanted, the initial sowing stage is the most critical window for determining the eventual success of the crop. Achieving a high germination rate and even spacing is the hallmark of a professional horticultural approach.
Before you even open a seed packet, you must ensure the planting site is perfectly prepared to welcome the new life. The soil should be worked to a fine tilth, meaning it is crumbly and free of any large debris that could hinder the growth of the emerging taproot. Carrots thrive in locations that receive full sunlight for at least six to eight hours a day. Proper site selection is the first step in ensuring that your seedlings have the energy they need to grow quickly and healthily.
Timing is another essential factor that you must consider when planning your carrot propagation schedule. Carrots are cool-season crops that can be sown as soon as the soil can be worked in the early spring, often three weeks before the last frost. For a continuous harvest, you can practice succession planting by sowing new seeds every two to three weeks until mid-summer. This strategy ensures a steady supply of fresh carrots throughout the growing season and into the autumn months.
Propagation from seed is the standard method, as carrots do not respond well to vegetative reproduction or cloning. While it is technically possible to grow the green tops from a harvested carrot, this will only produce foliage and seeds, not a new edible root. To grow the vegetable we eat, you must always start with high-quality seeds from a reputable supplier. Understanding this fundamental biological constraint is key to managing your expectations and focusing your efforts where they matter most.
Seed selection and preparation
Choosing the right variety of carrot is the first decision that will influence your planting success and harvest quality. There are several main types, such as Nantes, Chantenay, Danvers, and Imperator, each with different shapes and soil preferences. If you have heavy or shallow soil, a shorter variety like Chantenay is a professional choice because it resists forking. Conversely, if your soil is deep and sandy, you can successfully grow the long and slender Imperator types.
More articles on this topic
Carrot seeds are notoriously slow to germinate and have a relatively short shelf life compared to other vegetables. You should always use fresh seeds from the current year to ensure the highest possible germination percentage. Some professionals prefer to use “pelleted” seeds, which are coated in a clay-like substance to make them larger and easier to handle. This helps with precision planting and reduces the need for extensive thinning later in the process.
To speed up the germination process, you can pre-soak your carrot seeds for a few hours or overnight before sowing. This softens the hard seed coat and signals to the embryo that it is time to begin the growth cycle. However, because the seeds are so small, handling wet seeds can be a significant challenge during the actual sowing process. An alternative is to mix the seeds with damp sand and let them sit for a day before spreading the mixture into the furrows.
Another professional technique involves checking the “days to maturity” listed on the seed packet to align your planting with the local weather. If you are planting in a region with a short growing season, look for “early” varieties that develop in sixty days or less. For those interested in overwintering or late-season harvests, “maincrop” varieties are better suited as they are bred for size and storage capabilities. Matching the variety to your specific environmental constraints is a sign of an expert gardener.
Sowing techniques for even distribution
The physical act of sowing carrot seeds requires a steady hand and a clear strategy to avoid wasting seeds and over-crowding. You should create shallow furrows in the soil, no deeper than half a centimeter to one centimeter, using the handle of a tool or a finger. If the seeds are buried too deeply, the tiny seedlings will exhaust their energy reserves before they can reach the sunlight. Consistency in depth is the secret to a uniform emergence across the entire garden bed.
More articles on this topic
To achieve even spacing without the use of pelleted seeds, many experts mix their carrot seeds with dry sand or old coffee grounds. This adds volume to the seeds, making it much easier to sprinkle them thinly along the row by hand. A common rule of thumb is to aim for about three to five seeds per inch of the furrow. This density provides enough insurance against poor germination while still being manageable during the thinning stage.
Another popular method among professional market gardeners is the use of a precision seed sower or a “seed tape.” Seed tape consists of seeds pre-spaced between layers of biodegradable tissue, which you simply lay in the furrow and cover with soil. This method virtually eliminates the need for thinning and ensures that each plant has the exact amount of space it needs from day one. While it is more expensive than bulk seeds, the labor savings and improved crop uniformity often justify the cost.
After the seeds are placed in the furrow, you should cover them with a light layer of fine soil or vermiculite. Vermiculite is particularly useful because it stays light and does not crust over, making it very easy for the seedlings to break through. Once covered, gently firm the soil down with the palm of your hand to ensure good “seed-to-soil contact.” This ensures that moisture can move from the soil into the seed, which is the physical trigger for the germination process.
Maintaining moisture during germination
The most common reason for failed carrot propagation is the soil drying out during the critical germination window. Carrot seeds can take anywhere from ten to twenty-one days to sprout, and they must remain consistently moist the entire time. If the soil surface dries out and hardens for even a single day, the delicate germinating seeds may perish. You must commit to a regular watering schedule, sometimes misting the beds twice a day in dry weather.
A professional trick to keep the soil moist is to cover the newly sown rows with a piece of damp burlap or a thin wooden board. This cover prevents evaporation from the soil surface and keeps the seeds in a dark, humid environment that encourages sprouting. You must check under the cover every single day and remove it immediately as soon as you see the first green “hooks” emerging. Leaving the cover on too long will cause the seedlings to become leggy and weak.
Using a very fine mist setting on your garden hose is essential when watering your freshly planted carrot seeds. Heavy droplets from a standard watering can or a powerful hose can wash the tiny seeds out of their furrows or bury them too deeply. You want to saturate the top layer of soil without causing any erosion or surface runoff. Maintaining this delicate balance of moisture is the most labor-intensive part of the entire carrot-growing process.
If you are planting in a large area, you might consider using a professional-grade row cover made of lightweight fabric. This material allows light and water to pass through but reduces wind evaporation and provides a slight “greenhouse effect” for the soil. It also protects the emerging seedlings from birds and certain insects that might be tempted to nibble on the young greens. This protective barrier can significantly increase your overall success rate when propagating carrots on a larger scale.
Saving seeds and biennial propagation
If you want to propagate your own carrots from year to year, you must understand that the plant is a biennial. This means that the carrot completes its life cycle over two growing seasons rather than one. In the first year, the plant grows the edible root and a lush canopy of leaves to store energy. To produce seeds, the carrot must be allowed to survive the winter and continue growing into a second season.
In the second year, the plant will use the energy stored in the root to send up a tall flower stalk, often reaching over a meter in height. The flowers appear in flat, white clusters known as umbels, which are very attractive to pollinators like bees and beneficial wasps. Once the flowers are pollinated, they will develop into small, spiny seeds that gradually turn brown as they dry. You must wait until the seed heads are completely dry and brittle before harvesting them for future use.
To maintain the purity of a specific variety, you should be aware that carrots can cross-pollinate with wild carrots, also known as Queen Anne’s Lace. If wild carrots are growing nearby, the seeds you save may produce roots that are white, woody, and inedible. Professional seed savers often use isolation cages or hand-pollination techniques to ensure their varieties remain true to type. This level of care is necessary if you wish to preserve the specific traits of a favorite heirloom carrot.
Once you have harvested the dry seed heads, rub them between your hands to release the seeds and remove the small “beards” or spines. Store the cleaned seeds in a cool, dark, and dry place in a sealed envelope or glass jar. If stored correctly, home-saved carrot seeds can remain viable for up to three years. Propagating your own seeds is a rewarding way to close the loop in your garden and develop a strain of carrots perfectly adapted to your local soil.