Creating a successful foundation for your garden starts with mastering the techniques of planting and the art of multiplying your existing stock. You should approach the planting process with a focus on precision and careful preparation of the growing environment to ensure immediate root establishment. Propagation offers a rewarding way to expand your collection without incurring the costs of buying new specimens every spring. By following professional standards, you can transform a single healthy plant into a cascading waterfall of blooms that fills your entire outdoor space.
Selecting the ideal planting site
The location you choose for your new arrivals will dictate the pace of their development and the abundance of their eventual flowering. You should look for a spot that receives plenty of morning light but remains shielded from the scorching intensity of the late afternoon sun. A site with a gentle slope or elevated position is often preferred because it naturally prevents water from pooling around the sensitive root zone. Observe your garden for a few days before planting to understand how the shadows move across the landscape throughout the day.
Soil preparation is the next critical step in setting your plants up for a long and productive life in your outdoor containers or beds. You should clear the area of any competing weeds and turn the soil to a depth of at least twenty centimeters to ensure it is loose. Incorporating a balanced amount of organic compost will improve the structure and provide a rich reservoir of nutrients for the young roots. Professionals often emphasize that the quality of the planting hole is just as important as the quality of the plant itself.
Spacing is a factor that many novice gardeners get wrong by placing individual plants too close together in an effort to see immediate results. You should give each specimen enough room to expand its trailing stems without immediately overlapping with its neighbors. A distance of twenty to thirty centimeters between plants is generally considered optimal for allowing adequate airflow and light penetration. Proper spacing reduces the risk of disease and ensures that each plant can develop its own unique and beautiful shape.
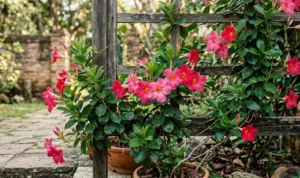
If you are planting in hanging baskets, the choice of the container material can impact how often you need to tend to your new plants. You might find that porous materials like terracotta dry out faster than plastic or glazed ceramic options in windy or sunny locations. You should also ensure that the drainage holes are large enough to prevent blockages from soil particles or root growth over time. The right container serves as a functional home that supports the specific hydration needs of these moisture-loving trailing plants.
More articles on this topic
Professional planting techniques
When you are ready to move your plants from their nursery pots into their permanent home, you must handle the root balls with extreme care. You should gently squeeze the sides of the temporary pot to loosen the soil before sliding the plant out into your hand. Avoid pulling on the delicate stems, as this can cause internal damage that stunts the growth of the plant for several weeks. Treating the roots with respect during this transition is the secret to avoiding the common problem of transplant shock.
Positioning the plant at the correct depth is vital for preventing stem rot and ensuring the crown remains healthy and productive. You should aim to place the top of the root ball at the same level as the surrounding soil surface in your new container or garden bed. Planting too deep can bury the base of the stems in moist soil, which often leads to fungal issues and slow decay. Conversely, planting too shallow can expose the roots to the drying air and cause the plant to wilt rapidly in the sun.
Firming the soil around the newly placed specimen creates the necessary contact between the roots and the surrounding nutrients and moisture. You should use your fingers to gently press down on the earth, making sure there are no large air pockets trapped beneath the surface. However, you must be careful not to compact the soil so tightly that water cannot easily penetrate the root zone during irrigation. A gentle but firm touch is required to provide structural support while maintaining the essential porosity of the growing medium.
Immediate hydration after planting is the final and most important step in the initial establishment process for your new garden additions. You should water the plants thoroughly until the moisture begins to run out of the bottom of the drainage holes in your pots. This initial soaking helps settle the soil around the roots and signals to the plant that it is in a safe and hospitable environment. Keeping the soil consistently moist for the first two weeks will encourage the roots to grow outward into their new surroundings.
More articles on this topic
Propagation from soft stem cuttings
Multiplying your plants through cuttings is an efficient and cost-effective way to fill your garden with high-quality genetic clones of your favorite varieties. You should select healthy, non-flowering stems that are approximately ten centimeters long for the best chance of successful rooting. Using a sharp, sterilized pair of scissors or a knife will ensure a clean cut that heals quickly and resists infection. This process is best performed in the late spring or early summer when the plant is in its most active growth phase.
Preparing the cuttings involves removing the lower leaves to expose the nodes where the new roots will eventually emerge. You should leave a few sets of leaves at the top of the cutting to provide the energy needed for the rooting process through photosynthesis. Some gardeners prefer to dip the cut end into a rooting hormone powder to speed up the development of the root system. However, these plants are known for their ability to root easily even without the help of specialized chemical stimulants.
The medium you use for rooting your cuttings should be light, airy, and capable of holding a consistent amount of moisture without being soggy. A mixture of equal parts perlite and peat moss provides an excellent balance of aeration and hydration for the developing young roots. You should insert the cuttings into the medium and press it firmly around the stems to ensure they stay upright and in contact with the moisture. Keeping the cuttings in a warm, brightly lit area away from direct sunlight will prevent them from wilting before they can support themselves.
Monitoring the humidity around your cuttings is essential for preventing them from drying out before they have a functional root system to draw water. You can create a simple mini-greenhouse by placing a clear plastic bag over the container or using a specialized propagation dome. Misting the leaves once or twice a day will help maintain the internal moisture levels of the stems during this critical transition period. Within two to three weeks, you should notice new growth, which indicates that the roots have successfully established themselves in the medium.
Growing and managing young starts
Once your cuttings have developed a robust root system, you can begin the process of hardening them off for the outdoor environment. You should gradually expose the young plants to increasing amounts of direct sunlight and fresh air over the course of a week. This step is crucial because it strengthens the cellular structure of the leaves and prevents them from being scorched by the sun. Moving them outdoors too quickly can result in significant damage or even the loss of your hard-earned new plants.
Transplanting your home-grown starts into their final containers follows the same principles as planting nursery-bought specimens. You should choose a high-quality potting mix and ensure that the young roots are handled with the same level of care and attention. Giving the small plants a light feeding of balanced liquid fertilizer will provide the nutrients they need to begin their rapid expansion. You will be amazed at how quickly these small starts can grow into large, flowering specimens given the right conditions.
Pinching the tips of the newly established plants will encourage them to branch out and become much bushier than if left to grow naturally. You should remove the top two centimeters of each main stem once the plant has reached a height of about ten centimeters. This simple action redirects the growth hormones to the lateral buds, creating a much more attractive and productive plant for your hanging baskets. Repeat this process every few weeks during the early season to maximize the eventual density of the floral display.
Record keeping is a helpful practice that allows you to track the success of different propagation methods and timing throughout the year. You should note which stems rooted the fastest and which environmental conditions seemed to produce the healthiest young plants. This knowledge becomes invaluable as you refine your skills and aim for even better results in the following gardening seasons. Building on your own experiences is the best way to become a true expert in the art of plant propagation.